|
|
Post by David Mitcham on May 19, 2015 16:24:09 GMT -5
Hi I've made a start! This year I'm building a replica of Graham Hill's entry in the US Grand Prix at Watkins Glen. Why this race? I certainly haven't chosen it because Hill had a great race and result; the car qualified 5th but didn't finish because of a differential problem resulting in retirement on the 53rd lap. The race was mainly notable for being the first, and only, win for the H16 engine but in Jim Clark'sLotus 43. No the reason is there are some really good pictures available from the race of the BRM's, particularly on Pete Lyons' website petelyons.photoshelter.com/gallery/F1-1966-Watkins-Glen-USGP/G0000t1HRHdMlA04/C00006mTYjO30sBY. Why this car? I really like the P83 - its brutal but elegant in its own way, and I'm attracted to less successful and quirky cars (who ever thought that putting two 1.5 litre V8s together was going to be a success?). It also has a cowling over the gear box which avoids having to make a facsimile gear box and makes it easier to conceal the crown gear without having unsightly "lumps". 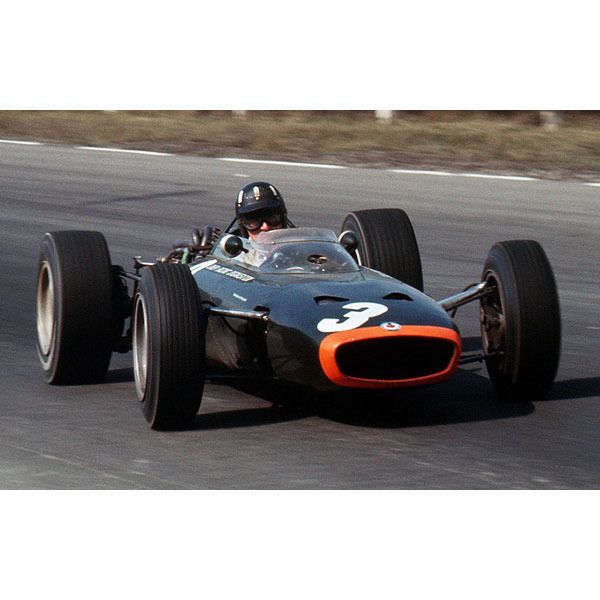 The model's body is from Pre-Wing. An excellent depiction of the car, although not the US GP one so modifications have had to be made - holes in the nose and a duct and two holes in the engine cover. I also couldn't resist making up my own exhausts out of aluminium wire and tube - truth be told the moulded resin ones are very good but I like making work for myself. The body looks a bit of mess at the moment because of filler where I've reshaped the the engine cowl but all will be well in the end!!! 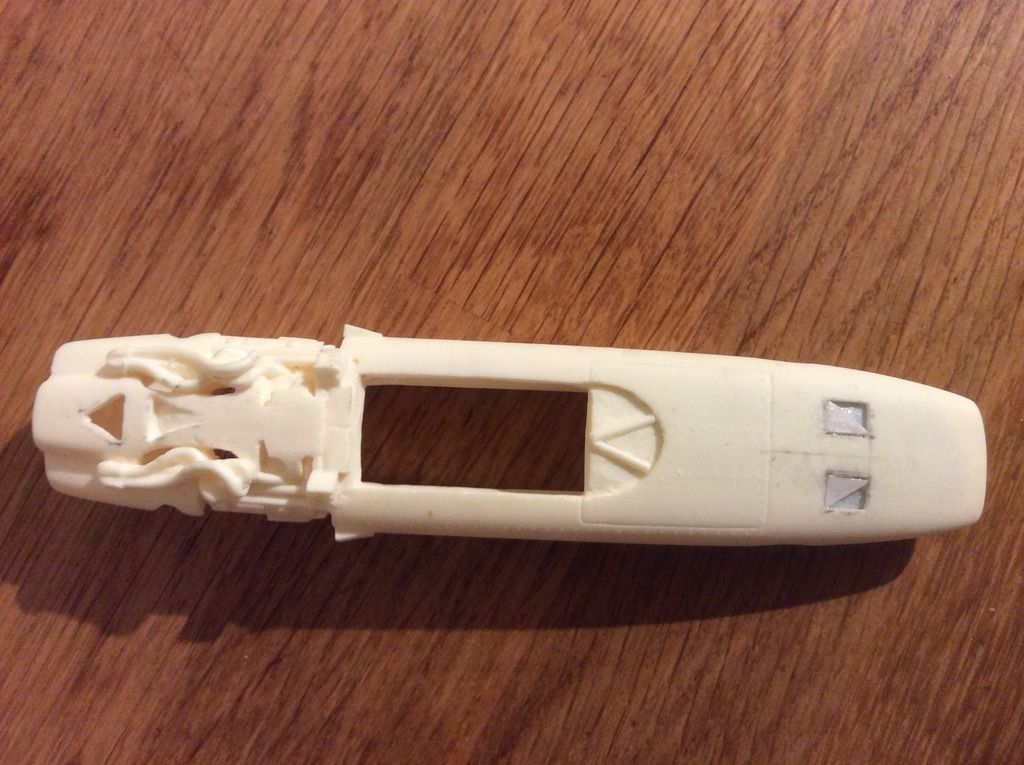 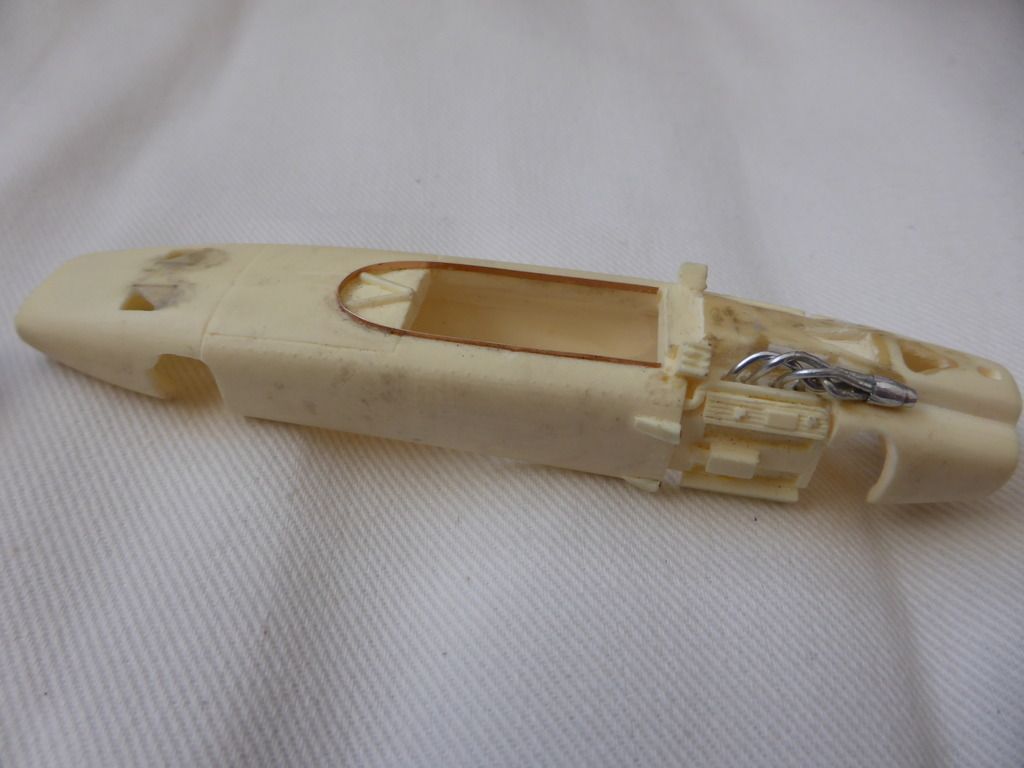 The chassis is built and the suspension detail has been attached. At the moment the car has CB Design five spoke wheels attached but it may not stay that way; they are excellent wheels but I'm not sure they look quite right - they'll certainly need painting as they are way too glossy! I just need to install the race motor, wiring, crown gear and guide and then we can go testing. The radius rods need finishing properly too so they line up with the mounting points on the body (these have been strengthened with small bore brass tube into which wire extensions to the final radius rods,which will also be brass tube, will fit). 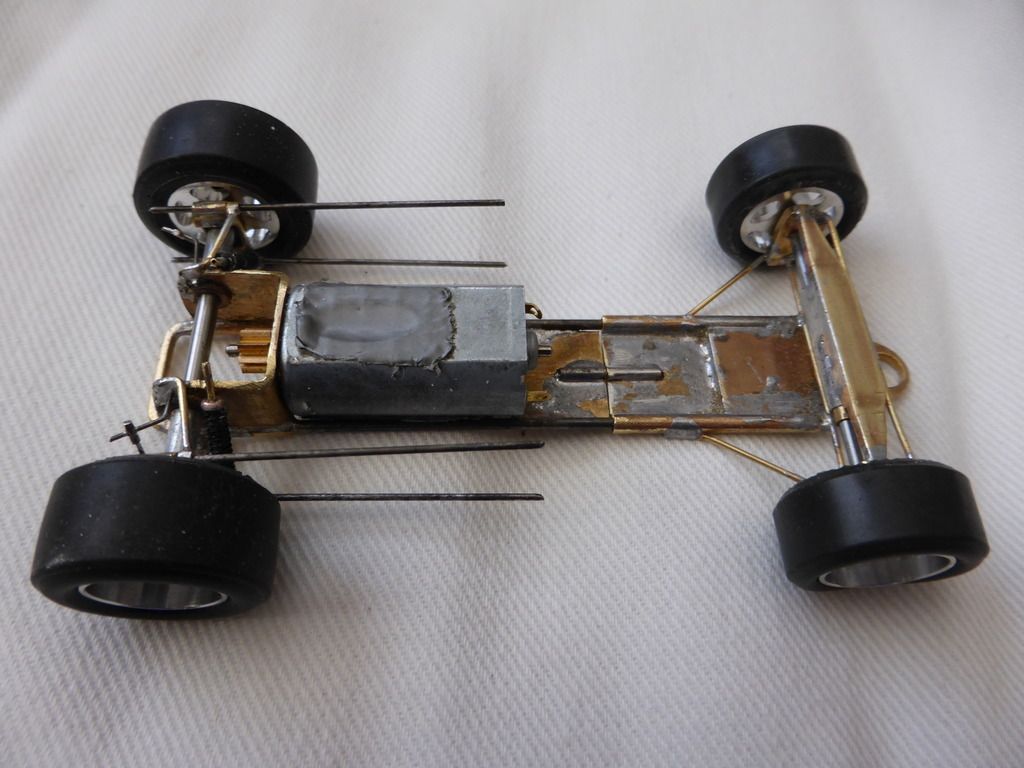 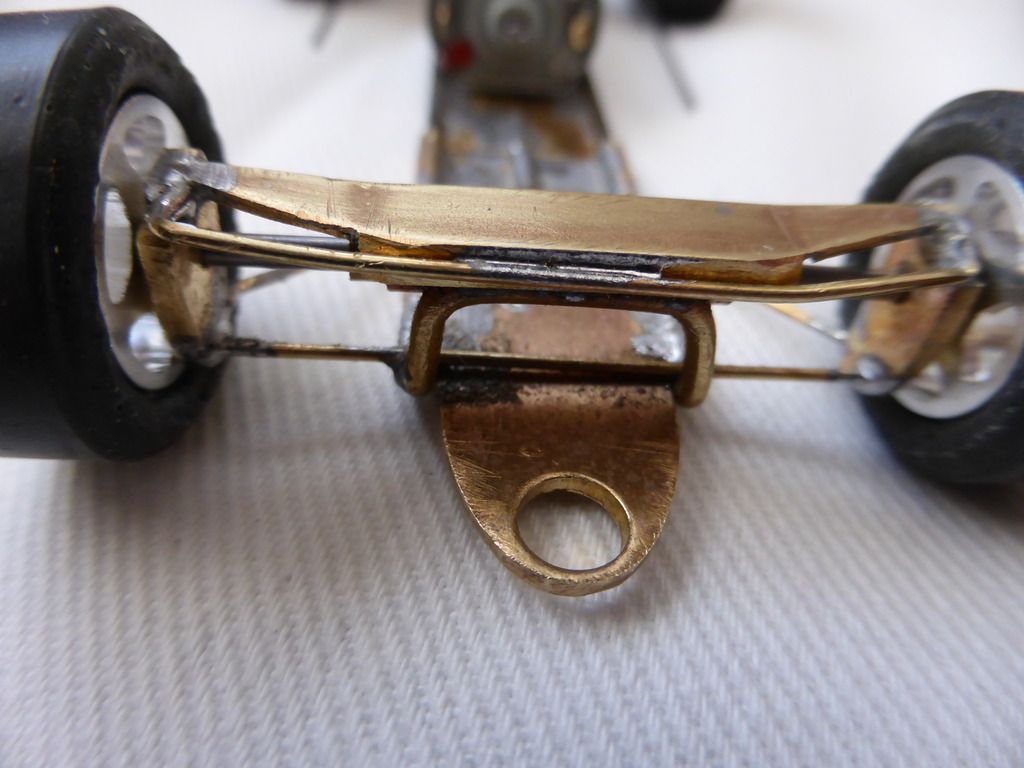 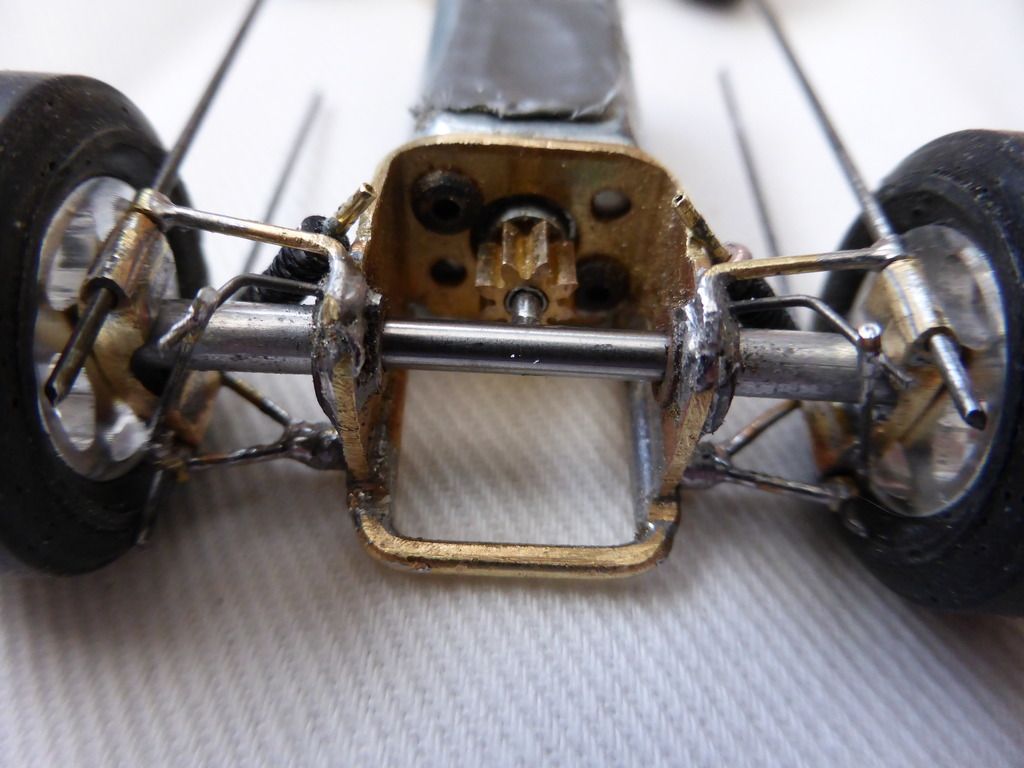 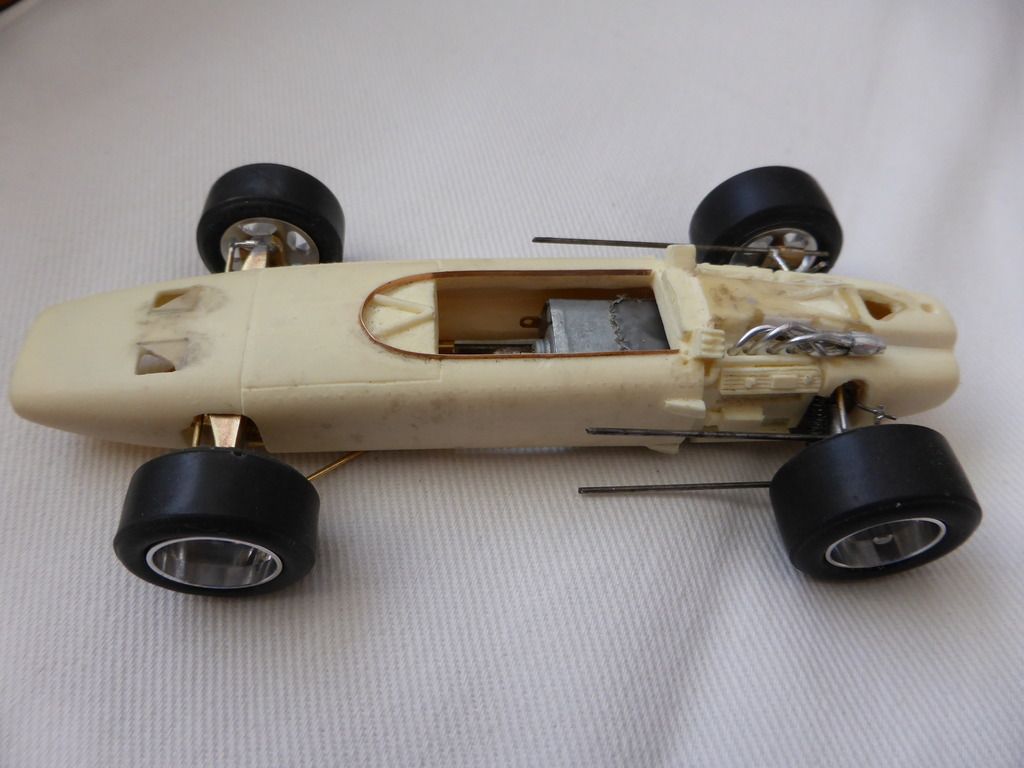 That's about it for now. Hopefully more progress to report in a week or so, I may even have primed the body. Best Regards David |
|
|
|
Post by munter on May 19, 2015 23:54:23 GMT -5
Looks great David. You are brave chomping off those exhausts. I have to say your scratch built ones do look good.
|
|
|
|
Post by David Lawson on May 20, 2015 14:00:11 GMT -5
David
The exhausts and the suspension work is excellent particularly the rear suspension components.
Are the rear uprights one piece or an assembly, have you soldered tube onto the end of the top link to connect it to the upright and likewise with the anti roll bar stays?
Sorry for all the questions but I'm a real fan of your intricate detailing.
David
|
|
|
|
Post by David Mitcham on May 20, 2015 15:01:31 GMT -5
Hi David
Thanks for the compliments. The rear uprights are oblong brass tube to roughly scale height with notches cut top and bottom to take small bore brass tube (I'm writing this away from my workbench so can't quote exact dimensions). A 3/32 hole is drilled through the upright and the centre of the upright filled out to give a more convincing appearance. The upper and lower links are made from brass rod with tube soldered to the ends and attached to the uprights by sliding the radius rods through them and the uprights. These are temporary ones at the moment; when finished they'll be small bore tube with piano wire through them, the ends of which will fit into tube in the mounting points in body. At least that's the theory - it was the method I used for the Tecno which seems to work well but that car only has upper radius rods.
The anti-roll bar is wire and brass tube soldered to the uprights and the chassis. The spring/damper units (constructed from different diameters of tube, through springs I bought from Cornwall Model Boats(!), and these are attached to the uprights using a right angled piece of wire attached to the bottom of the damper and inserted into a hole in the bottom of the upright. The top of the spring/damper will be soldered to the chassis.
It sounds a bit complicated but its not, it just needs patience, good measurement, fine drill bits and a bit of trial error (and a good jig to hold everything together during assembly).
Best Regards
David
|
|
|
|
Post by Andrew Rowland on May 27, 2015 23:18:35 GMT -5
Nice work as always David. It was great to meet by the way!
Andi
|
|
|
|
Post by David Mitcham on Jun 16, 2015 14:38:38 GMT -5
Here is the latest progress on the BRM P83. The shell has been primed and I’ve more or less sorted out all the ancillary bits and pieces. Graham Hill has undergone slimming surgery (but he will have two arms eventually!). The rear gearbox casing has been made out of plasticard and odd bits of aluminium. The wheels are CB Design Inserts and the inserts themselves are from Rock Racing – I picked them up at the UK Slotcar Festival. The tyres are from Paul Gage although I might use some very nice treaded ones of unknown origin (they have “BRM” on the side wall) but performance will determine which. One or two things still need to be trial fitted to the car but I should be in a position to put on a first top-coat (probably Maserati Rifle Grey although I have Tourmaline Green in reserve!) this weekend. 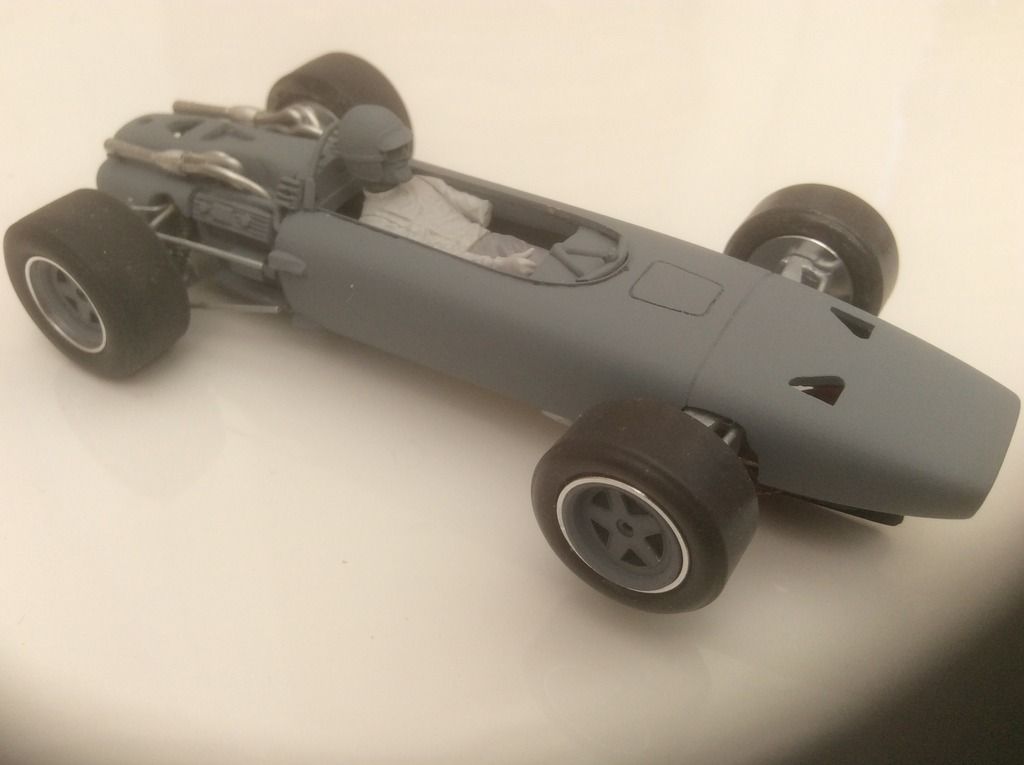 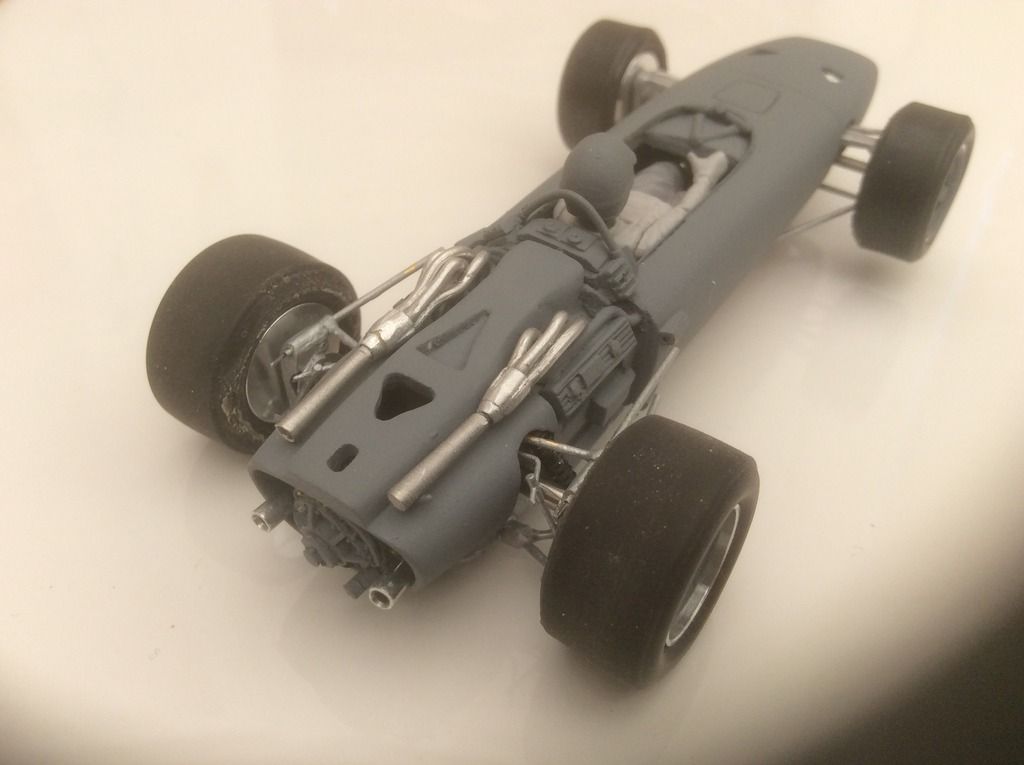 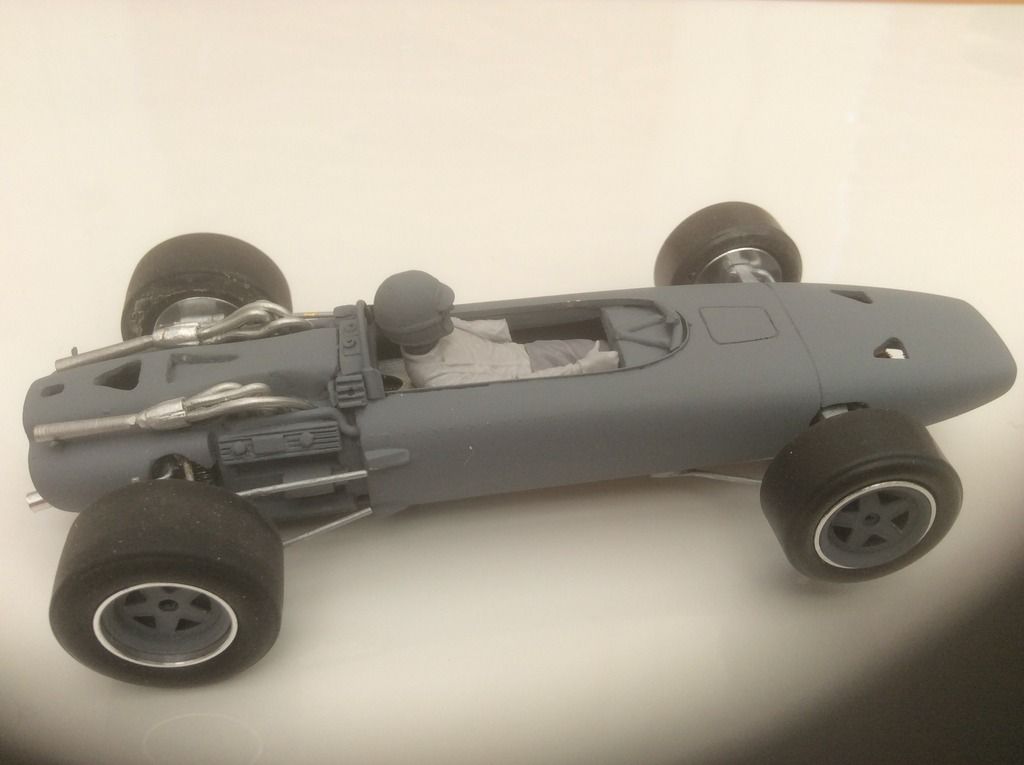 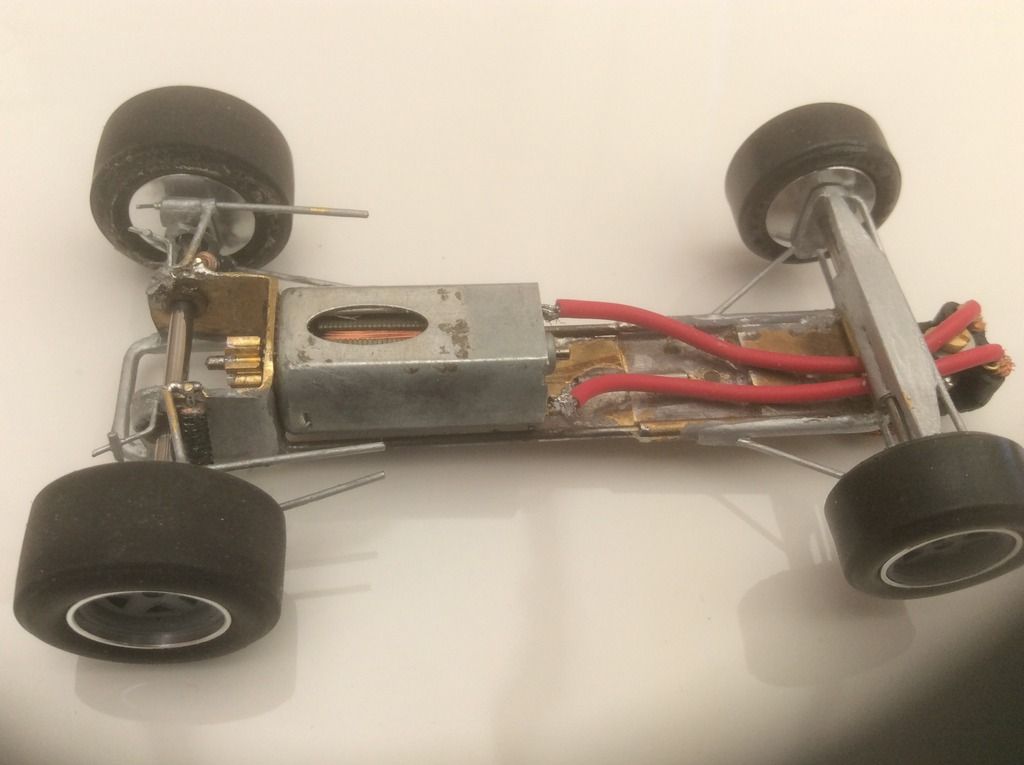 Regards David |
|
|
|
Post by Aurora on Jun 19, 2015 14:07:48 GMT -5
Great progress David. I like your detail work - I think we have both arrived at the same solution for suspension work as my chassis are very similar. I'm not sure how to make those iso designs though.
The wheels and inserts look good. The CB Design 5-spoke wheels are too big for these 3 liter cars, are they not?
|
|
|
|
Post by Taffy on Jun 26, 2015 13:09:49 GMT -5
David, very good progress. The body looks great and I really like the way aurora and you are building the suspension!
I had done a P83 before, but in big scale for the "Classic Formula Days". As the prototype, the car wasn´t a success...
I have a Betta@Classic body in stock and anytime, I will build the car in 1:32, too.
I´m looking forward to seeing your car colour-coated.
|
|
|
|
Post by David Mitcham on Jul 10, 2015 8:31:34 GMT -5
A brief report on where the BRM P83 is at! The body painting is complete and just awaits a clear coat. Its been quite a long process involving applying a lot of rivets which don't show up well in the photographs, together with getting the nose band sprayed without ruining the rest of the body paint work. For those interested in such things the nose band is Rover Vermilion which is the nearest approximation to whatever is the right colour I could find in Halfords. Something that looks reasonably like BRM green has been achieved with alternating light coats of Maserati Rifle Grey and Ford Tourmaline Green, as applied to the VRAA BRM P57, the subject of another thread on this Forum. All the bits and pieces to be attached to the body are complete as is Graham Hill. Given the likely slippage in the start date to the GPd2015 I've been focussing a bit more on my VRAA entries but my target completion date is still 24 July! 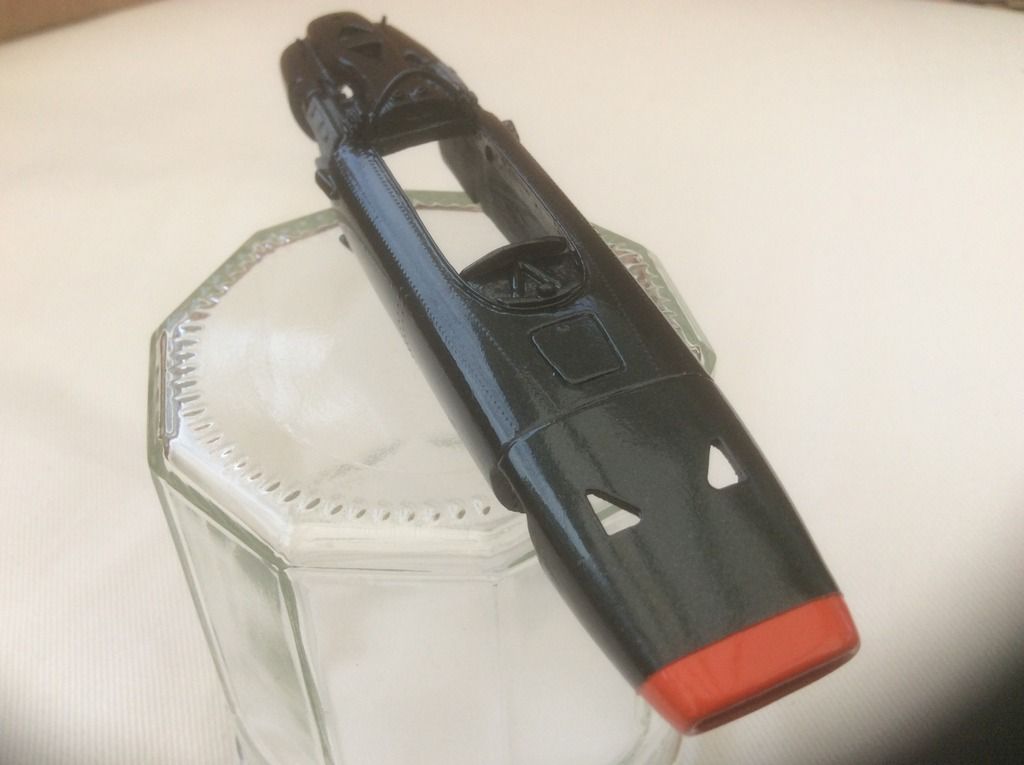 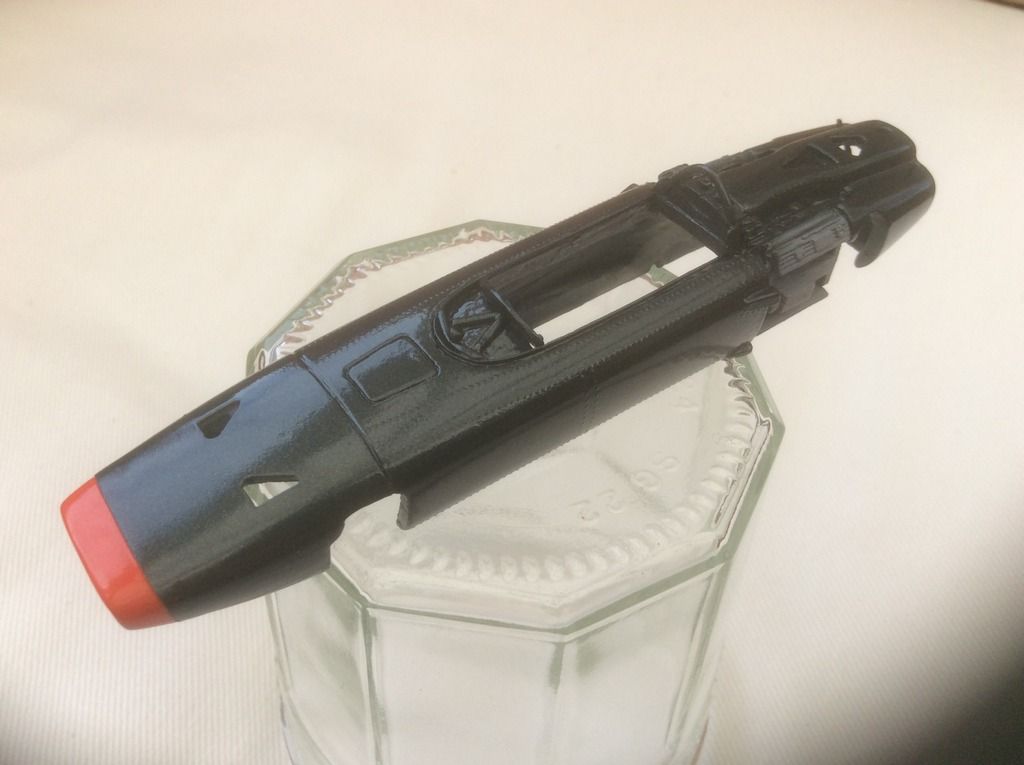 Best Regards David |
|
|
|
Post by Aurora on Jul 10, 2015 13:02:44 GMT -5
Great progress David. I'm really looking forward to seeing all the BRMs in the proxy this year. Perhaps BRM should be the featured marque.
Are you using resin rivets decals? if so, they look very good. I've used them before but have been debating whether to use them on my BRM P133. If your results are anything to go by, I think I'll use them.
|
|
|
|
Post by Taffy on Jul 10, 2015 13:47:42 GMT -5
David, I think, both colours are matching very well and the rivets are stunning!
|
|
|
|
Post by Chris Wright on Jul 10, 2015 13:52:01 GMT -5
Hi David,
Just a quick post to say that the two BRM's look fantastic, and the Ferrari's coming along great too.
So how long did it take to regain your eye-sight after you installed the rivets on the P-578 windscreen?
Chris
|
|
|
|
Post by David Mitcham on Jul 10, 2015 18:02:47 GMT -5
Thanks for the compliments everyone.
Matt, Yes I used Archer resin rivet decals. I applied them just before the final top coat on the bodies of the three cars. I find that if you put them on, say, after the primer coat they tend to get lost once the top coats are applied.
Chris, it wasn't so much the eyesight but the number of dropped rivets before getting them all in place - and the consequent bad language. At least the eyes back to normal enough to see a distant Robert Plant and his band at an open air concert this evening!
Taffy, thanks I really like your Lotus 43 too and all four of your proxy cars look great on the Jersey circuit!
Best Regards
David
|
|
|
|
Post by David Mitcham on Jul 16, 2015 16:10:34 GMT -5
Its been a very productive few days and the P83 is almost ready for final assembly and decals. Just the windscreen and mirrors to fit. Sorry for the poor photos, not sure what went wrong! 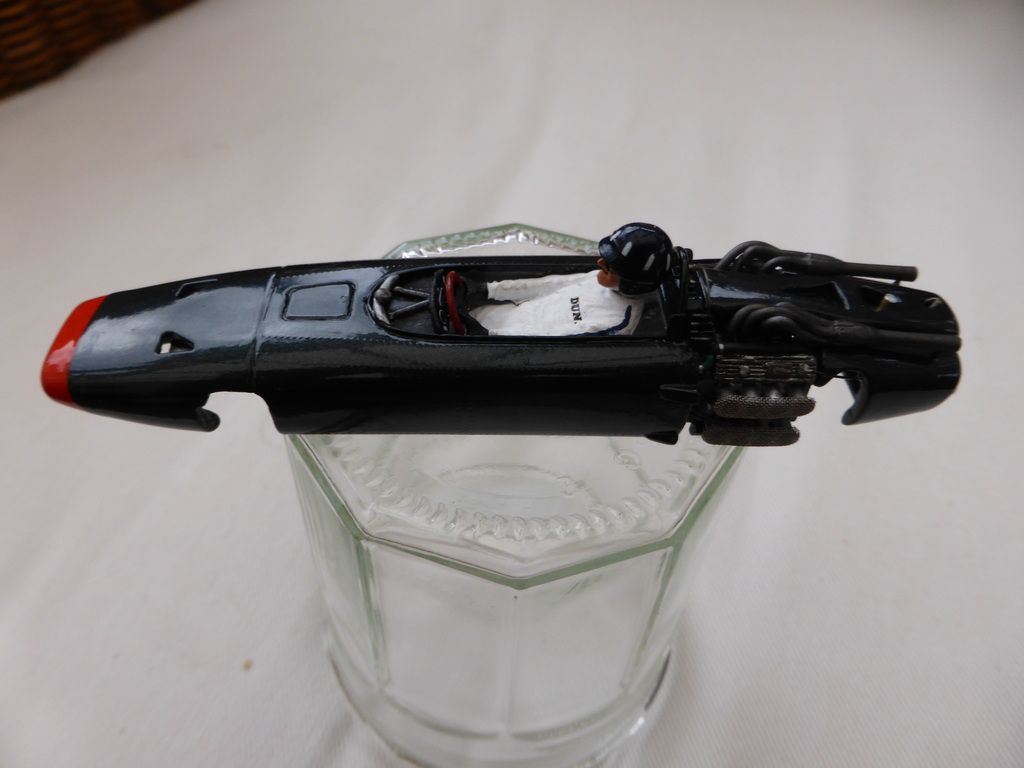 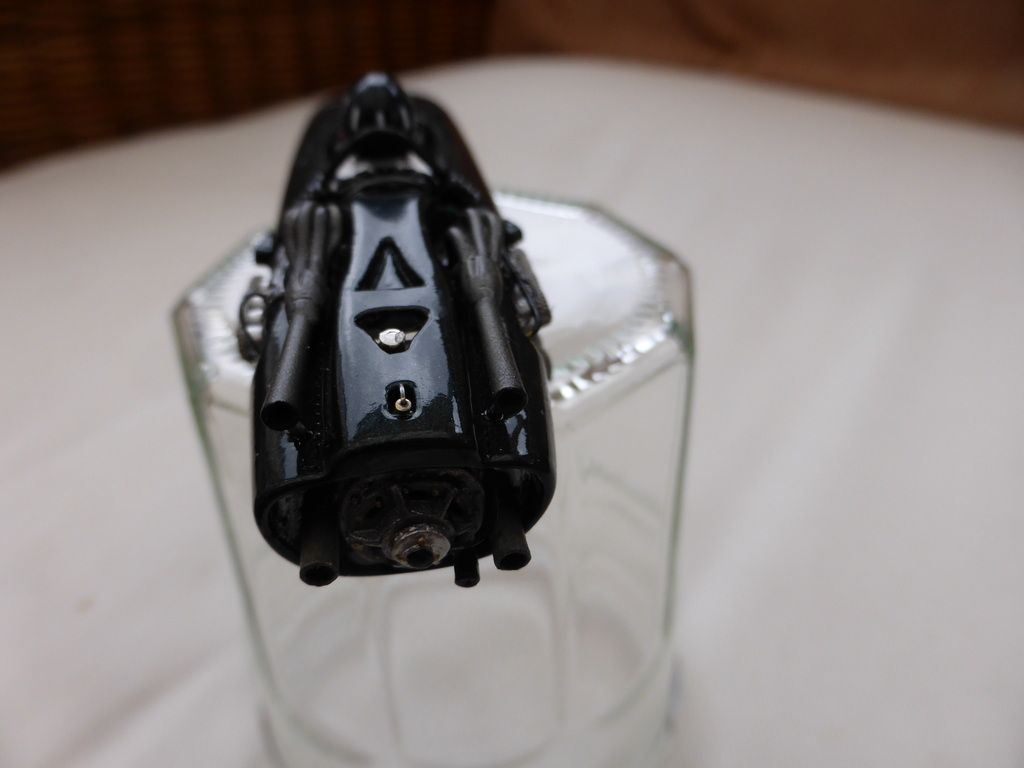  Best Regards David |
|
|
|
Post by David Mitcham on Jul 22, 2015 12:21:17 GMT -5
The H16 is finished! I’ll let the pictures below speak for themselves. Its been a very enjoyable build working with the excellent Pre-Wing body-shell and adapting it to the US GP version. So now its all ready to send off to race once Mark gives the word to start the series. It has been a hectic few months building three cars at once to a deadline; I thought I wouldn’t be able to do it but I’ve surprised myself! Now its time to take a month and a half off from building slotcars as we have all our family visiting (from Canada, New Zealand and Manchester!) and my workshop has to revert to its primary purpose as the attic bedroom. Nevertheless the grandchildren will be having some fun with Grandad’s indestructible slotcars. My presence on the Forum will probably be a bit spasmodic over the next few weeks so have a great summer everyone! Best Regards David 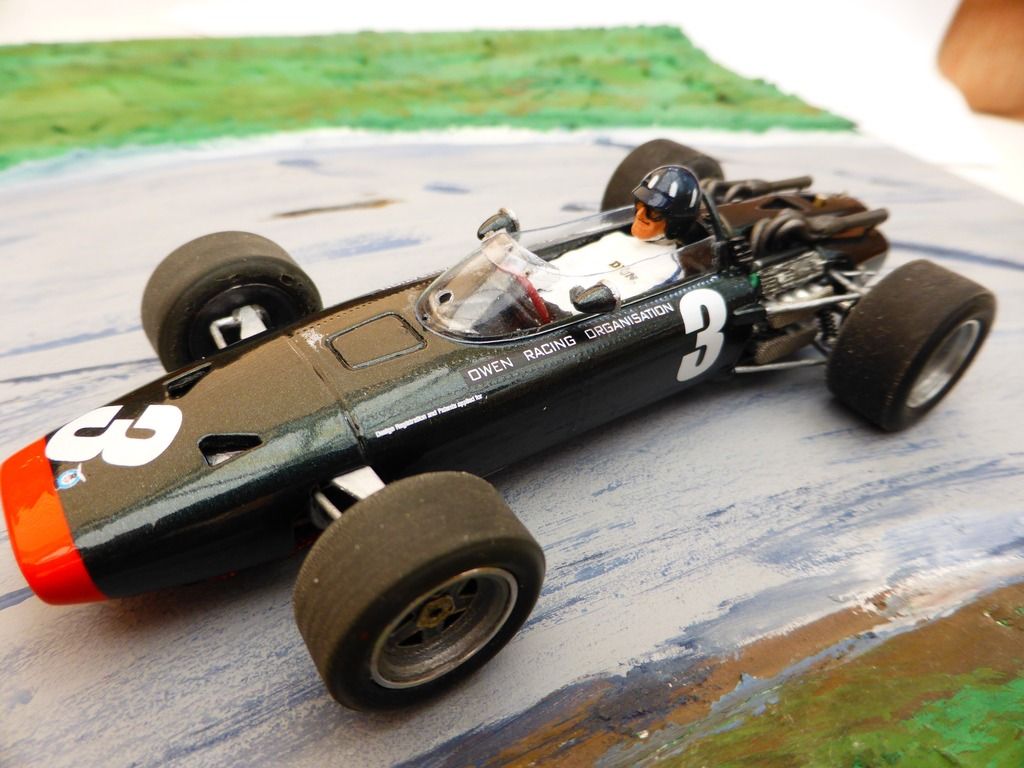 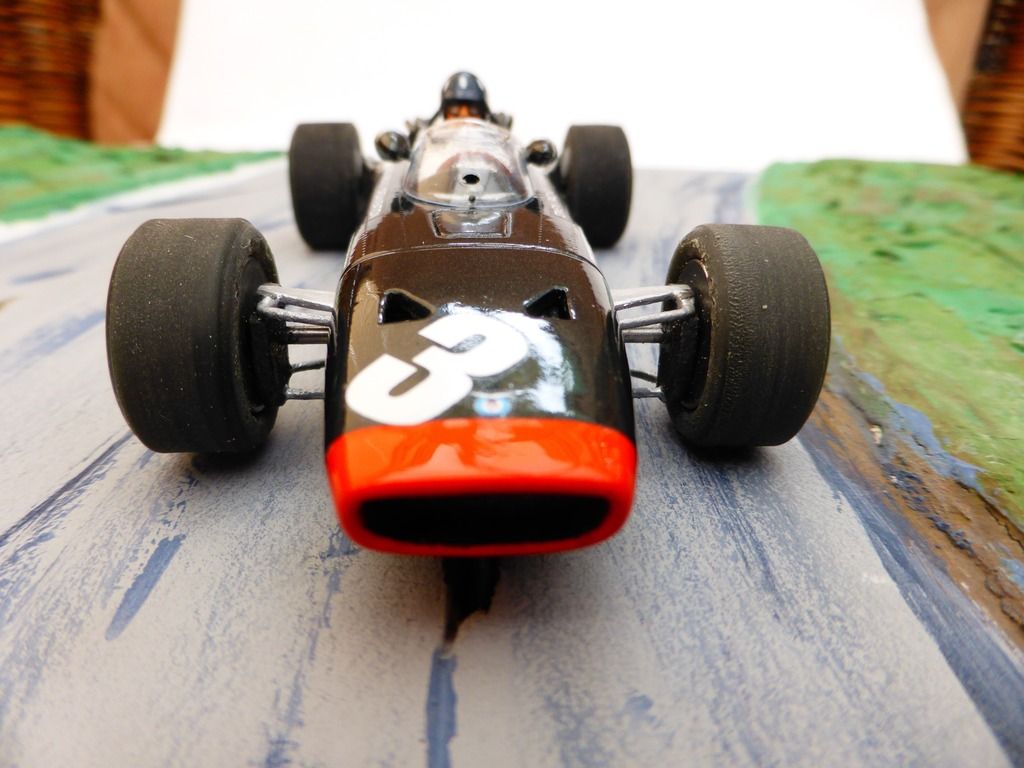 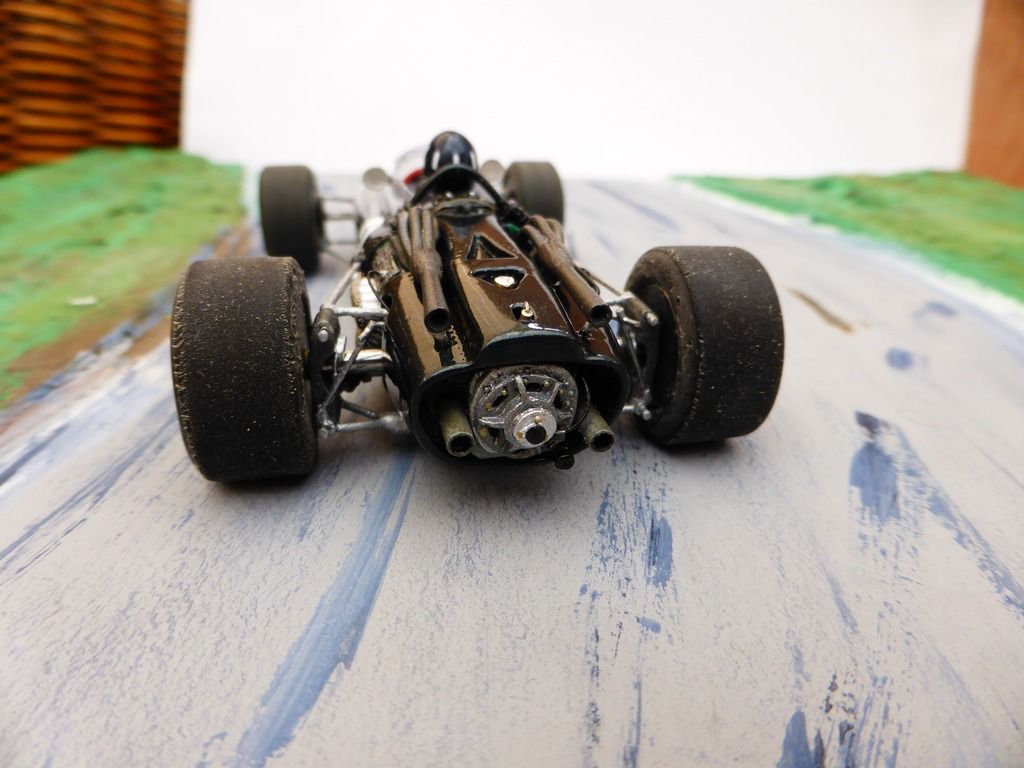 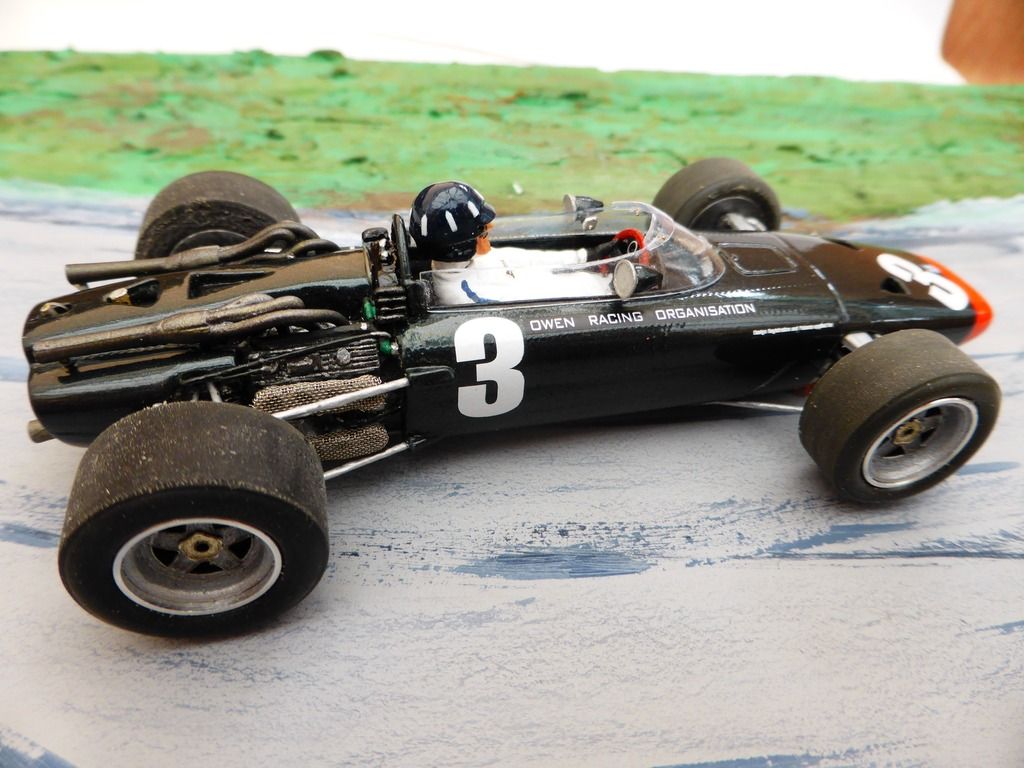 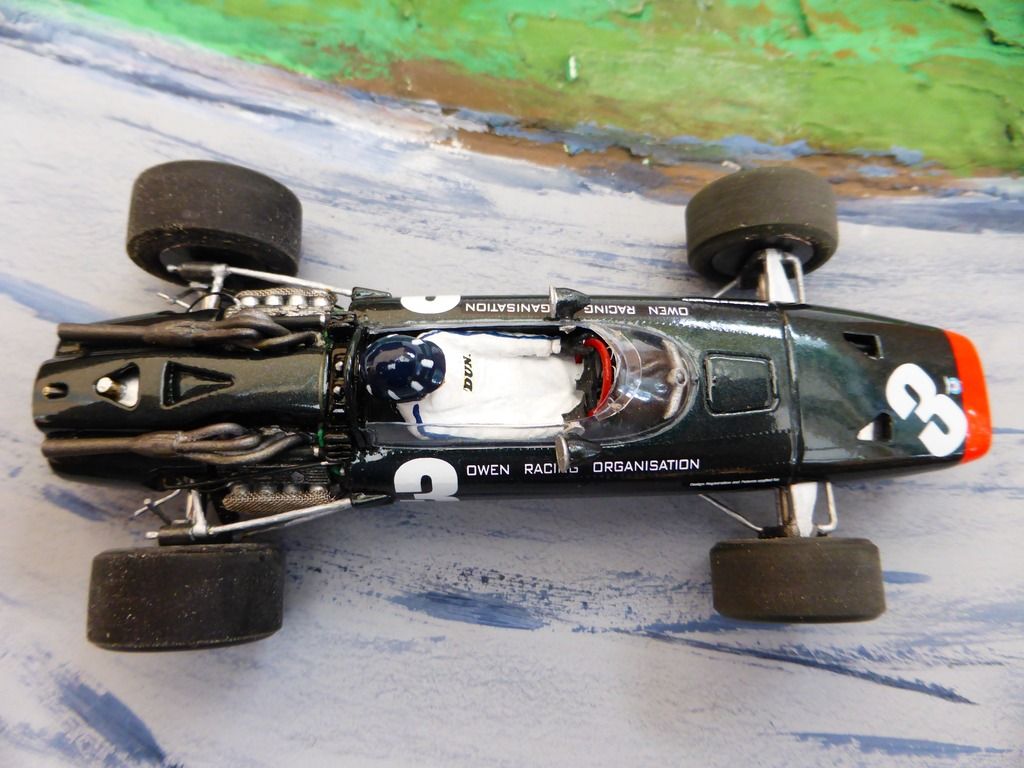 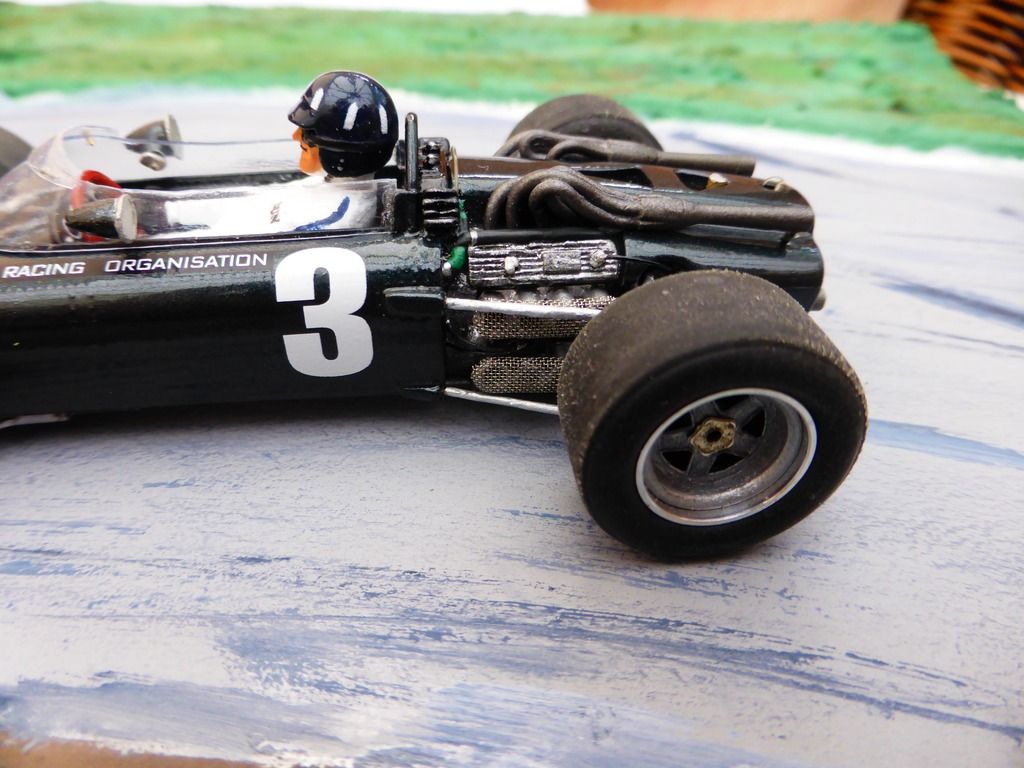 |
|


 Taffy
Taffy