|
|
Post by Andrew Rowland on Feb 14, 2016 16:00:42 GMT -5
David
Just to let you know (unless you are reversing the photos of course), you have the crown set on the wrong side.
Several tips you need to get this running smoothly without tearing up the crown gear.
1. Reverse the crown. You might think this is just a voltage direction thjng but the whole thing is not symmetrical so I would strongly recommend it!
2. Ensure you use the 2x0.2mm spacers between the crown and the bushing.
3. Ensure you screw the motor in with the single head screw into the motor mount to prevent motor movement and rotation.
4. Ensure you use the Policar pinion. It is a particular size and others might cut too deep into the crown over time.
5. Run the car in for about an hour or two to get the gears bedded in.
Looking good so far, your Tecno is going in the post tomorrow. I sadly packed it up today. It has been wonderful to drive it and study it over the last year...
Thanks
Andi
|
|
|
|
Post by David Mitcham on Feb 14, 2016 17:29:20 GMT -5
Oops! Thanks Andi. I thought I'd checked the right configuration against the Lotus 72 - obviously not! I will change things around even though it seems nice and smooth as it is. I am using the Policar pinion.
Best Regards
David
|
|
|
|
Post by Andrew Rowland on Feb 15, 2016 2:30:06 GMT -5
Hi David
Well it might, by some amazing coincidence work the other way round but i'm just nervous..... The crowns are very hard nylon and will tend to wear the brass pinion, however if the backlash and set up dimension is not absolutely correct or if there is any play in the motor they will strip as the pinion engages incorrectly.
Cheers
Andi
|
|
|
|
Post by David Mitcham on Feb 21, 2016 15:05:28 GMT -5
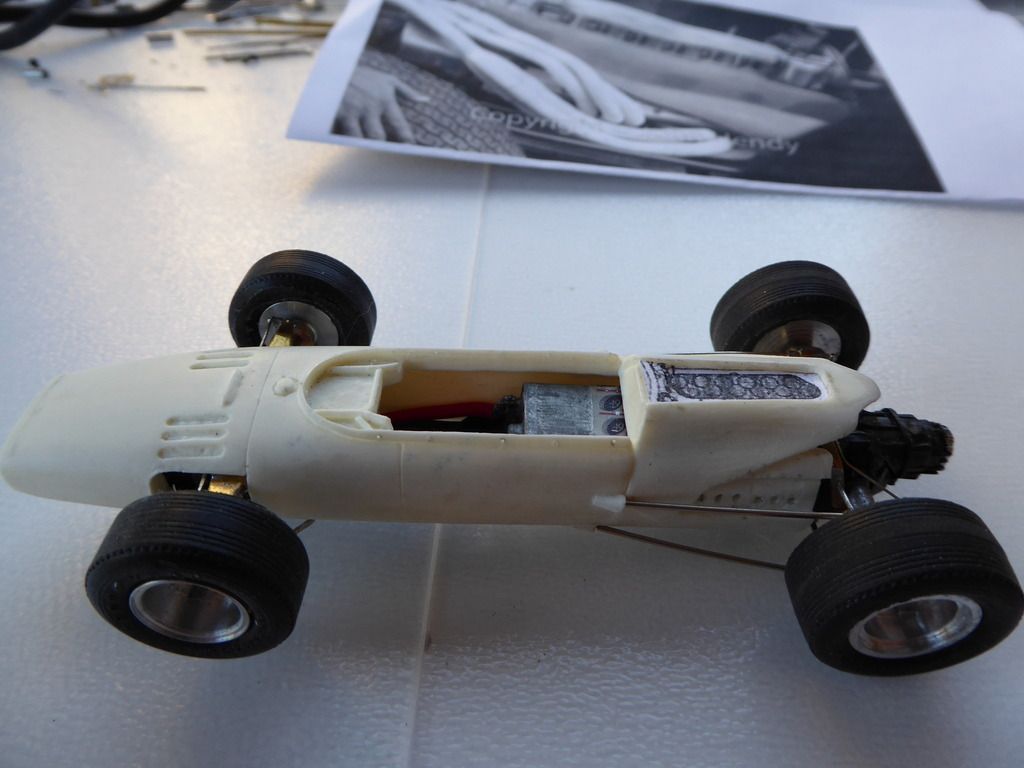
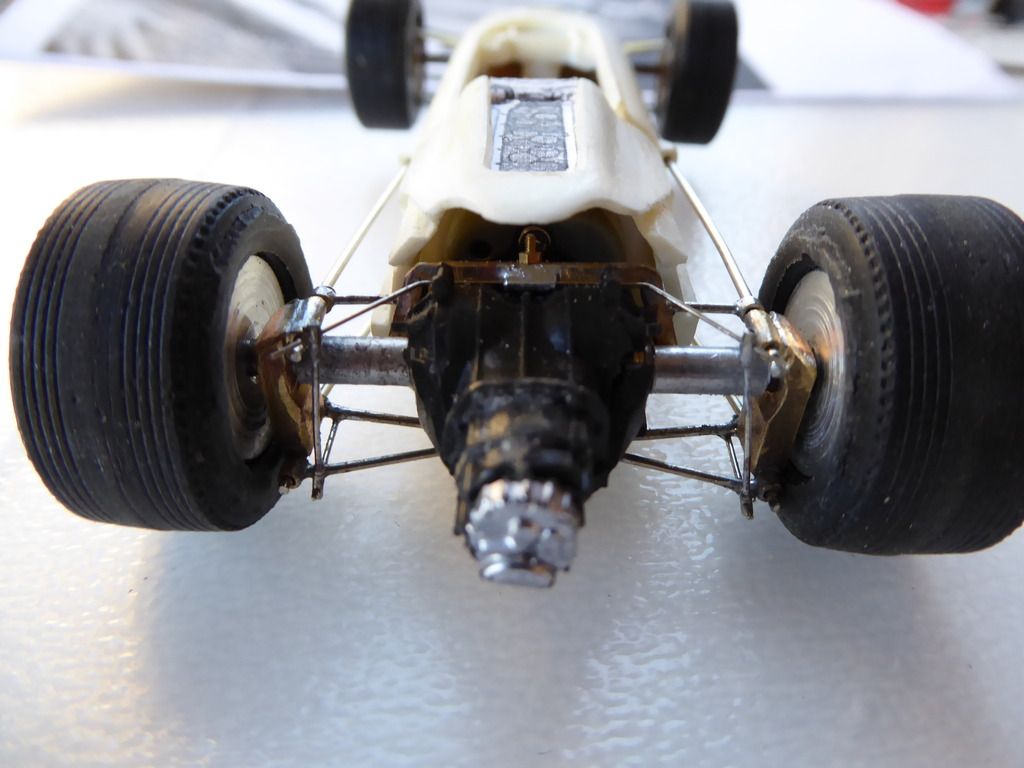
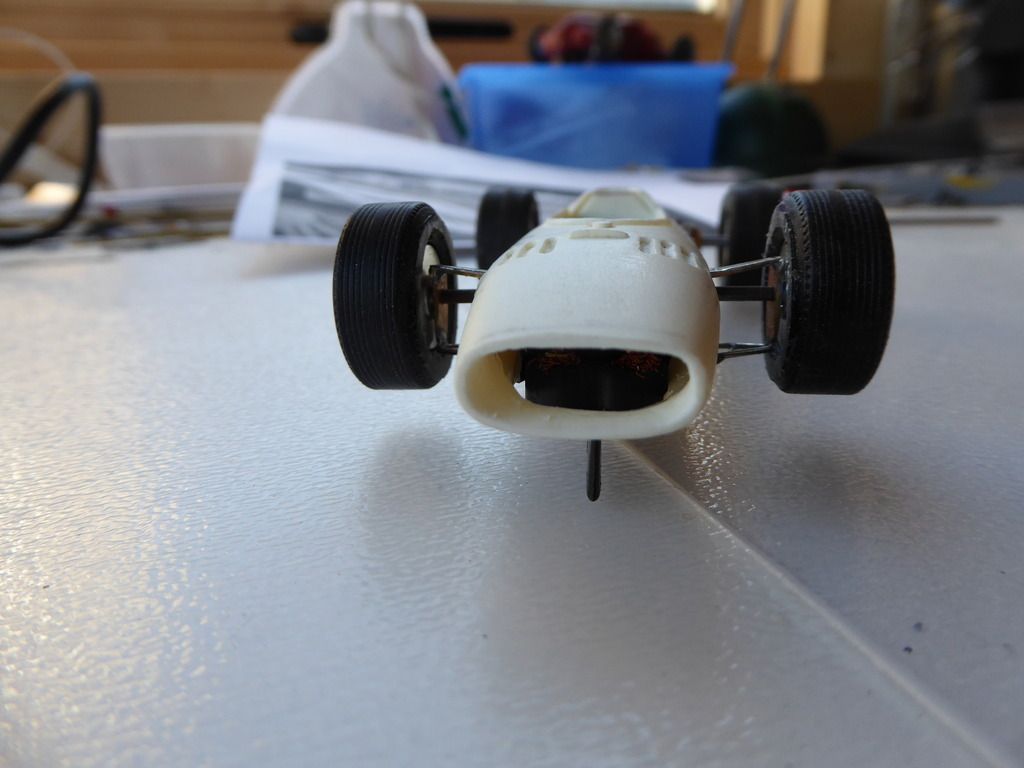
I know it doesn't seem much but here are the results of my labours this week. First I corrected my error with the way I had put the Policar gearbox together - thanks to Andi for pointing this out. Second I've fabricated and assembled the rear suspension; some neatening up and finishing required but basically its done. I've taken my usual approach of making all the parts with oblong brass tube cut and filed to shape for the uprights, tube fitted to them to hold the lower A-arms and upper links, these to be held together with the radius rods (the ones below are temporary pending fitting the chassis to the body). The one change I've made is to use nickel-silver rod for the suspension arms - this should avoid having to paint them; the radius rods will be nickel-silver tube too with piano wire running through them which will fit into the body mounting points. The spring and damper units have been made and loosely fitted. To attach all the bits to the nylon motor/gearbox pod I made up a brass plate and screwed it to the bottom of the pod - fortunately there are two holes for the screws already drilled in the nylon. The bottom suspension has been soldered to that - the nylon takes heat surprisingly well as long as the iron doesn't dwell too long! The upper suspension arms and anti-roll bar are attached to a piece of square brass tube bent to fit round and screwed too, the top of the plastic Policar gearbox cover. Yes I know the Policar gearbox cover is for a Lotus 72 and therefore isn't correct for the 312 but to the untrained eye it looks the part and is pretty much to scale. As the whole is slotted together it will be possible to take it apart when maintenance is required. 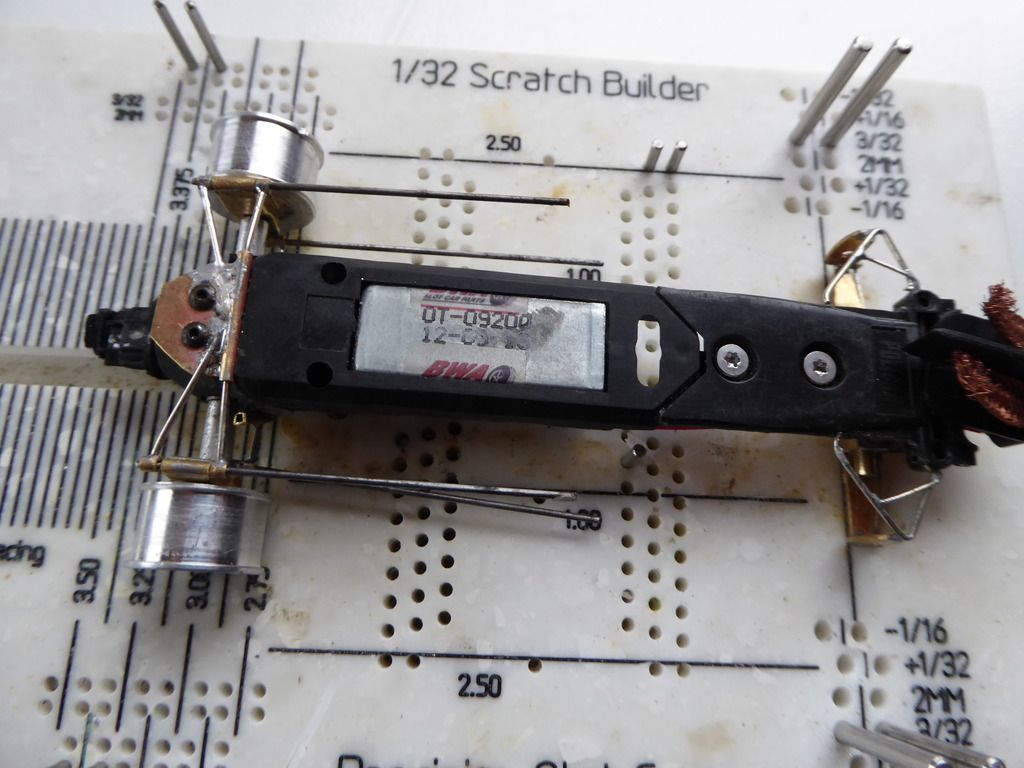 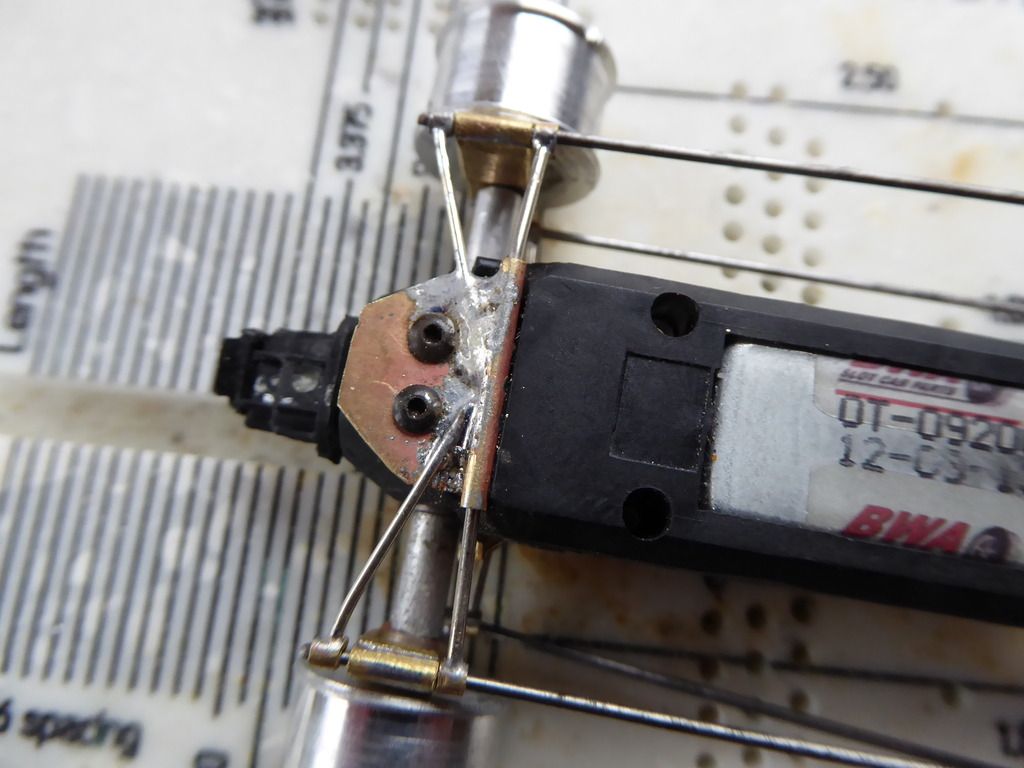 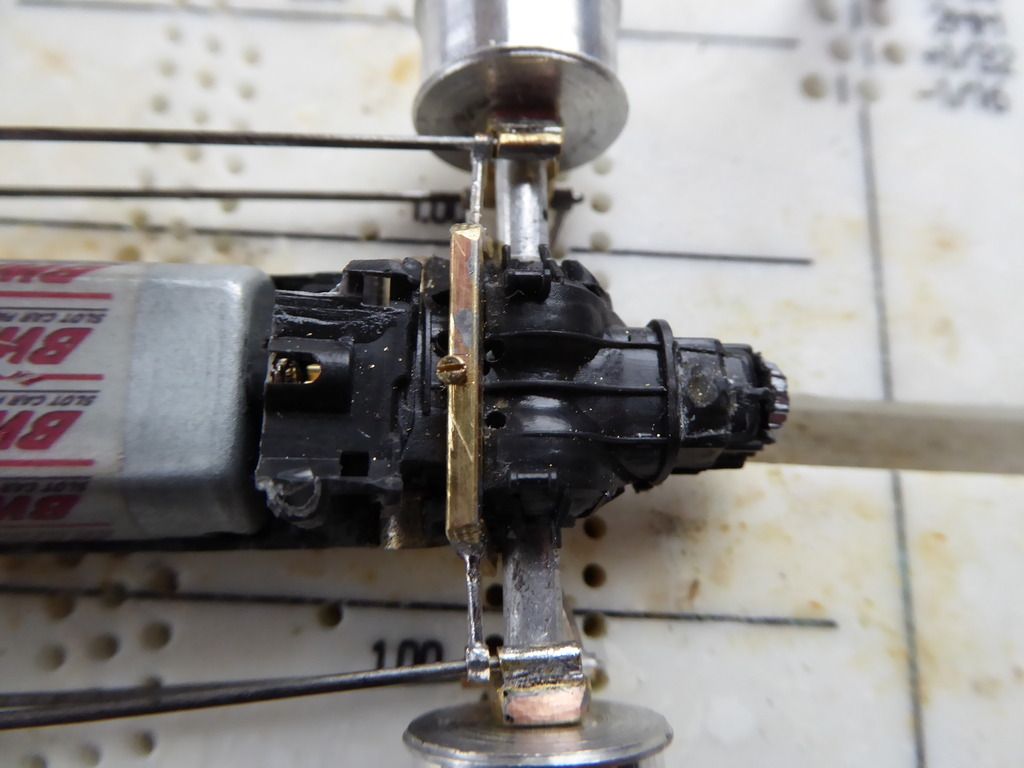 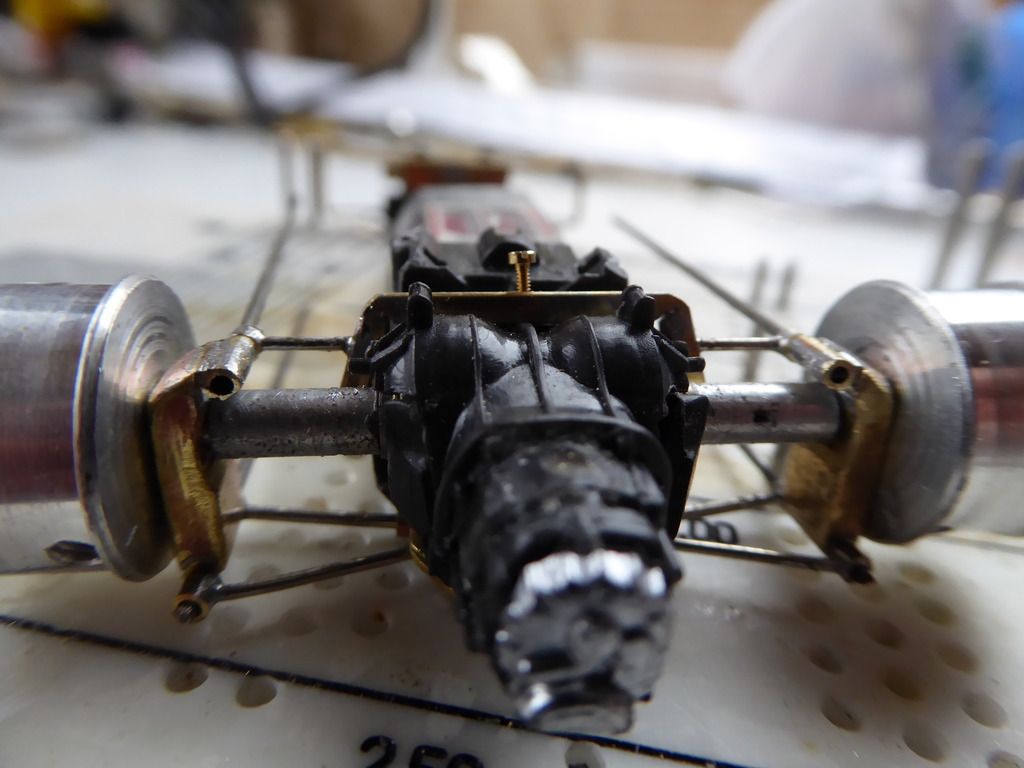 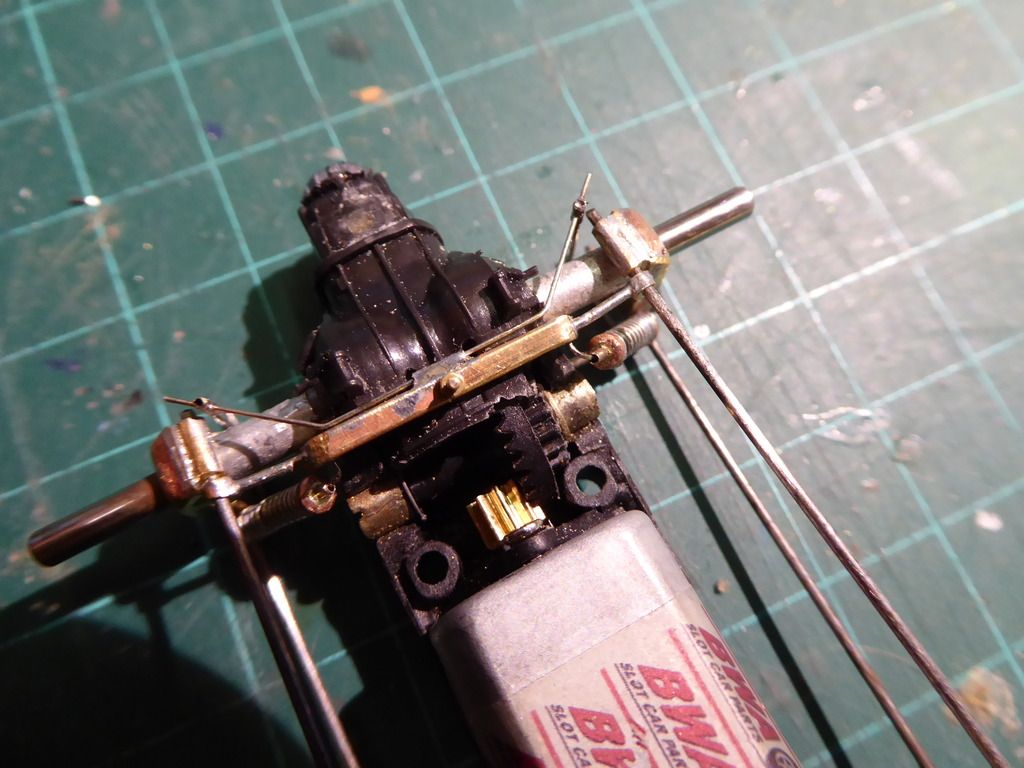 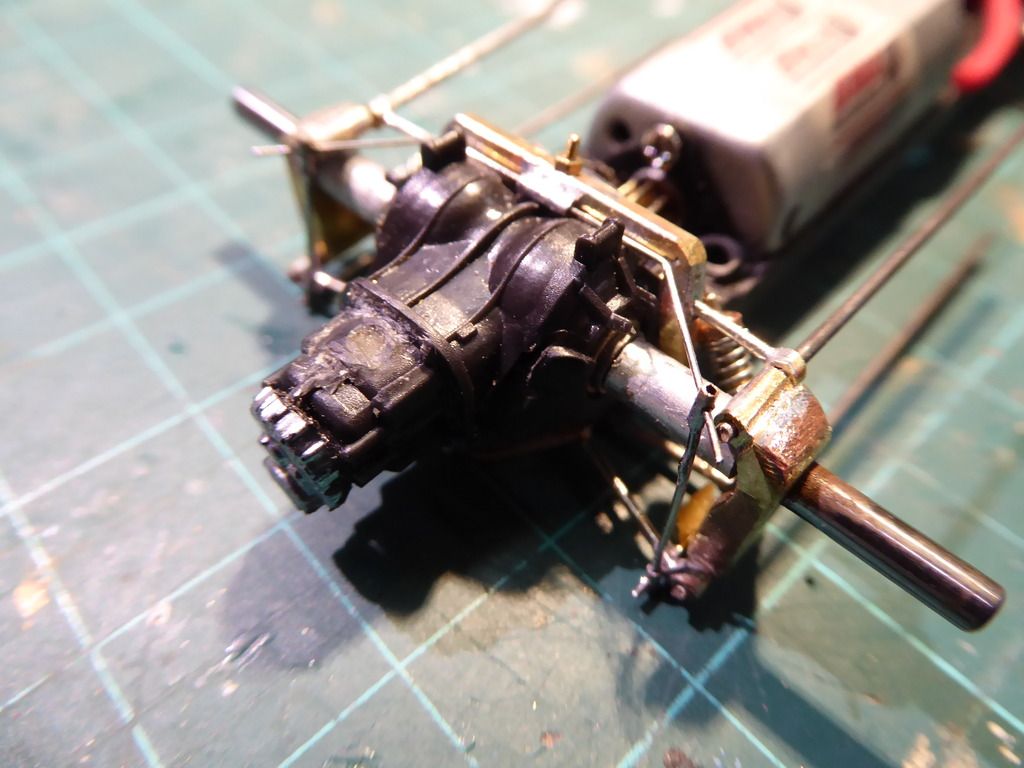 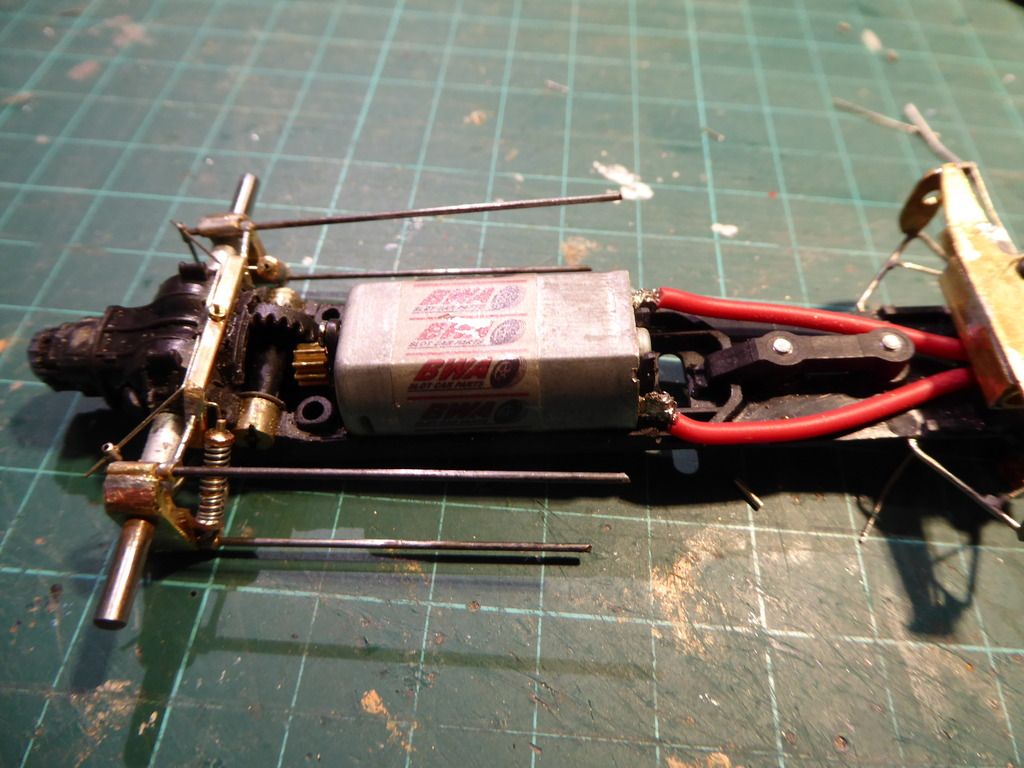 More later in the week! Best Regards David |
|
|
|
Post by Andrew Rowland on Feb 21, 2016 17:03:32 GMT -5
Wow! I'm just realising how exciting it is to watch people evolving new ways to tackle their builds using these parts!
Thanks for posting David!
Andi
|
|
|
|
Post by Aurora on Feb 23, 2016 8:21:49 GMT -5
Great job tackling this new type of gearbox David and showing how it all fits together. The plastic gearbox doesn't hinder the construction of a nice suspension.
May I ask from where do you get your Nickel Silver tube, and is it available online at a reasonable price? As with many things in Thailand, Nickel Silver probably does exist here, but darned if I can find any. I've found only a single UK based online supplier that sells tube in suitable diameters, and the price is on the order of 90 GBP per 100mm length.
Matt
|
|
|
|
Post by Chris Wright on Feb 23, 2016 9:37:14 GMT -5
Great job tackling this new type of gearbox David and showing how it all fits together. The plastic gearbox doesn't hinder the construction of a nice suspension. May I ask from where do you get your Nickel Silver tube, and is it available online at a reasonable price? As with many things in Thailand, Nickel Silver probably does exist here, but darned if I can find any. I've found only a single UK based online supplier that sells tube in suitable diameters, and the price is on the order of 90 GBP per 100mm length. Matt Matt try this place in the states, lot's of goodies. These tubes are stainless steel. www.rbmotion.com/www.rbmotion.com/index.php?route=product/category&path=65_67Chris |
|
|
|
Post by Aurora on Feb 23, 2016 10:36:04 GMT -5
Thanks Chris - some very nice products on that site. They have some small rod ends that might be small enough to simulate suspension linkages.
|
|
Deleted
Deleted Member
Posts: 0
|
Post by Deleted on Feb 23, 2016 11:42:37 GMT -5
Tiny nickel silver rod and tube can be had from anyone who sells Albion Alloys products. They don't sell direct, but have a lot of dealers. I think Eileen's Emporium and Euromodels sell it....AND the even tinier rod that slides inside the tube. I have 0.3mm diameter tube with a rod that goes INSIDE that!
I use 0.8mm n/s rod for F1 radius arms. No paint or polish needed.
Martin
Edited to say that stainless is difficult to solder and piano (music) wire will rust in no time. Always use n/s rod or tube.
|
|
|
|
Post by David Mitcham on Feb 23, 2016 12:00:52 GMT -5
|
|
|
|
Post by Aurora on Feb 24, 2016 6:33:01 GMT -5
Thanks Gentlemen for those very useful referrals! I've spent the last few enjoyable minutes perusing their wares and will be placing orders. Maybe now I can stop using wire that I find laying in the road.
Anyway, back to David's build...
|
|
|
|
Post by David Mitcham on Feb 29, 2016 15:37:21 GMT -5
|
|
|
|
Post by Andrew Rowland on Feb 29, 2016 16:32:02 GMT -5
Nice detail there David, rear end looks especially realistic.
Andi
|
|
Deleted
Deleted Member
Posts: 0
|
Post by Deleted on Mar 1, 2016 4:32:25 GMT -5
Exhausts look nicely done, David, but 12 cylinder exhausts on a small 3 litre engine are actually not much, if any, bigger than the primaries of a V8 1.5 Litre engine, so I use 1/32nd" brass wire from the K&S Metal Centre. I find, by the time you paint those w/ms white they seem to "grow" in thickness and presence. I usually spend at least a full day making exhaust masters. Maybe we should save costs in future by leaving exhausts to clients!
Martin
|
|
|
|
Post by David Mitcham on Mar 12, 2016 13:28:54 GMT -5
Its been a busy week on things non-slotcar but here are a few more photographs of the 312. Body primed; exhausts bent and temporarily fitted (the odd looking 'device' at the end of the pipes is just to hold them in the correct configuration and will be removed once they are glued in place); John Surtees primed and temporarily fitted in place; checked to make sure it all sits nicely on the chassis (the exhausts just fit within the radius rods!). 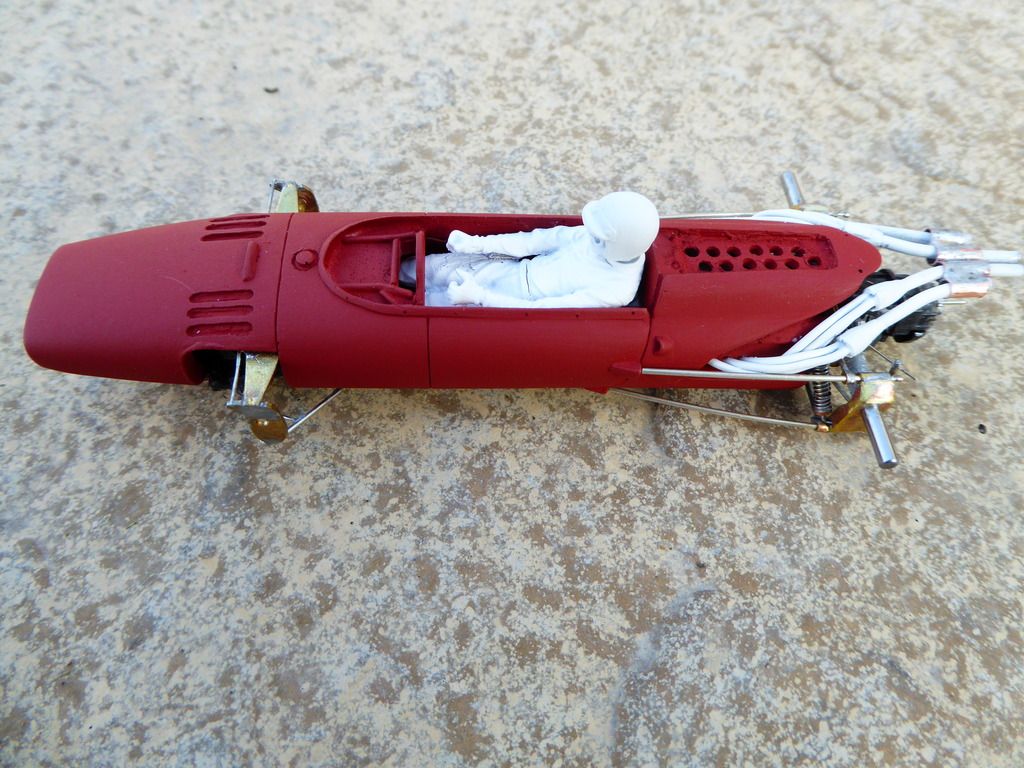 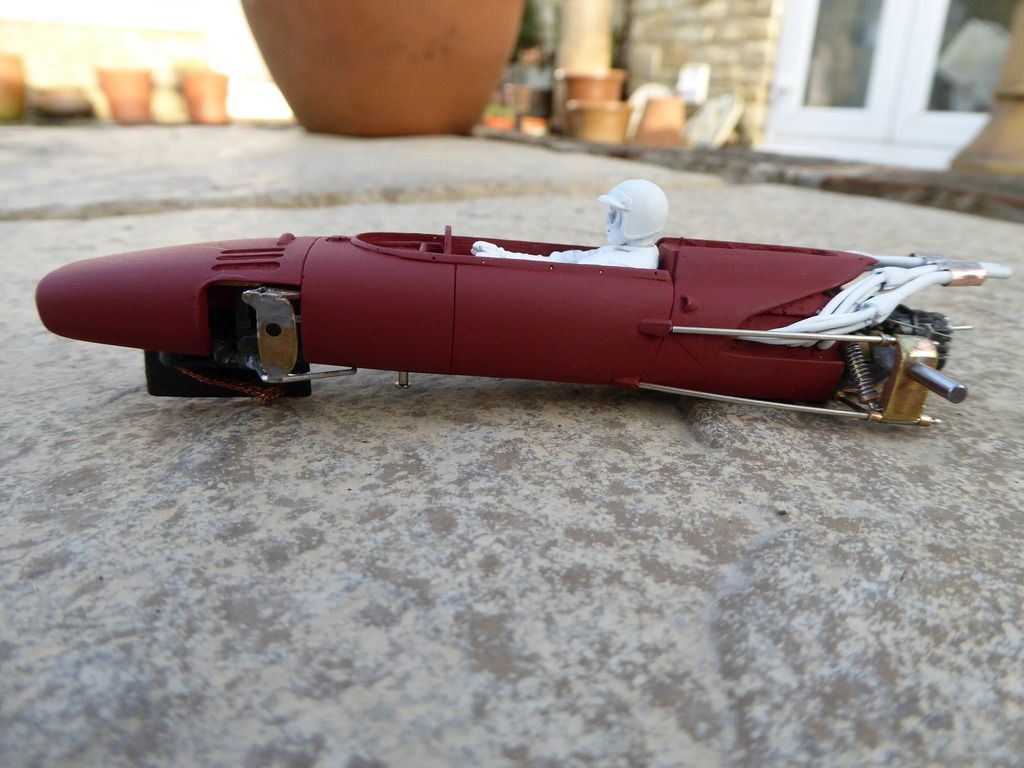 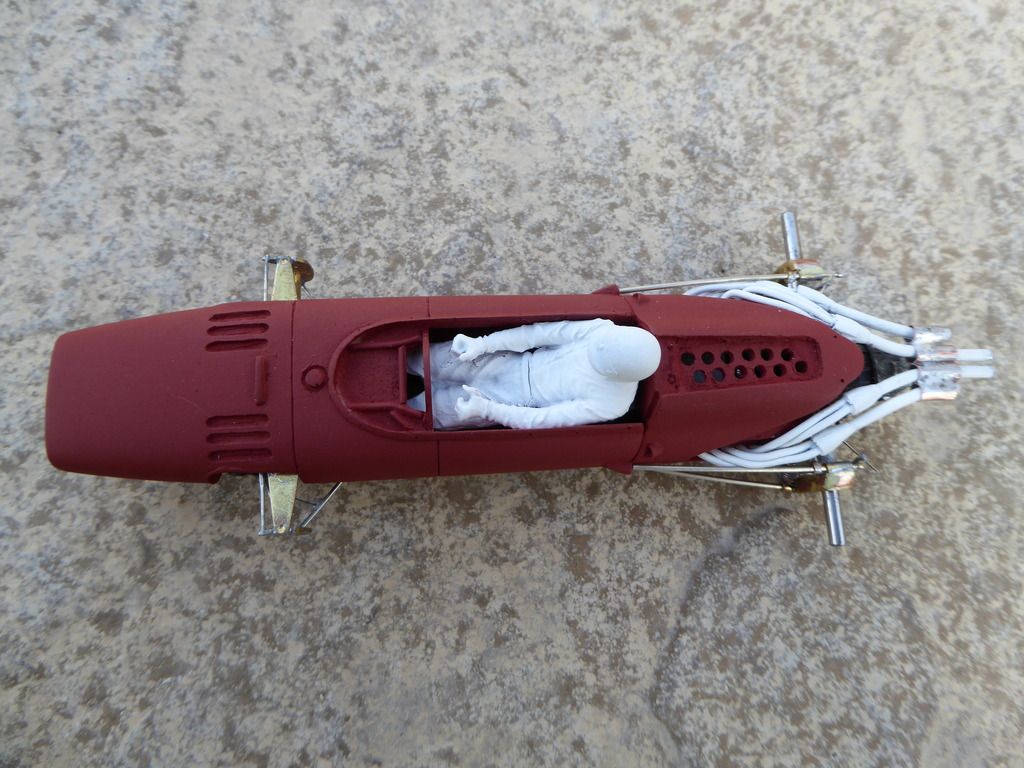 Best Regards David |
|