|
|
Post by munter on Feb 20, 2016 12:24:48 GMT -5
I see a centre line
|
|
|
|
Post by Peter Seager-Thomas on Feb 20, 2016 13:03:59 GMT -5
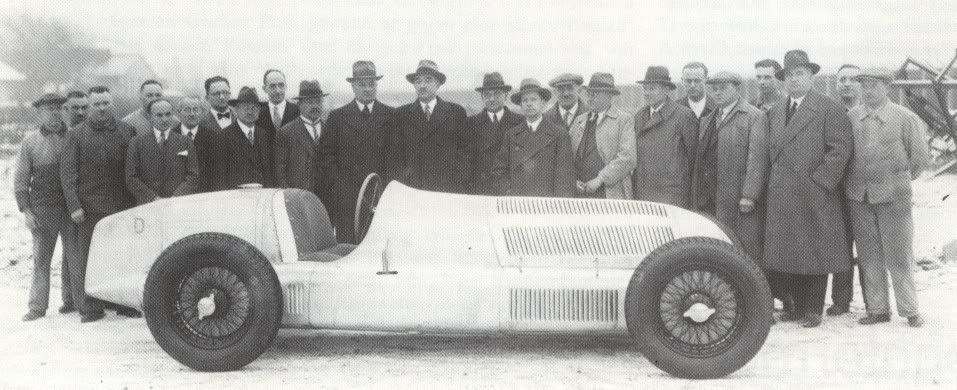
I'd suggest that the prototype W25 was in fact white, and not only was it painted, it had a registration number too (111A-27801). This is the car with the outside handbrake. There is another shot of presumably the same car which looks decidedly like a car with paint stripped off. The 'D' on the tail appears to have a white edge.....
Martin, is this another master for Colin?
I look forward to progress on this one.
Peter.
|
|
Deleted
Deleted Member
Posts: 0
|
Post by Deleted on Feb 20, 2016 13:18:46 GMT -5
Well, Peter, the only pics. I've seen of the prototype are without paint. The whole stripping paint to save weight last minute tale has now been well and truly scotched, not that it matters. Clearly these ran in bare ally. It would be good to see your pictures, though and no, this is not for Colin although it will suit his new wheels very well as they seem to be rim laced and all the same size and relatively skinny.
A handbrake? On a GP car? Once again, not on any pics. I've seen.
John, you will always see a centre line on my models. In fact I've just used it to reduce the width of the main bodywork.
Alas, the drawing I used showed the body too straight sided, so I will be adding Milliput to the sides tonight to give more bow shape in plan. Best to just accept such things and act quickly, than try to save the job by "purer" means.
Cheers,
Martin
|
|
Deleted
Deleted Member
Posts: 0
|
Post by Deleted on Feb 20, 2016 13:21:45 GMT -5
I was speaking to a well connected old boy tother day who claimed that "his chum" had sponsored 6 W25 replicas to be made, by Crossthwaite and Gardner. Yet oddly, I can find nothing on the net about such things. He reckoned a million each. I would have thought more, but no mention anywhere.
Martin
|
|
|
|
Post by Chris Wright on Feb 20, 2016 17:09:52 GMT -5
|
|
Deleted
Deleted Member
Posts: 0
|
Post by Deleted on Feb 20, 2016 19:09:56 GMT -5
Old photos being what they are that could so easily be bare metal. But it isn't really important as when they actually did any serious racing they were bare ally. But thi one s earlier than any I've found as I never saw that crazy handbrake before!
I'll check Taffy's build out, thanks.
Martin
Edited to say that the picture in Taffy's post does look white, especially with what I assume is a road registration number of the day with a D badge, too! Also, the Mac Pinches body has the relatively easy cop-out of "outie" louvres, where they should actually be "innies", which have to be individually cut in to th surface or at best engraved into a strip of styrene and then glued into a recess on the model and faired into the surface. I've done both and think the former the more satisfactory.
|
|
marlon
Innes Ireland

Posts: 31
|
Post by marlon on Feb 21, 2016 12:48:13 GMT -5
PS. looking forward to see how you do louvres. I tend to use cable ties where I can but they do have their limitations. On the W25 I did with the roof that drove at AVUS I used cable ties....  |
|
|
|
Post by Taffy on Feb 21, 2016 13:27:47 GMT -5
Hi, gents!
Most pictures of the prototype, that show the car with a registration number, in my opinion show a white painted car. The only picture, where I´m in doubt of this fact, is the picture with the car shown from the front and side, like posted by Marlon.
The car had got this reg. number and the "D" to do test rides on open roads in Italy, because early in the year in Italy there were better weather conditions than in Germany, so that test rides could be started earlier.
Building the prototype car I have done two main mistakes: 1. the rear shape of the bonnet of my prototype is wrong, it must be the same as in the later racing car (clearly shown by the picture, that Chris has posted). 2. I have changed my opinion about the clipped-on windscreen of the prototype. I think, it was made of a solid material and not "see-through".
I don´t want to contribute to the "colour-story", I think, this will remain a mystery, beside of all facts, that are known so far. But from the first race / practice session I remember to have seen pictures of the racing car, that clearly show white wheels (like the pictures Marlon has shown) and I wonder, why there were white painted wheels fitted to a silver car?
It was real fun to do the prototype car, it was one of my first conversions / scratchbuilds where I tried moulding and resin casting. Martin, I wish you as much fun as I had, doing this project!
Best regards,
Taffy
|
|
|
|
Post by David Mitcham on Feb 21, 2016 15:09:25 GMT -5
Hi Martin
The carving process is very interesting and instructive, thanks for sharing it. I look forward to the next tutorial!
Best Regards
David
|
|
Deleted
Deleted Member
Posts: 0
|
Post by Deleted on Feb 22, 2016 4:42:40 GMT -5
Well! From a very quiet weekend to a very noisy Monday morning!
Thanks gents, for all your contributions. I will have to pass all this to my commissioning gent for his opinion.
I really don't have to worry about the colour issue as I am just making the master, but it is very interesting, nonetheless.
But it's just the shape that I am concerned with. The bit of windscreen is something I hadn't noticed, but is too thin to be included in the master. But that handbrake will need to be sorted out as in yes or no.
I have done a bit more over the weekend (which I normally try not to do), so will be taking photos today.
Cheers,
Martin
|
|
Deleted
Deleted Member
Posts: 0
|
Post by Deleted on Feb 22, 2016 4:45:40 GMT -5
Marlon,
unfortunately cable ties aren't wide enough to do the louvres on this one and I could never curve them across their width anyway, so it'll be a case of styrene with the louvres engraved in the surface, then let into the recesses, as I assume yours were.
Am I correct in thinking your current masters are 3D printed?
Cheers,
Martin
|
|
marlon
Innes Ireland
Posts: 31
|
Post by marlon on Feb 22, 2016 7:04:21 GMT -5
Hi Martin, no definitely not. I did all my new range by hand starting with balsa blocks. I made all my current masters over the previous 12 months so hope to release all 12 of my new cars this year. With regards louvres, curved across the width is a good point and something I tried to tackle on my 308 pattern. For the louvres on that one I rolled the end of something that had a straight knurl on it into some plasticine and took a casting of that and cut into strips. Because it was resin I could warm it and get a silght curve across its width and set those in. Not quite enough but the effect was quite good... 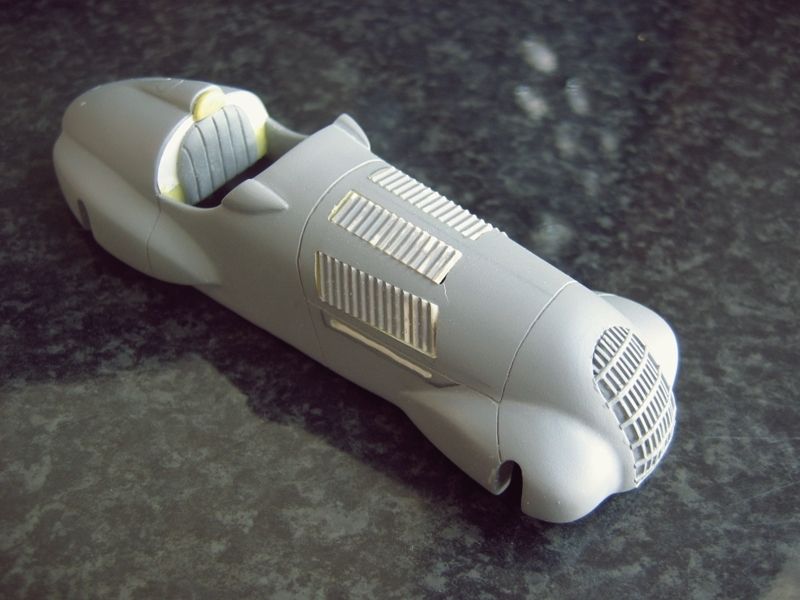 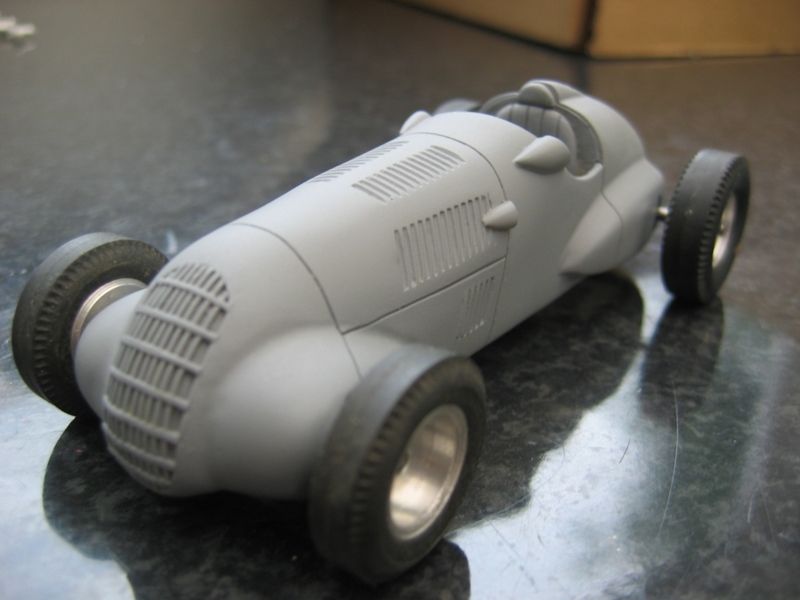 the other reason I did it this way instead of cable ties is that the louvres weren't perpendicular with the line of travel they were slightly angled. |
|
Deleted
Deleted Member
Posts: 0
|
Post by Deleted on Feb 22, 2016 7:36:22 GMT -5
Well, I'm glad to learn that you did them the proper way! Balsa wood? Arghh!! Hate the stuff. You're very brave.
Of course the angled louvres are a pain and that's what I'm stuck with on this W25.
At least they're "innies", which makes life a bit easier. The V-16 BRM had those hefty "outies" which had to be made and attached individually!
I can't do any moulding and resin casting as I don't have and don't like resin! On the Amilcar I just cut them straight in to the Ureol. It was surprisingly quick.
Nice work on these new series cars, though, BTW. Good luck with the project. I redid the 1938 158 for Dave Capelen (including all new louvres) and he hasn't done a thing with it!
Cheers,
Martin
|
|
Deleted
Deleted Member
Posts: 0
|
Post by Deleted on Feb 22, 2016 12:45:24 GMT -5
This is with the Milliput added to get the slight belly to the lower part of the body and to provide enough meat for the radii between some components like the headrest and aerodynamic suspension covers. Milliput is still the only filler worth a damn, but is NOT what it once was and is grainier and gooier than it once was. It sticks to even a spitty finger better than it sticks to a car model body and doesn't like to be manipulated quite so hard or so often. BUT....it still does the job. Yellow/Green is as fine as you'll ever need and goes off easier than the others with a bit of heat. I leave mine on the woodburner, this time of year. Please don't waste your money on the white stuff. It chalks, crumbles and is no finer a surface, whatever they say. The black ain't bad either, but people seem to not want a black filler. I ain't fussy if it behaves the same as the yellow/green. So, here we have it on the W25. Try to get it on as near the final shape as possible. 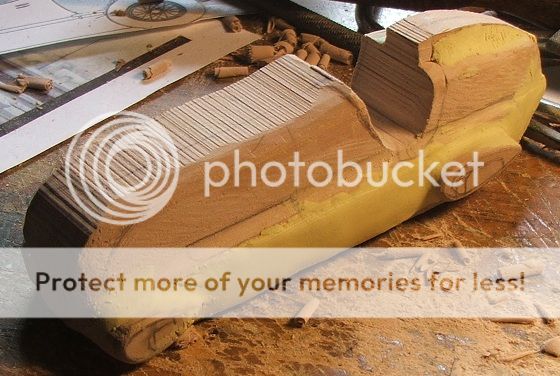 Then after some file and sanding work, which always makes me cough or sneeze. 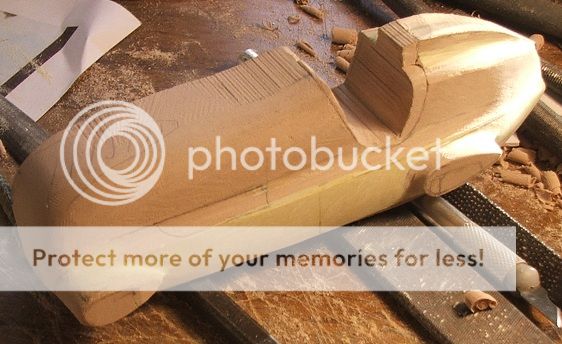 A bit of marking up for the exhaust pipe opening in the side, and you can see where I have corrected and slightly re-sized the aeros and blended them in. That pale colour at the back is pure camera fantasy, something I am prone to. The cross-hatching on the bonnet is my personal code for where to do something, what and how much, in this case drop the angle of the front of the bonnet a bit. Naturally the centre line will disappear when work goes right over it, but I will always re-instate it, as I have already done. More recent pics., including some panel lines, tomorrow. Martin |
|
|
|
Post by munter on Feb 22, 2016 16:41:49 GMT -5
Nice to see you combining materials. I know you like Milliput...never liked it myself. maybe I am too impatient and expect it to harden in five minutes.
Fast curing fillers I will use at different times for different purposes are:
P38 auto body filler....a tip off from Mr P told me this but I used builders bog previously which is nearly the same thing.
JB weld Quik....goes very hard, need to shape it during the curing stage.
Tamiya putty (basic grey)...I like this stuff for filling small gaps and joins, white version is poor in comparison in my opinion.
|
|


 Taffy
Taffy