

Post by Andrew Rowland on Sept 7, 2012 2:22:56 GMT -5
So this is NOT a scratchbuild by me but I think it deserves a post.
These cars, as many of you might remember, from the SF posts in 2010/2011 were produced by Claudio Mazza as a run of 25 cars. Some of you may well even have this car in your collection!
This is the car we’re talking about:

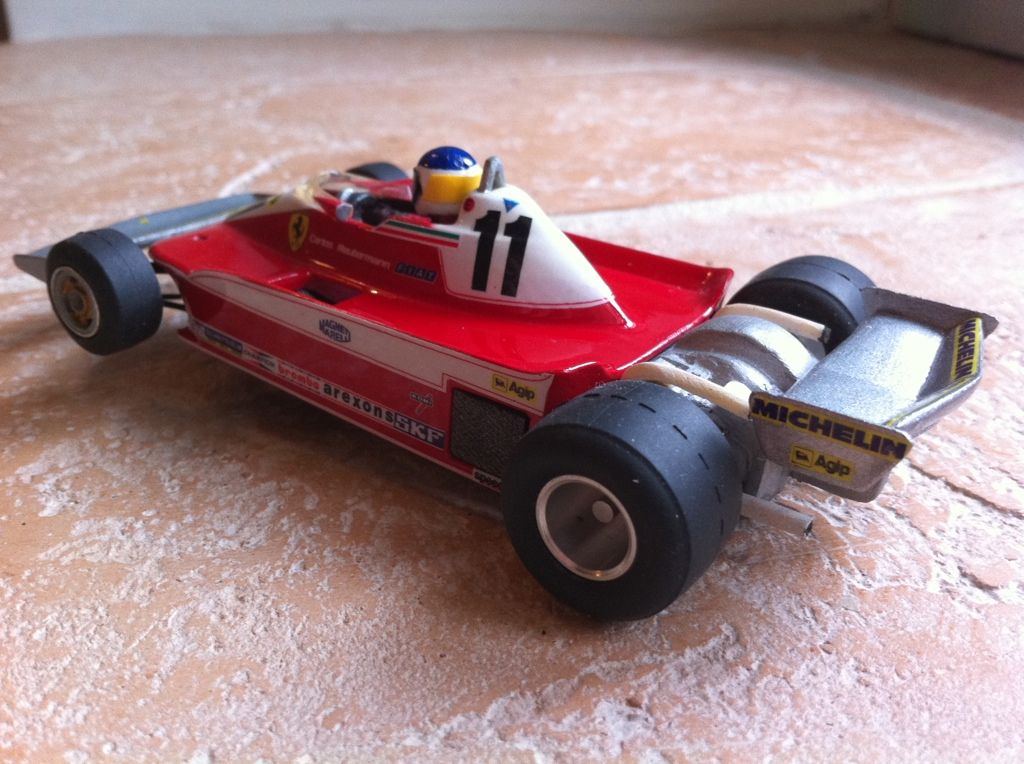
As Claudio is now embarking on a new F1 project for the Matra MS80 of 1969 I thought it might be useful of me to post some photos of his earlier project and show the works i've done to make the car, lets say, more competitive.
Now I have to reveal that my car, when it arrived and I put it on the track, didn’t turn a wheel hence my works but I don't want this to look like any sort of complaining thread. Claudio’s work is great and as he is one of just a few producing scratchbuilt ‘production runs’ I want to support, not criticize.
The point then is to ‘show-off’ this car as well as show how this or similar cars can be made to work.
The problem with my car, once I took the body off to investigate was that the hand-made length extension to the motor axle had sheared as soon as I tried to accelerate away. This might not have occurred on other people’s cars but on mine it did and that caused me to look at and review the whole drive train.
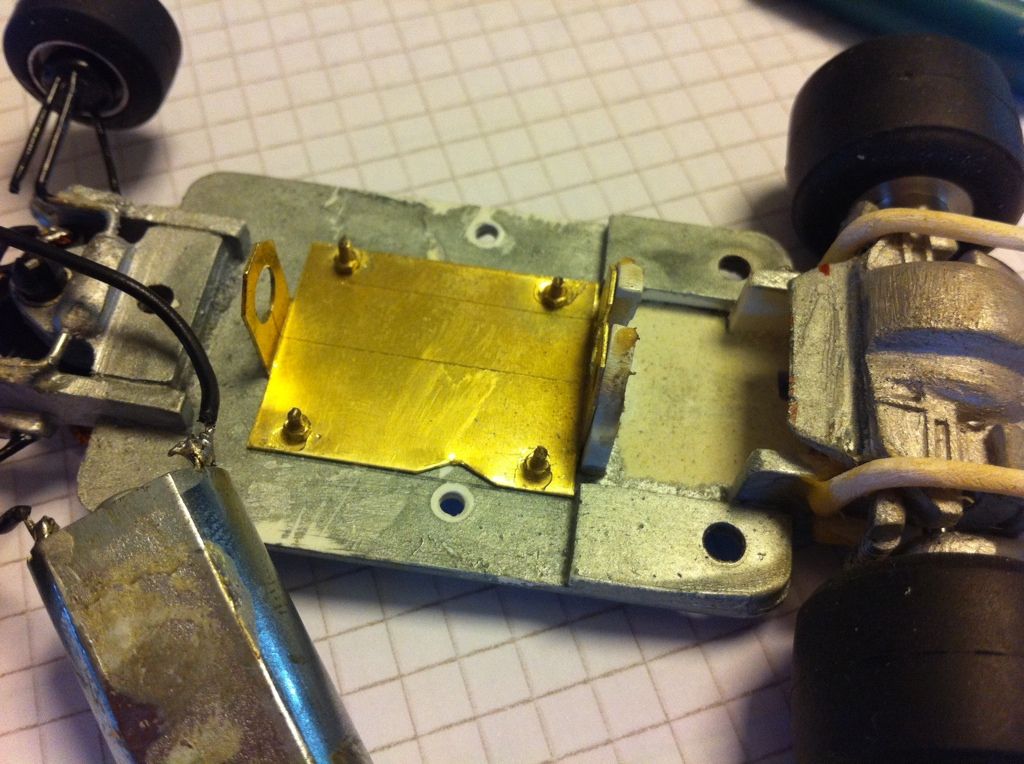
The original drive train looked like this:
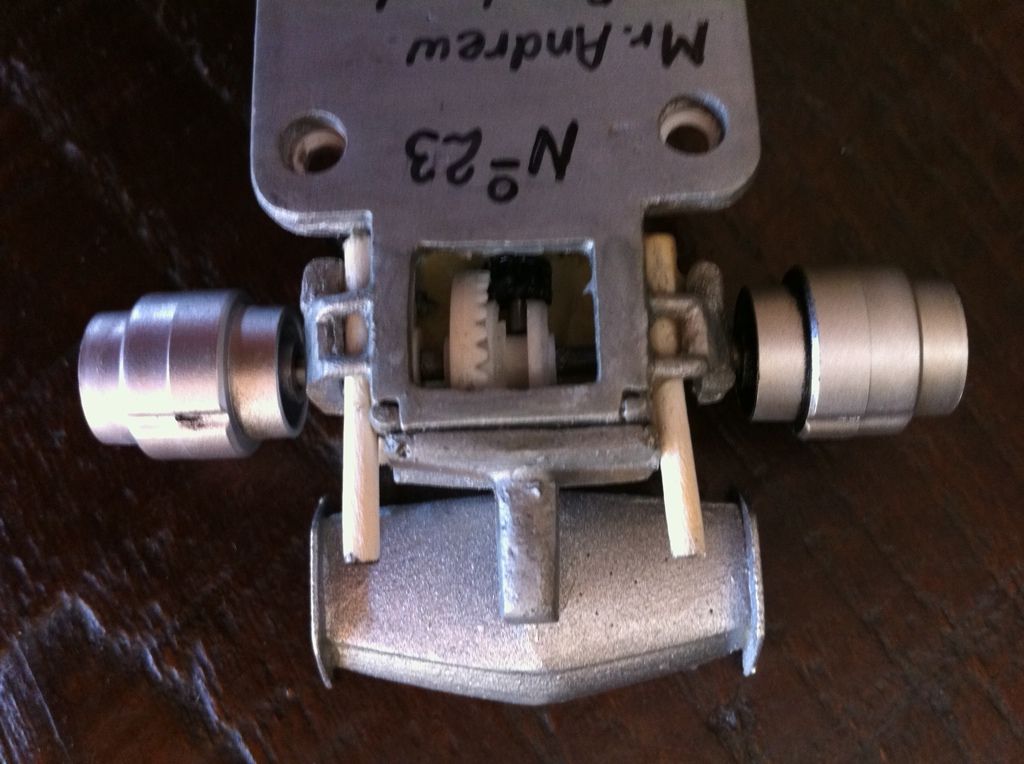
The points to note are:
a) Lengthened motor spindle by the use of a piece of imprecise internal diameter brass tube, soldered to the motor spindle and another piece of 1.5mm stainless steel bar.
b) The resulting spindle (1.5mm dia.) and pinion were then twinned with a single piece plastic crown (I’m not personally sure who makes them – maybe Fly?)
c) The crown is designed, with its own keeper, to accept a 2mm axle but by some ‘combination’ the 1.5mm axle and the pinion size did in fact ‘keep’ the rear axle in place although the mesh was clearly tight to achieve this.
d) The rear axle and crown are a single piece, the rear axle having been knurled (which is why I suspect Fly). This is fine but Claudio had built the body around the axle such that the axle / crown were not removeable.
e) The motor itself, despite having a plastic fixing plate was glued well to the bottom chassis plate.
f) The rear bushes are plastic.
g) The rear wheels are also plastic and this time I know they are Fly March F1 wheels.
So I started to think up a way to ‘repair’ the motor spindle and decided instead that I needed to replace the whole drive train.
What I came up with was:
a) AB slotsport do some wonderful little 1.5mm internal diameter, 2mm external diameter shaft ‘increasers’ (does such a word exist?).
b) I did a lot of research into grub screw fixed collars. In the US I found several long collars with 2mm internal dia. (never 1.5mm sadly) which would have been perfect for lengthening but sadly postage was prohibitive, so from ‘Hobby’s’ (UK) website I found single collars in brass which could be therefore be soldered together. Since I will soon be needing some of these for the Beardog_Rowland Lotus 63 I bought a few of these.
c) I soldered two collars together while they were fixed onto a single length of 2mm dia. SS thus keeping them perfectly aligned.
d) I slipped a piece of the AB slotsport ‘increaser’ onto the end of the motor spindle, tightened up the first grub screw and then inserted an appropriate length of 2mm drill blank into the other end of the double collar and tightened that up, finally fitting a Slot.it pinion (9t for the record).
e) Removing the wheels I used a flame type soldering iron to heat up the rear axle sufficiently that the knurling became ‘loose’ enough for me to pull the axle out from the crown gear.
f) The plastic bushes were removed with a scalpel. Sadly this revealed that they had been glued in and their ‘seats’ were anything but perfect.
g) I had decided to insert ball races from SMG bearings (I use them on all my builds if possible), so I fabricated new ‘seats’ from plasticard and glued these in place inside the chassis.
h) Meanwhile I discovered that despite the old crown coming out the new Slot.it one wouldn’t go in. Obviously a RD gear or similar could have been used but I happened to have a Slot.it set and wanted to use that as space was not at a premium in Claudio’s body. I had, against my desires to modify the chassis ever so slightly in order to insert the gear from below but hope that Claudio wont mind……
i) The motor itself, once cut out, was cleaned up and a brass ‘clip’ fabricated out of 0.4mm sheet which was then bolted to the chassis using very small brass nuts and bolts. This clip was made to hold both ends of the motor, removing any risk of rotation given the length of the motor spindle.
j) Once the new bearing seats were glued in and the motor was clipped and screwed in it was a simple matter of assembly, pushing the axle through the ‘gearbox’ moulding, adding some NSR spacers and finally tightening up the PP aluminium hubs.

All in all a fun afternoon which took this car from a non-runner to a competitive car, befitting this lovely build…..
These cars, as many of you might remember, from the SF posts in 2010/2011 were produced by Claudio Mazza as a run of 25 cars. Some of you may well even have this car in your collection!
This is the car we’re talking about:
As Claudio is now embarking on a new F1 project for the Matra MS80 of 1969 I thought it might be useful of me to post some photos of his earlier project and show the works i've done to make the car, lets say, more competitive.
Now I have to reveal that my car, when it arrived and I put it on the track, didn’t turn a wheel hence my works but I don't want this to look like any sort of complaining thread. Claudio’s work is great and as he is one of just a few producing scratchbuilt ‘production runs’ I want to support, not criticize.
The point then is to ‘show-off’ this car as well as show how this or similar cars can be made to work.
The problem with my car, once I took the body off to investigate was that the hand-made length extension to the motor axle had sheared as soon as I tried to accelerate away. This might not have occurred on other people’s cars but on mine it did and that caused me to look at and review the whole drive train.
The original drive train looked like this:
The points to note are:
a) Lengthened motor spindle by the use of a piece of imprecise internal diameter brass tube, soldered to the motor spindle and another piece of 1.5mm stainless steel bar.
b) The resulting spindle (1.5mm dia.) and pinion were then twinned with a single piece plastic crown (I’m not personally sure who makes them – maybe Fly?)
c) The crown is designed, with its own keeper, to accept a 2mm axle but by some ‘combination’ the 1.5mm axle and the pinion size did in fact ‘keep’ the rear axle in place although the mesh was clearly tight to achieve this.
d) The rear axle and crown are a single piece, the rear axle having been knurled (which is why I suspect Fly). This is fine but Claudio had built the body around the axle such that the axle / crown were not removeable.
e) The motor itself, despite having a plastic fixing plate was glued well to the bottom chassis plate.
f) The rear bushes are plastic.
g) The rear wheels are also plastic and this time I know they are Fly March F1 wheels.
So I started to think up a way to ‘repair’ the motor spindle and decided instead that I needed to replace the whole drive train.
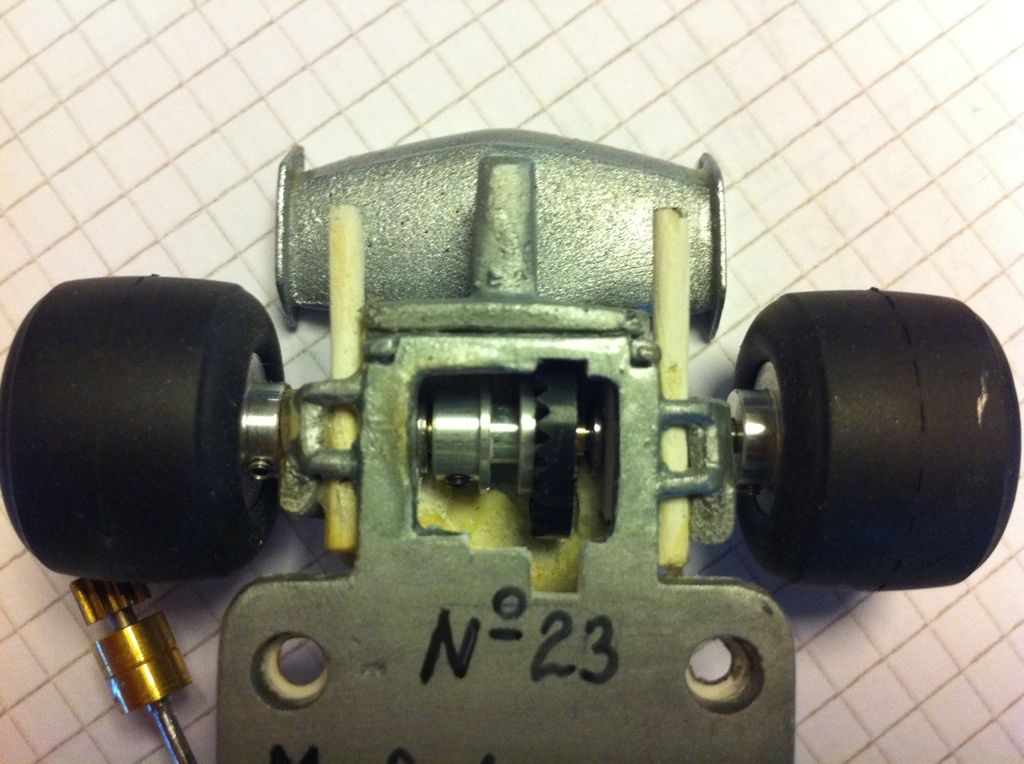
What I came up with was:
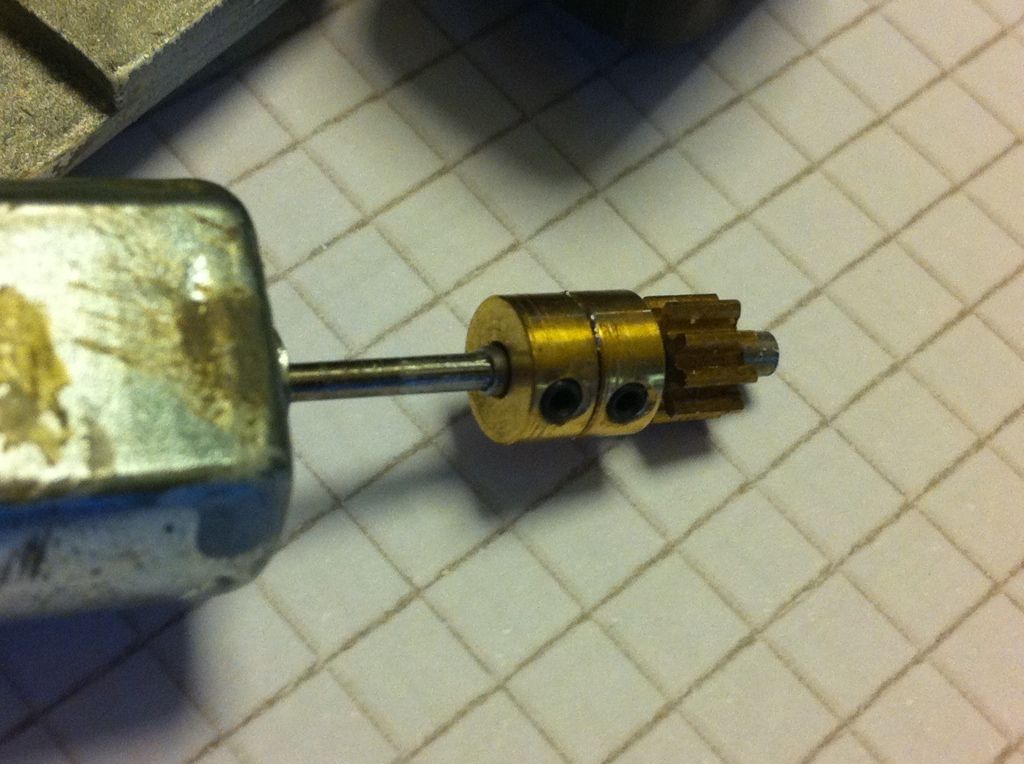
a) AB slotsport do some wonderful little 1.5mm internal diameter, 2mm external diameter shaft ‘increasers’ (does such a word exist?).
b) I did a lot of research into grub screw fixed collars. In the US I found several long collars with 2mm internal dia. (never 1.5mm sadly) which would have been perfect for lengthening but sadly postage was prohibitive, so from ‘Hobby’s’ (UK) website I found single collars in brass which could be therefore be soldered together. Since I will soon be needing some of these for the Beardog_Rowland Lotus 63 I bought a few of these.
c) I soldered two collars together while they were fixed onto a single length of 2mm dia. SS thus keeping them perfectly aligned.
d) I slipped a piece of the AB slotsport ‘increaser’ onto the end of the motor spindle, tightened up the first grub screw and then inserted an appropriate length of 2mm drill blank into the other end of the double collar and tightened that up, finally fitting a Slot.it pinion (9t for the record).
e) Removing the wheels I used a flame type soldering iron to heat up the rear axle sufficiently that the knurling became ‘loose’ enough for me to pull the axle out from the crown gear.
f) The plastic bushes were removed with a scalpel. Sadly this revealed that they had been glued in and their ‘seats’ were anything but perfect.
g) I had decided to insert ball races from SMG bearings (I use them on all my builds if possible), so I fabricated new ‘seats’ from plasticard and glued these in place inside the chassis.
h) Meanwhile I discovered that despite the old crown coming out the new Slot.it one wouldn’t go in. Obviously a RD gear or similar could have been used but I happened to have a Slot.it set and wanted to use that as space was not at a premium in Claudio’s body. I had, against my desires to modify the chassis ever so slightly in order to insert the gear from below but hope that Claudio wont mind……
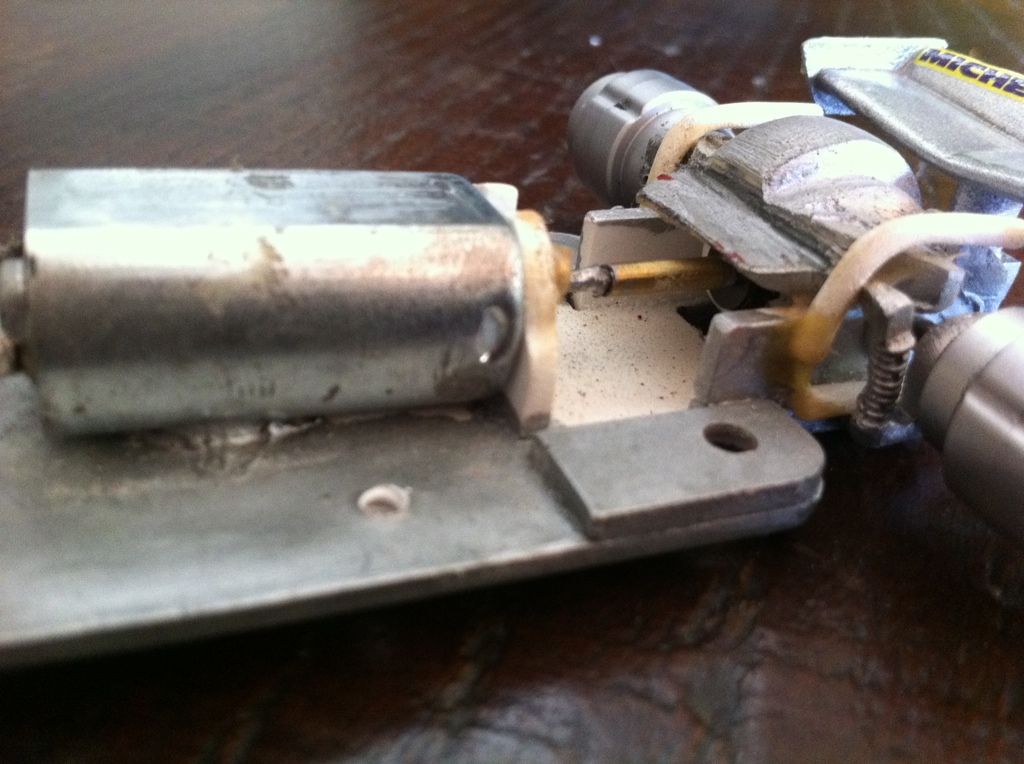
i) The motor itself, once cut out, was cleaned up and a brass ‘clip’ fabricated out of 0.4mm sheet which was then bolted to the chassis using very small brass nuts and bolts. This clip was made to hold both ends of the motor, removing any risk of rotation given the length of the motor spindle.
j) Once the new bearing seats were glued in and the motor was clipped and screwed in it was a simple matter of assembly, pushing the axle through the ‘gearbox’ moulding, adding some NSR spacers and finally tightening up the PP aluminium hubs.
All in all a fun afternoon which took this car from a non-runner to a competitive car, befitting this lovely build…..

