|
|
Post by Aurora on Nov 5, 2013 13:48:41 GMT -5
Brian, So painting looms eh? You say that like it's a bad thing... No matter what happens, I guarantee that you will not make all (or any!) of the mistakes I made with my first paint session on a vintage MRRC car that I had purchased on Ebay, to wit: 1) Car arrives in mail 2) Mark opens up package decides it needs to be painted 3) Mark drives over to Ben Franklin crafts store and buys a can of Testor's British Racing Greeen enamel spray paint 4) Mark scrapes off decals Aren't there about 6 or 7 steps missing here?5) Mark sprays enamel paint on the MRRC shell. 6) One hour later Mark picks up the car body to examine it more closely It really didn't look too good.. So.. don't do ANY of that.  I'm sure you will be just fine! |
|
|
|
Post by Mark Huber on Nov 5, 2013 14:05:56 GMT -5
Matt, There are at least 7 steps that were missing compared to the way I have since learned to paint. Plus I don't use enamel paints anymore. Perhaps that is just me, but I don't have that much time in my life to wait for enamel paint to dry! If however, you chose to paint a shell in style similar to the Beardog approved method (with exponentially improved results) there are between 14-20 steps missing, depending on how many coats of paint you apply and how many gradients of sanding paper/sticks you choose to use. |
|
|
|
Post by Aurora on Nov 6, 2013 1:12:11 GMT -5
aaaah yeah, there's the big mistake - ENAMEL paint! That hadn't even registered. Did you airbrush it on, or is enamel paint still available in spray cans? I can't stand the stuff, try to avoid it unless absolutely no other option.
Brian - here's some unsolicited advice: Don't use enamel paint.
|
|
|
|
Post by Brian on Nov 19, 2013 13:41:47 GMT -5
Finally got around to priming my Matra. Second coat today. Been spending many an hour on my first boarded track. Bought some RS alloys, with Scalextric classic F1 tyres. You may notice I have removed a little more resin from the cooling water filling pipe and around the exhaust pipes    Cheers. Brian |
|
|
|
Post by Brian on Nov 27, 2013 11:50:06 GMT -5
Well I took the plunge and have started to paint my Matra.     Stopped for the day as my concentration was starting to wane. Will continue tomorrow.  I'm flitting between my new boarded track scenery and my Matra. Thanks for looking. Brian |
|
|
|
Post by Chris Wright on Nov 27, 2013 12:11:23 GMT -5
Well I took the plunge and have started to paint my Matra. View AttachmentView AttachmentView AttachmentStopped for the day as my concentration was starting to waning. Will continue tomorrow. I'm flitting between my new boarded track scenery and my Matra. Thanks for looking. Brian Brian, looking good, actually it's looking great... A quick question how are you posting photo's, Mark and I have no idea how or why your pix come up as thumb-nails, if you follow the rather vague instructions in the how to post pictures thread, they'll come up in all their glory, full sized for everyone to gawk at in amazement. Chris |
|
|
|
Post by Brian on Nov 27, 2013 12:25:15 GMT -5
Brian, looking good, actually it's looking great... A quick question how are you posting photo's, Mark and I have no idea how or why your pix come up as thumb-nails, if you follow the rather vague instructions in the how to post pictures thread, they'll come up in all their glory, full sized for everyone to gawk at in amazement. Chris Hi Chris, I post via "Add Attachment" and search through the photo's on my Laptop, then insert. I read your post regarding posting photo's after I submitted my last. I do not have a "Photo bucket" account or anything similar. So I need to do some research and try to attach photo's as discussed in you post. Brian |
|
|
|
Post by Chris Wright on Nov 27, 2013 13:28:41 GMT -5
Hi Brian,
I understand.
You can re-post important pictures in a larger size by: clicking on the thumb-nail (the original size photo comes up) right click on that...copy the URL and paste into a new post. It'll come up full size in that post.
Chris
|
|
|
|
Post by Brian on Nov 28, 2013 12:23:56 GMT -5
Chris, when I paste my photo's URL, I still only get the thumb nail. I will now try and register for Photobucket.   Brian |
|
|
|
Post by Chris Wright on Nov 28, 2013 12:35:15 GMT -5
Looking better and better,
Chris
|
|
|
|
Post by Brian on Nov 28, 2013 13:33:50 GMT -5
Thanks Chris for your words of encouragement. Added detail today, getting the Ford on the cylinder heads took some doing!  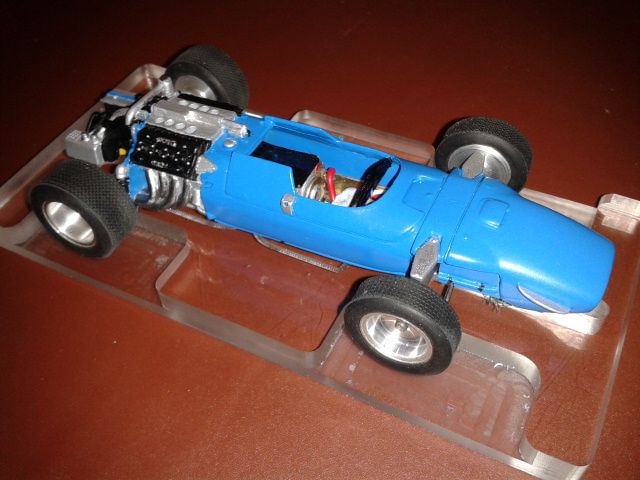 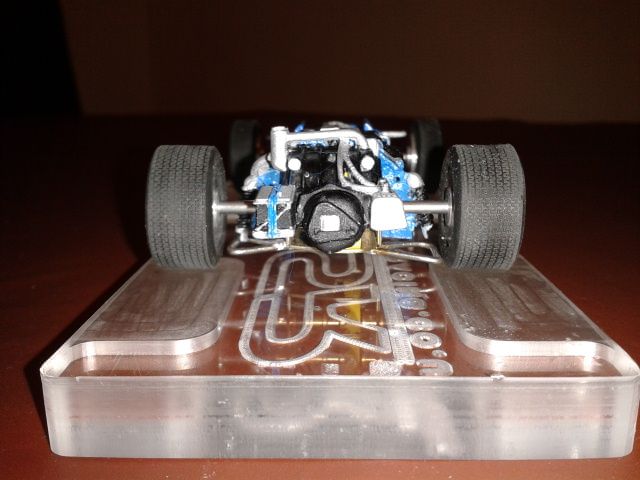 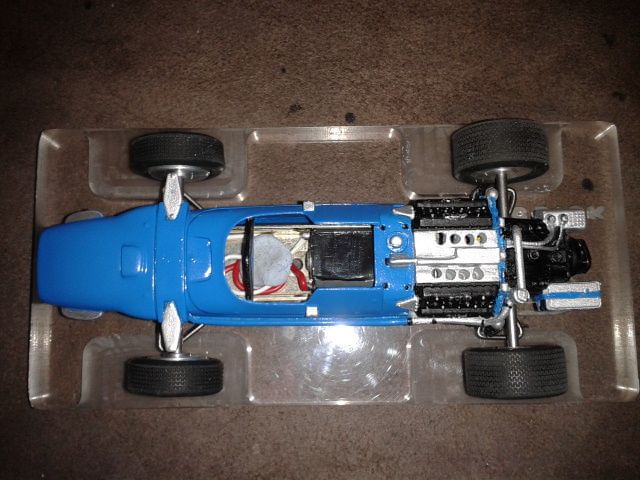 Hey, I think I've only gone and did it, no more thumb nails! Cheers, Brian |
|
|
|
Post by Brian on Nov 29, 2013 4:17:08 GMT -5
Getting excited now. I just love this car.  Suspension secured, other items are fitted, but not secure. Need to work on grill and trumpet meshes (I have bought a cafetiere for this purpose) and a little more detail. Upper rear loop to be replaced. Then decals to go on and then Jackie, I'm coming for you! 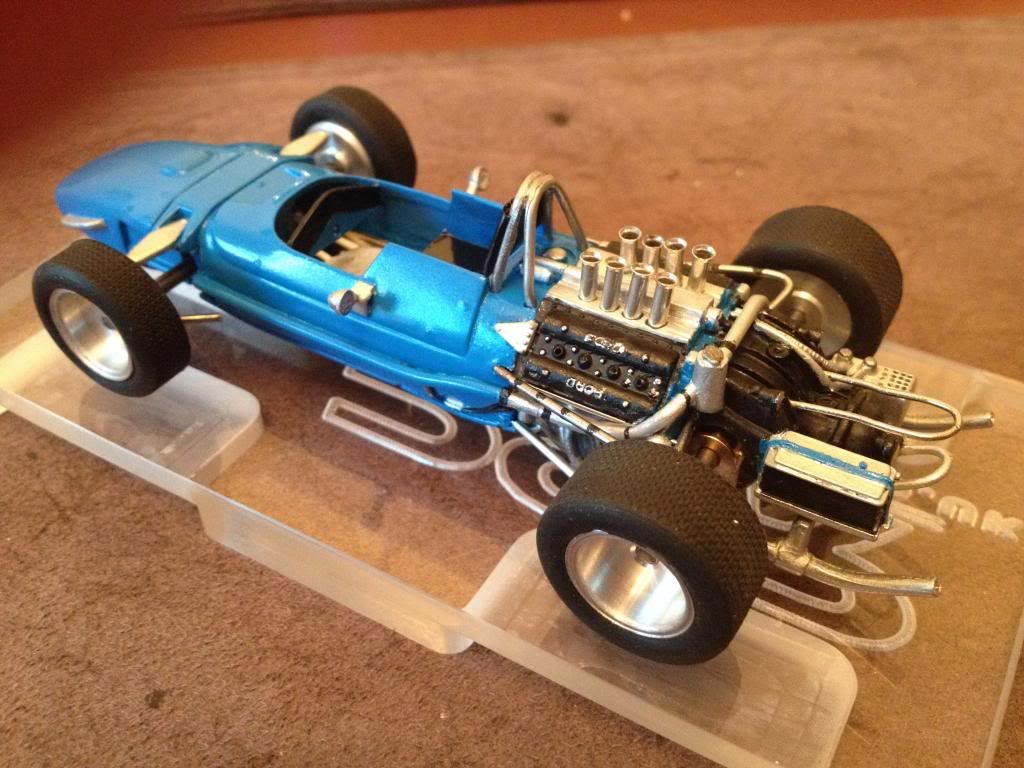 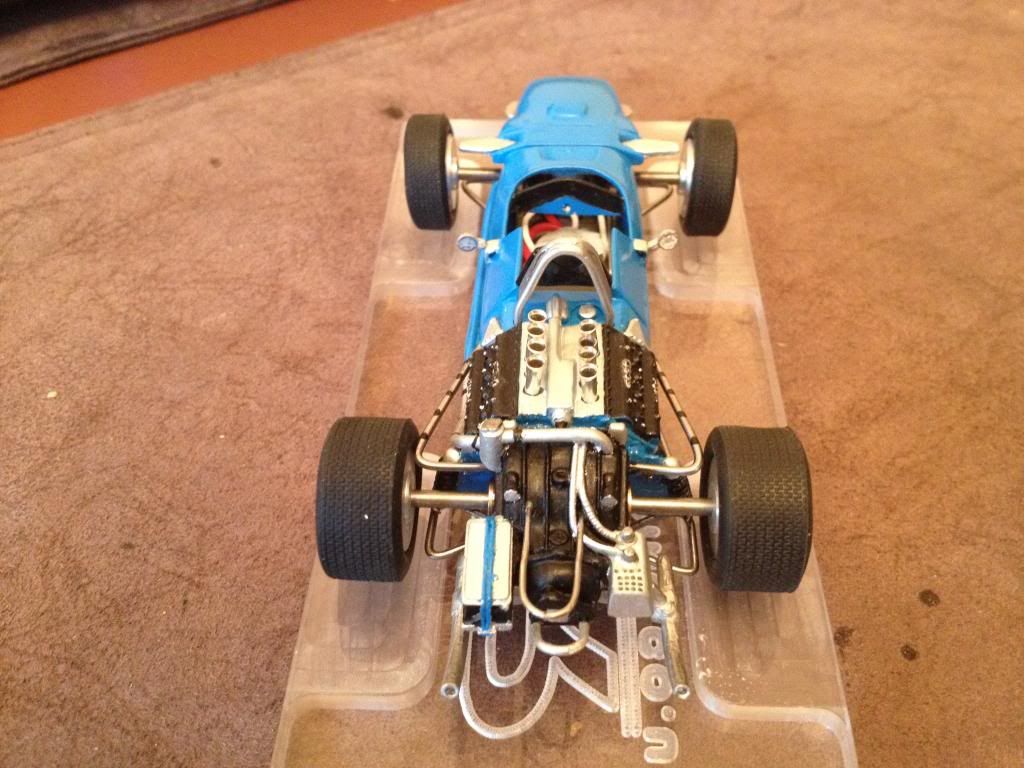 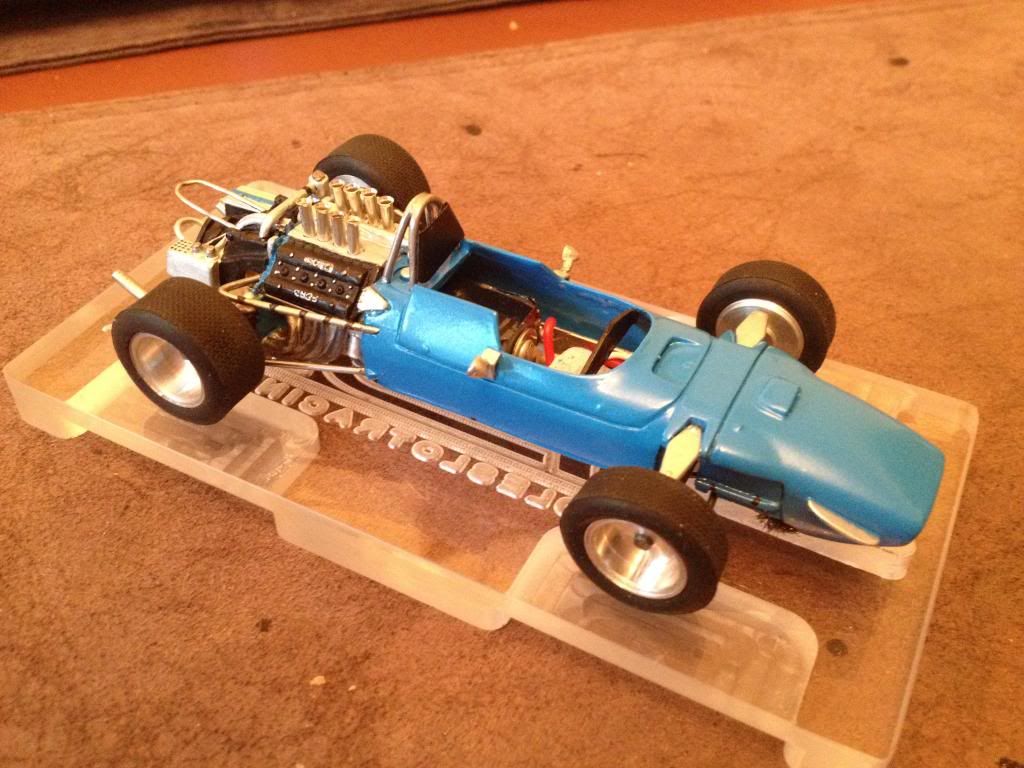 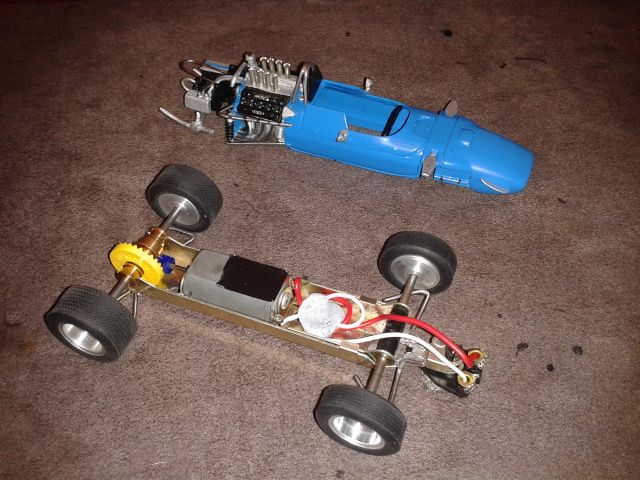 Thanks. Brian |
|
|
|
Post by David Mitcham on Nov 29, 2013 9:01:09 GMT -5
Hi Brian
Looks very good and its been really interesting watching your progress. You'll be pleased you bought the cafitiere! Please would you remind me what make of wheels and tyres you've used? I like the detail touch of the simulated tape on the upper rear radius arms - how about adding some very fine wire to simulate the tubing the tape securred?
Excellent job! You look far from beginner to me!
Best Regards
David
|
|
|
|
Post by Brian on Nov 30, 2013 3:17:48 GMT -5
Hi Brian Looks very good and its been really interesting watching your progress. You'll be pleased you bought the cafitiere! Please would you remind me what make of wheels and tyres you've used? I like the detail touch of the simulated tape on the upper rear radius arms - how about adding some very fine wire to simulate the tubing the tape securred? Excellent job! You look far from beginner to me! Best Regards David Morning David, Thank you for your kind comments. The wheels are RSW003 Alloys (15x7)front and RSW002 Alloys (15x9)rear, purchased from RS Slot Racing. Tyres ar Scalextric W9593 Lotus 49/Eagle's. I had to widen the inner groove of the tyres to fit onto the hubs. I have some fuse wire of varying gauge and did think about adding more detail to the radius arms. Watch this space, I'll have a go. Thanks again for your words of encouragement, it's greatly appreciated. Brian |
|
|
|
Post by Brian on Nov 30, 2013 12:08:01 GMT -5
Hi David, I have added HT leads and pipes running across upper radius arms. I have shown the HT leads initially unpainted so they can be seen clearer. 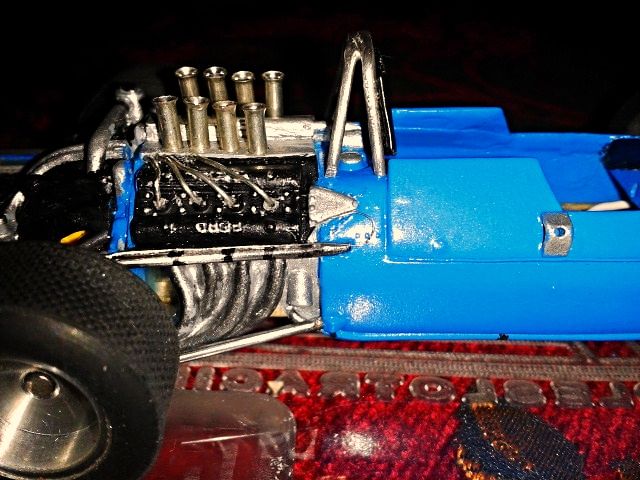 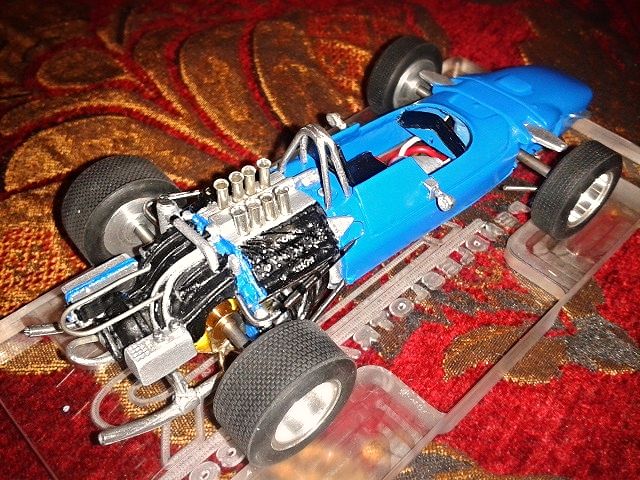  Brian |
|


