|
|
Post by David Lawson on Oct 1, 2014 6:07:40 GMT -5
The car that Chapman said would be a much improved Lotus 72 with innovative features such as anti-dive, rising rate suspension and a semi automatic clutch added to lessons learned from its highly successful predecessor.
That was the theory but the reality was that this car was one of Team Lotus worst designs and was soon heavily modified and the innovations removed one by one before the team reverted to the old faithful '72s.
I love this car for two reasons, there is something special about Chapman's radical thinking even when he gets it so wrong and the car in its original specification looked wonderful with its bi-plane rear end and tapering engine cover to help flow to those wings (even if they did have a great big airbox in the way!)
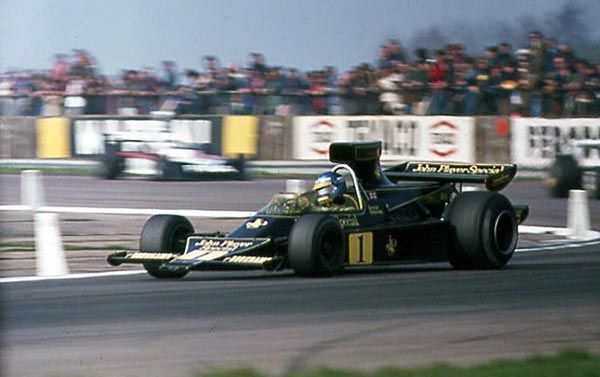
I was at Silverstone that year for the International Trophy race where Ronnie Peterson overcame most of the car's shortcomings to dice for the lead. I was in my usual spot at Becketts where I took this picture.
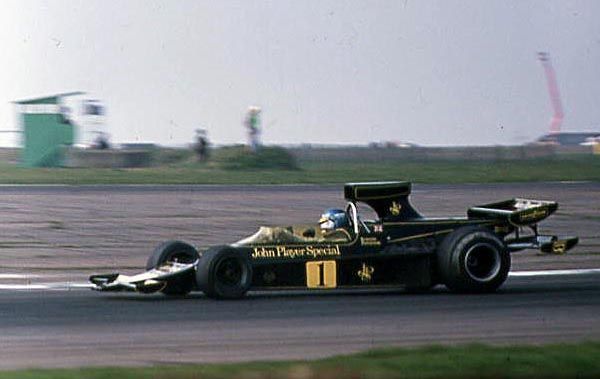
Another photo I took was this panning shot which emphasises the extended engine cover and rear wings, you will note that Peterson has an armful of opposite lock as usual.
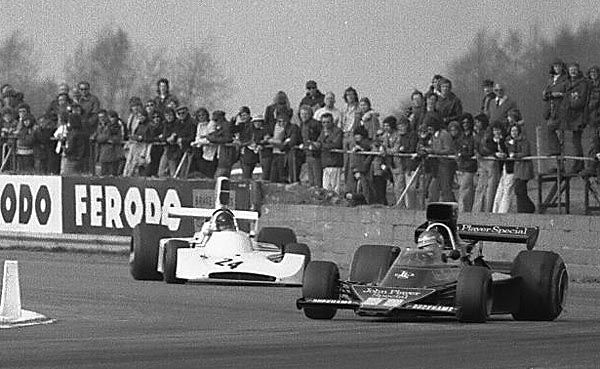
Later in the race I had switched to B&W film, Peterson and Hunt dice for the lead but Ronnie's rear tyre was starting to blister.
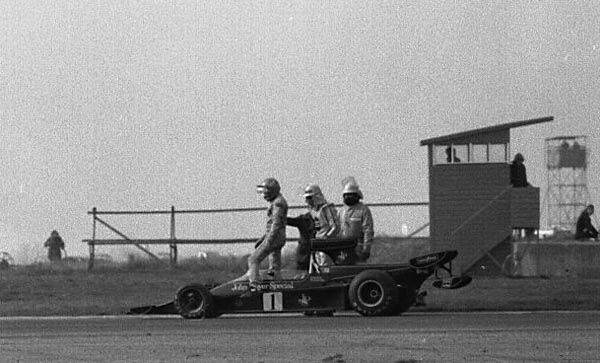
Unfortunately engine failure put paid to Peterson's race and he came to a halt opposite where I was standing. This picture really emphasises how small the car is.
The Slot Car
As the car's monocoque is all straight lines I decided to make it from sheet plastic. This is an exercise really and I may not actually complete the project but I thought it would be fun to try as I've seen various slot car scratchbuilds over the years using this method.
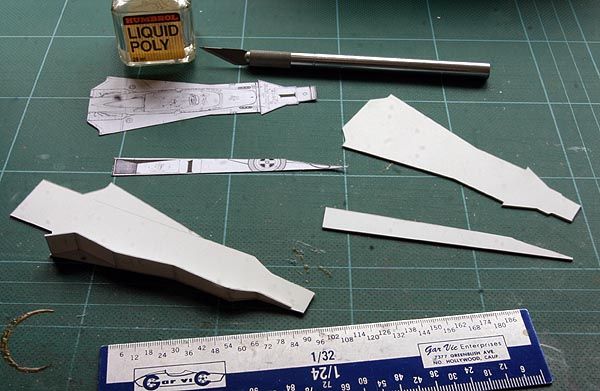
The four chassis parts cut to shape and the side panel folded to fit and glued in place.
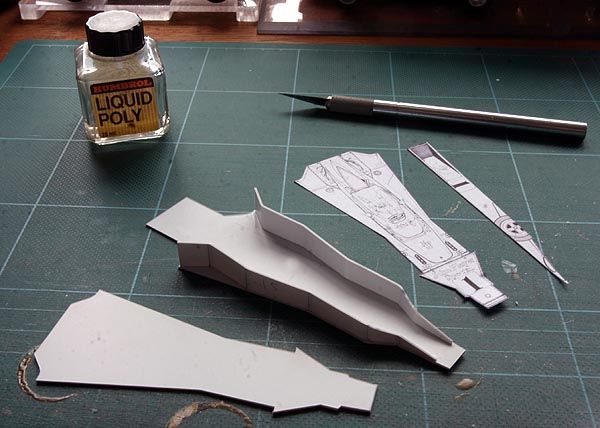
The other side now in place.
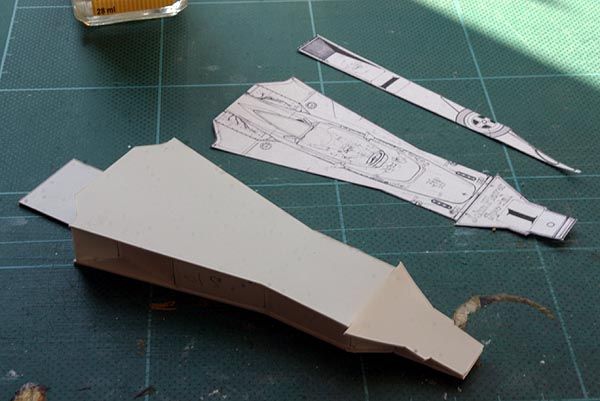
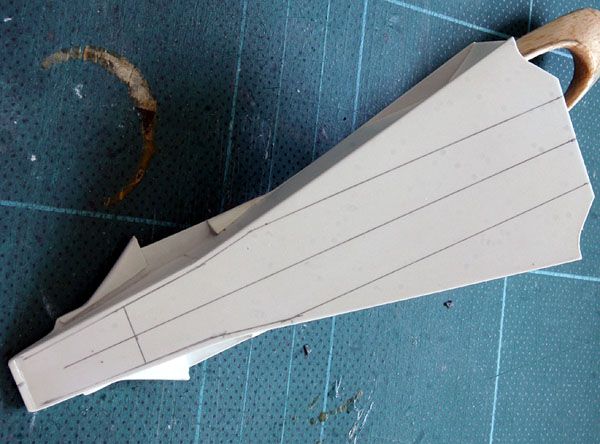
The top of the chassis/bodywork now glued in place, again this is all straight lines although there is a subtle concave shape to the nose which you can't really see in this picture but I formed it by rolling an Exacto handle along the top surface to create the gentle curve.
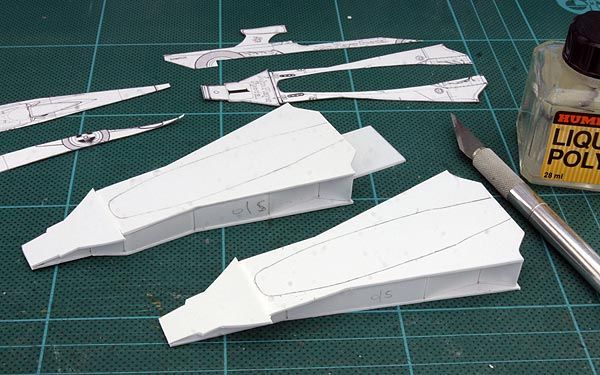
When I looked at my work the following day I realised I had made a mistake as I had the top and bottom panels the same shape and I should have tapered the lower panel in the area of the front suspension so out came the plastic sheet and I made another one.
The cockpit surround and engine cover will be carved due to its shape and I will post further when I've made some progress.
David
|
|
|
|
Post by Mark Huber on Oct 1, 2014 9:06:30 GMT -5
Wow David!
I have at least a dozen questions, but for once, I will hold my peace as I am sure all will be revealed and answered in due course.
I am really going to enjoy watching this build progress. Thanks for sharing this project from the beginning of the process.
|
|
|
|
Post by Andrew Rowland on Oct 1, 2014 12:17:26 GMT -5
Wonderful David, the sheer quality of your work jumps out.
Hope this may soon be battling with my Brabham BT42!
|
|
|
|
Post by Phil Kalbfell on Oct 1, 2014 18:11:05 GMT -5
Great build David. The late Larry Shephard started me building using styrene sheet, I have mainly used it for some sports cars.
But when next years DFV Proxy was announced I cut up some paper and stuck it to some sheet and started to hatch away.
How is the Humbrol Glue working? I was using MEKP But not very good if you breath it in!
|
|
|
|
Post by David Lawson on Oct 2, 2014 1:53:54 GMT -5
Phil - the Humbrol liquid glue is excellent, it runs along the joint and sets within a minute so it is quick and easy building. There aren't too many fumes either. I remember your plastic card Chaparral very well as an excellent example of this process.
I've done a bit more, this build is really a sort of thinking out loud process where I am trying a couple of things to see if that is the way to go or not.

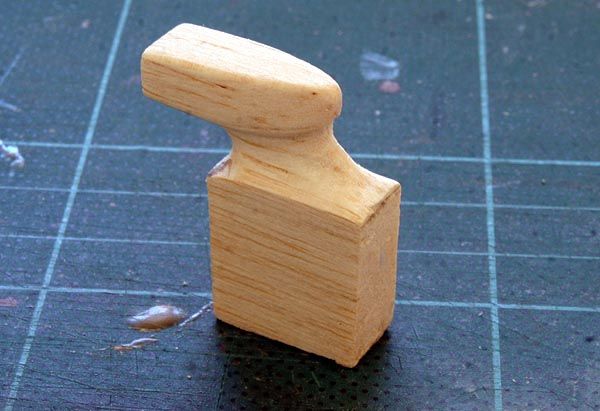
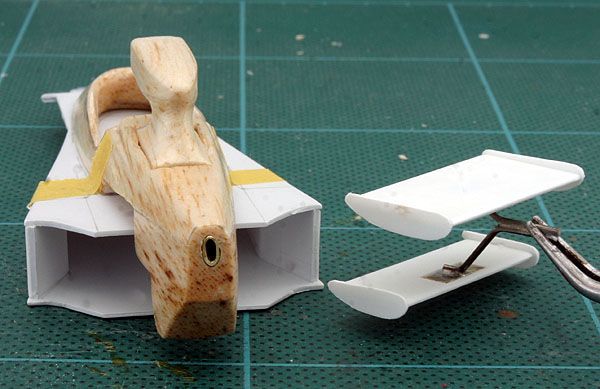
The cockpit/engine cover being carved out of balsa wood
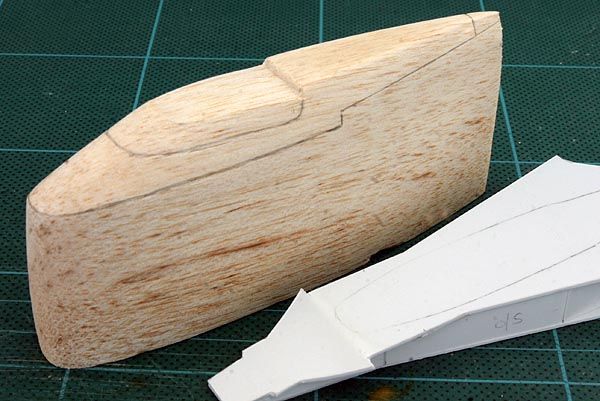
Almost finished.
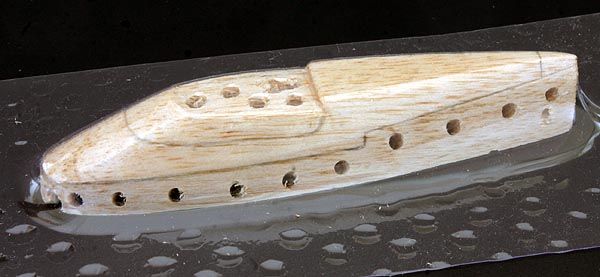
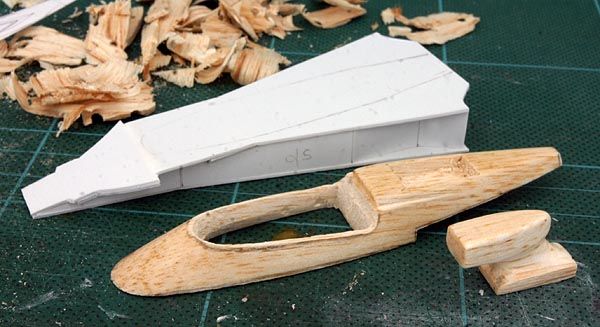
The work cut down and drilled for vacforming the screen

I then wondered if I should use the vacform as the medium for this part of the bodywork so I quickly masked and primered it to see what it would look like. I used the discarded incorrect chassis for this as I didn't want to cut out the aperture in the final chassis. This method has the advantage of being a little lighter than balsa (but not much), it also has the advantage of including the screen but I'm not sure and it will be more of a fiddle to add the airbox and wings to it so I suspect I will go the balsa route where I can include more detailing.
David |
|
|
|
Post by Mark Huber on Oct 2, 2014 10:25:01 GMT -5
Okay, I'm breaking my promise:
Two questions for David:
1) What is the thickness of the styrene sheet you used for the body panels?
2) Did you use a straight edge or some brace to ensure that the side panels were perpendicular to the top and bottom pieces and parallel with one another?
You mentioned that the glue you used dries in a minute or less. I know I wound't be able to use a glue that bonds in 5 or 10 seconds (too much chance of not getting the piece in the right spot) but I suspect my hand would shake too much to hold any piece for much longer.. the dilemma I face when I'm gluing lots of things!
|
|
|
|
Post by David Lawson on Oct 2, 2014 13:05:58 GMT -5
Andi
No doubt your Brabham and my Lotus will test together at George Turner's at some point fairly soon but I doubt mine will be as quick as your very fast car.
Mark
I'm using 1mm plastic sheet.
I use a 12" steel rule to guide the scalpel blade and just take care to keep the blade square. When I bend a panel I use a small set square so that the bend is always at a right angle. The liquid glue hardens in about a minute but it starts to set within about 10 - 15 seconds so you have time to position it but you don't have to hold it in place for too long. Believe me it is really easy but just have a couple of practice goes with some sheet until you're happy with your technique.
David
|
|
|
|
Post by David Lawson on Oct 3, 2014 8:24:21 GMT -5
After some thought I decided to go the balsa route for the upper bodywork.
This morning I carved the airbox to attach to the cockpit/engine cover I made the other day.
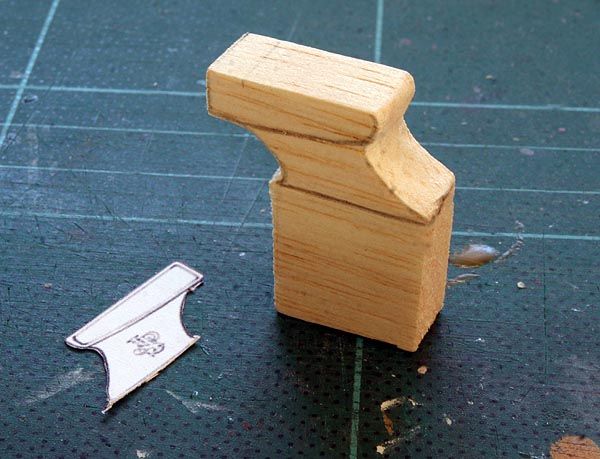
I marked out the side elevation of the airbox on a piece of balsa and shaped it.
I then thinned the central part of the airbox to its correct width and I marked out the plan view of the top of the airbox.
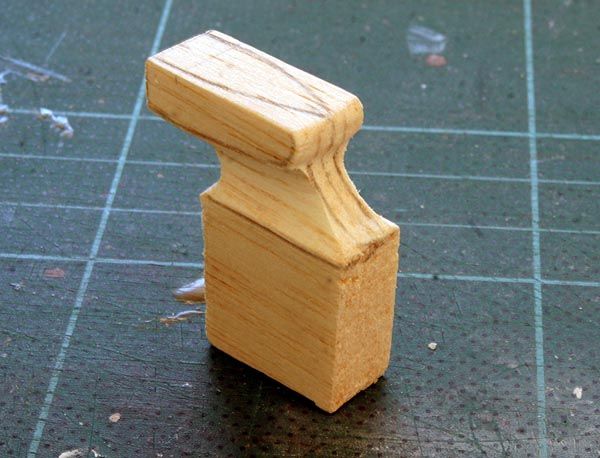
I shaped the airbox top and smoothed the contours all round.
I cut a rebate into the top of the engine cover to attach the airbox, cut and sanded the whole piece to its final shape and partially hollowed out the cockpit area.
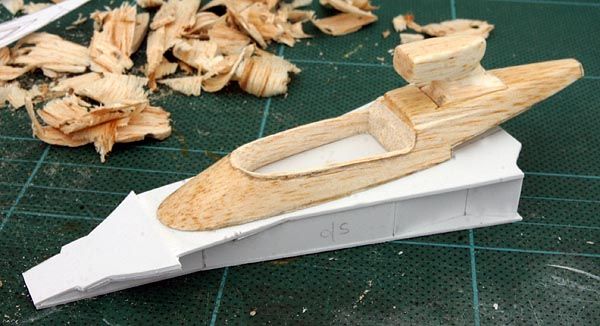
The pieces dry fitted while I ponder the next step.
David
|
|
|
|
Post by Dave Wisdom on Oct 4, 2014 2:32:41 GMT -5
Marvellous craftsmanship David and this project has all the hall marks of being a magnificent looking model.
|
|
|
|
Post by David Lawson on Oct 7, 2014 3:38:27 GMT -5
A little bit of progress to report, these little details and refinements take longer than the building of the chassis and the initial carving.
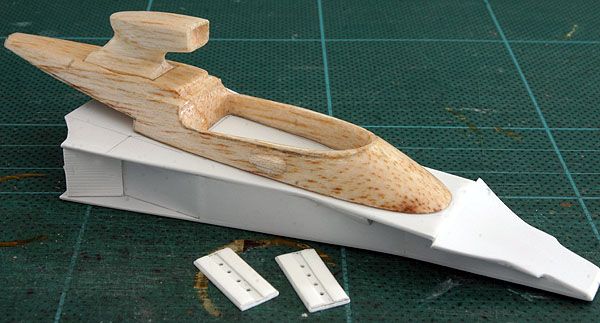
The plastic sheet chassis has had its edges rounded off using a sanding stick and wet and dry paper and I've generally cleaned up all the joints between the pieces.
I made up simple radiators by scribing plastic sheet pieces and gluing them to the chassis, I've made a pair of DFV cam covers ready for detailing the engine area.
I've added a balsa gear lever blister to the cockpit side, opened up the intake on the airbox and improved the shape of the engine cover in the area where the roll hoop will go.
This shot of the underside shows the front suspension strengthening and cowl pieces I've added.
This picture also shows just how slim the car is at the front, I've drawn out the area I will cut out where the chassis will go and I suspect I might have to use a pin guide, more pondering to do.
David
|
|
|
|
Post by David Mitcham on Oct 7, 2014 5:12:40 GMT -5
Superb work David. Your skills and determination to try different techniques are very inspiring. You're making me seriously consider constructing an engine cover for the Tecno I'm building for Andi's proxy series as I'm not satisfied with the original molding or my feeble attempts to improve it. Your plastcard technique would be very suitable for doing so as the Tecno is very angular - see Andi's comments on my build so far! In fact the whole car could be built from scratch using the plasticard and balsa method but I don't have the time to go there and, anyway, overall the BSB body is good.
Best Regards
David
|
|
|
|
Post by pilot70 on Oct 7, 2014 18:04:07 GMT -5
David,
It is a superb work indeed.
I just love the way the car is in this stage of the build, I just can imagine the way she will look when finished.
This is true scratch building.
More, please!!!
Kind regards, Dan.
|
|
|
|
Post by David Lawson on Oct 11, 2014 9:09:56 GMT -5
David
Have a go with the engine cover on your Tecno, it isn't a complex shape and you can make up the cover separately from the shell so that if it doesn't go to plan you've still got the original intact.
I've only done a little more in the last day or so.
I carved and attached the gearbox cowling that hangs below the extended engine cover and keeps all the airflow smooth around all the untidy bits of the car. The final shape of the bottom edge might need a little adjustment around the U-bracket when I fit the shell to the chassis.
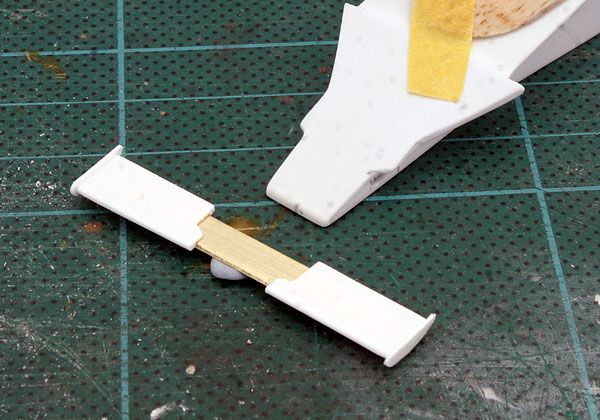
One of the main features on the 76 is the twin rear wing and I've been pondering how to do this, the simplest way would have been to make it all out of thin brass sheet but it would have been too heavy. In the end I decided to make the supports from piano wire and I soldered two small brass pieces to the support, the plastic sheet wings will have a recess in them where these brass pieces will sit, that's the idea anyway.

I hope to make the front and rear wings over the next day or so.
David
|
|
|
|
Post by David Lawson on Oct 13, 2014 6:09:07 GMT -5
I've made up the front wings and rear aerofoils.
The aerofoils are two-ply plastic sheet with a cut out in one of the sheets to allow the brass wing support to sit flush inside it.
To mount the support to the engine/gearbox cover I crimped a piece of brass tubing to fit over the piano wire support.
I made a slot in either side of the nose for a brass strip to pass through, this strip fits flush inside the lower ply of the plastic sheet front wings, the wing is securely located and should survive a fair amount of contact, hopefully...

Not too much to do now, I will fill and blend the airbox into the cover, scribe the panel lines and various filler caps and finish the engine detail and mirrors.
David
|
|
|
|
Post by Chris Wright on Oct 13, 2014 10:11:20 GMT -5
Looking great David,....another photo 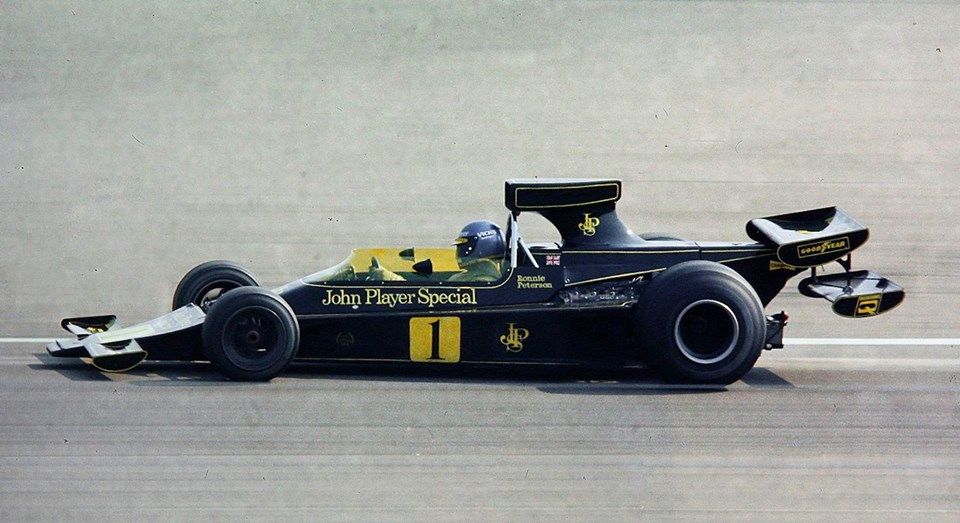 |
|


