|
|
Post by David Lawson on Oct 24, 2014 13:42:20 GMT -5
One of my favourite McLaren's was the little ballasted Formula 2 M4B fitted with a BRM 2.1 litre Tasman engine and extra pannier petrol tanks for grand prix duty until the M5A was ready. Its race history was very short lived but I loved its compact quirky looks and it performed well at the Race of Champions at Brands Hatch and the Monaco Grand Prix before crashing at Zandvoort and subsequently burning out back in the UK.
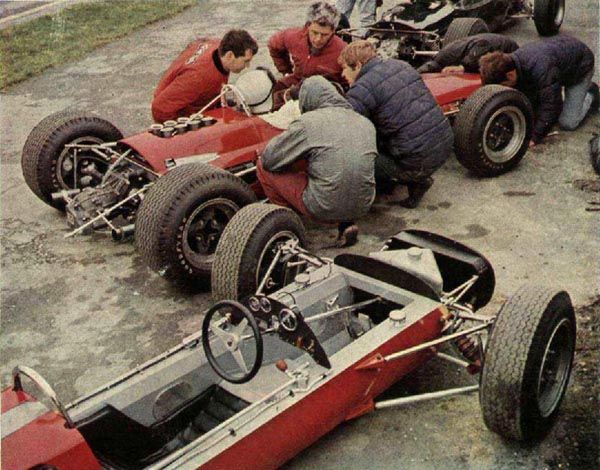
Testing the M4B in the UK before the season started. This picture really emphasises how tiny the car was, the chassis in the foreground is the Formula 2 M4A.

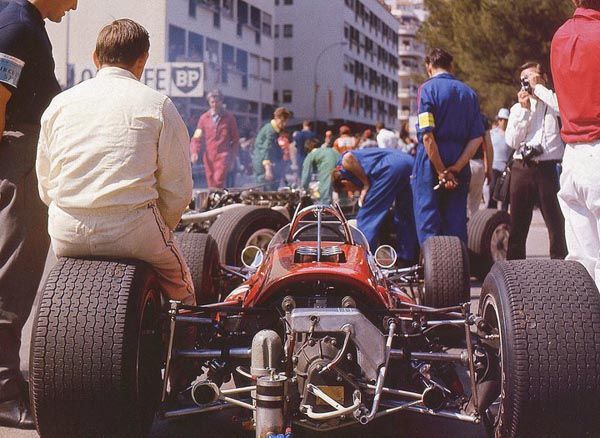
A practice shot of McLaren at the Monaco Grand Prix. This shows the shortened nose and pannier tanks, after this picture was taken they cut radiator extractor ducts into the bodywork.
A nice shot of the rear of the car in the pit road.
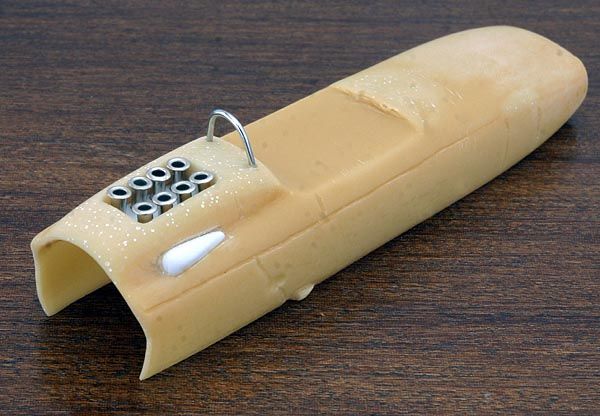
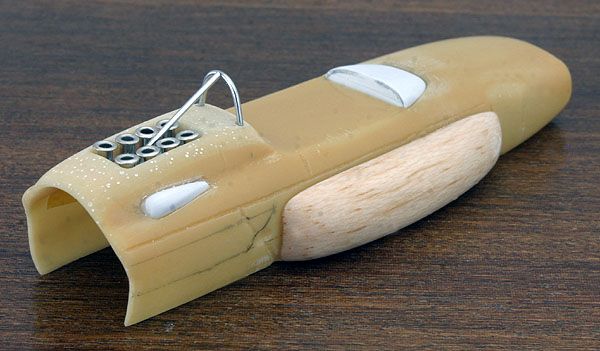
I thought about a balsa carving but then I looked through my box of bodyshells for a suitable donor. Originally I started to convert a Charlie Fitzpatrick 1964 Cooper Climax but after some work on it I realised it was too much hassle to reshape it so I used one of my own resin Lotus 24 shells as the basis for the shell.

Loads more still to do but here is one of my Lotus 24 shells and the start of the conversion.
David
|
|
|
|
Post by tedm01 on Oct 24, 2014 18:32:17 GMT -5
I look forward to seeing this finished! Bruce was a real hero and I love to see models of any of his cars.
TED....
|
|
|
|
Post by David Lawson on Oct 25, 2014 9:25:46 GMT -5
My thanks to John Prince who sent me a pdf of the Miniature Autos magazine article on the M4B by Doug Nye from 1967 it was very interesting reading. Funnily enough it also throws up a bit of doubt about which engine was used in the car. Back in 1967 Nye said it was the 1.9 litre but other sources have quoted both 1.9 and 2.1, it doesn't affect the model but it would be nice to know, I'll check what DSJ said in MotorSport magazine when I get the chance.
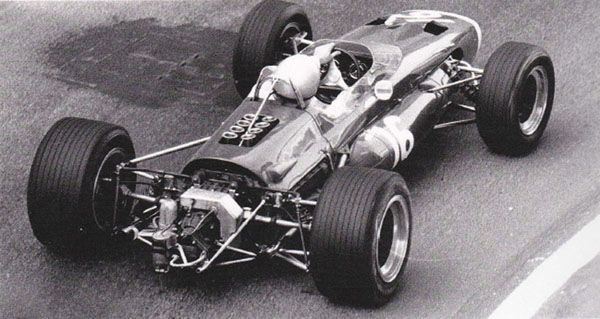
A nice shot of the rear of the car at Monaco which helps with detailing. By this point the team had cut out the extractor ducts for the radiator.
I spent a little time today making up a plastic plate with the NSR motor lead ferrules engine intake trumpets, I also added the small blister on the offside of the engine cover, this is plastic sheet sanded to shape and fitted into a cut out in the shell. I also added a paper clip roll over hoop. I have truncated the nose to Monaco spec but it still needs further work and there's obviously still lots more to do to the shell.
David
|
|
|
|
Post by Chris Wright on Oct 25, 2014 10:12:49 GMT -5
Hi David, This may help too: 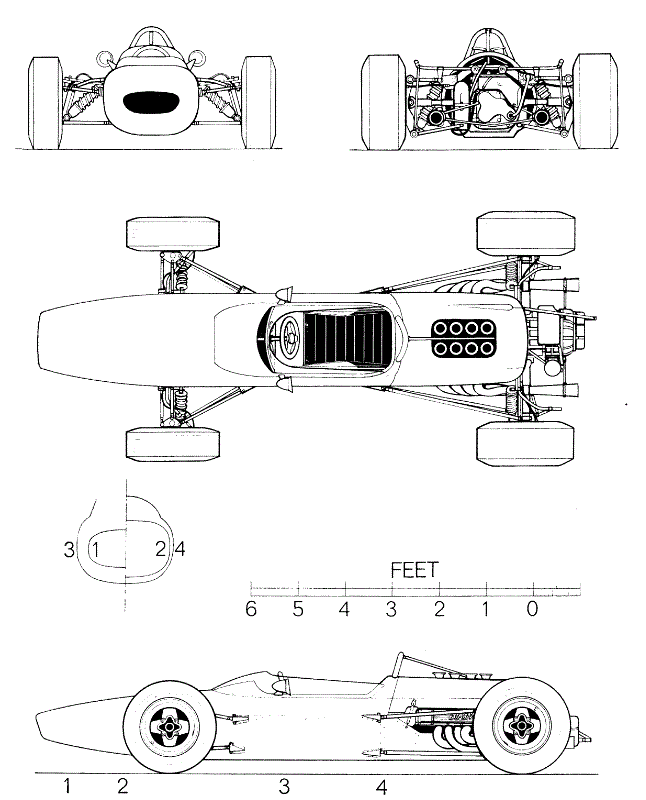 Chris |
|
|
|
Post by Mark Huber on Oct 25, 2014 11:39:25 GMT -5
My thanks to John Prince who sent me a pdf of the Miniature Autos magazine article on the M4B by Doug Nye from 1967 it was very interesting reading. Funnily enough it also throws up a bit of doubt about which engine was used in the car. Back in 1967 Nye said it was the 1.9 litre but other sources have quoted both 1.9 and 2.1, it doesn't affect the model but it would be nice to know, I'll check what DSJ said in MotorSport magazine when I get the chance.
David Nye's BRM Saga Volume III, published in 2008, lists the engine as 2.1L. I know the Tasman engines were modified in a variety of displacements ranging from 1.9L to 2.1L, but I have no idea which one really powered the McLaren M4B at Monaco.   |
|
|
|
Post by David Lawson on Oct 27, 2014 8:58:16 GMT -5
Thanks very much for the extra references, that engine shot without the cover is particularly useful as I plan to build as much of that detail as possible and attach it to the chassis with the body dropping separately over the top.
I checked a pre-season report by Denis Jenkinson when he visited the factory and he confirms it was definitely a 2.1 litre version although rather carelessly in his race report for the Race of Champions he described it as 2.0 litre which is most unlike him as he was usually very factually correct.
I've done a little more. The brace for the roll over hoop, the dashboard cowl and I've roughed out a pair of pannier tanks which still need to have their shape refined, that photo from the inside of the Station Hairpin from Mark's book helps with the exact position and shape.
David
|
|
|
|
Post by Mark Huber on Oct 27, 2014 9:41:10 GMT -5
David,
I like the look of your build. As I may have mentioned earlier or elsewhere, the M4B is a particular favorite of mine--I have fond memories of a very off scale Aurora Thunderjet HO car that was supposed to be a McLaren M4B. That must have been about 45 years ago., I bought one of those Thunderjets along with the companion Brabham Repco BT24. As I recall, neither car was as quick as the regular Thunderjets due to their "Slimline" chassis and smaller magnets, but they were supposed to be F1 cars so I had to have them.
Now, a very important question for you. Is the roll bar, a paper clip, bent piano wire, or both? (I tend to favor the paper clips myself if they are generally the right shape).
I'm glad the pictures are proving useful.
|
|
|
|
Post by David Lawson on Oct 29, 2014 9:48:19 GMT -5
Mark - the roll over hoop and brace is made from a paper clip, I like the finish of them.
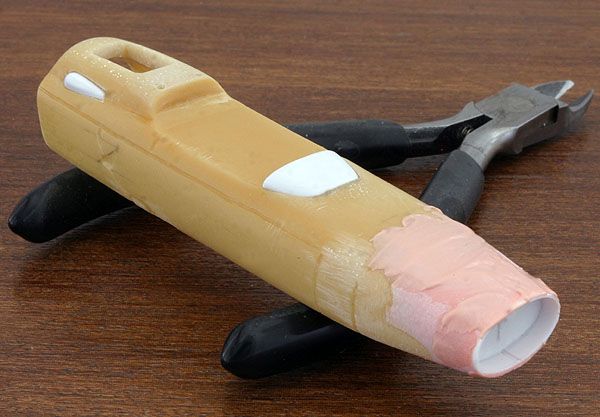
A little bit more progress this morning, I added plastic sheet into the truncated nose and plastic strip around that to form the new opening. I've then blended car body filler to alter the shape of the front of the body. It has had one rub down to shape and has had a second lot applied but this hasn't been rubbed down yet. I've tweaked the shape of the pannier tanks but there's still more to do so haven't photographed them yet.
David
|
|
|
|
Post by David Lawson on Nov 4, 2014 3:40:27 GMT -5
A small amount of progress
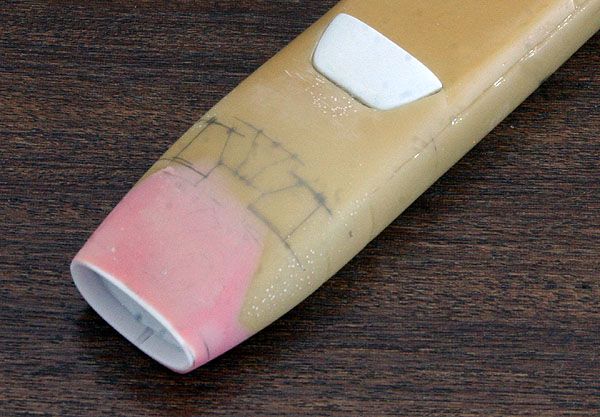
The filler has been smoothed around the nose and after about half a dozen attempts to draw the lines of the ducts I eventually settled for this.
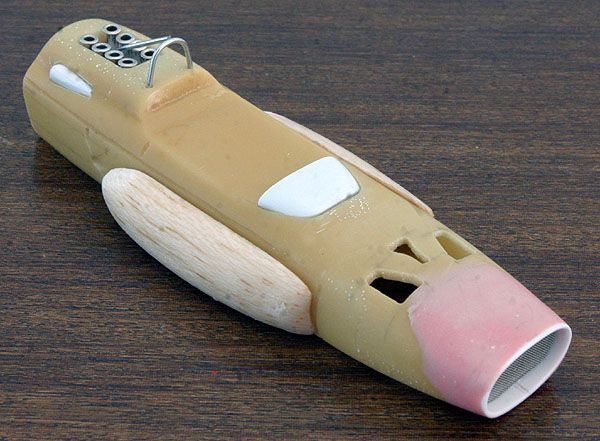
The ducts drilled out and filed to shape. I've cut some mesh to shape and dry fitted it for the radiator.
Still lots of refining and shaping to be done to the various elements of the shell but it is more or less taking shape now.
David
|
|
|
|
Post by David Lawson on Dec 18, 2014 11:09:23 GMT -5
I haven't really progressed this car for over a month but I did a small bit of detailing yesterday.
I wouldn't normally post about such a small job as this but I have because of the material I used, someone on this forum (it might have been Taffy) mentioned breaking up old floppy discs to use some fine mesh inside. I did this and at the same time kept the metal from the outer case as it is a nice natural aluminium colour and I thought it would come in handy for trim tabs and Gurney flaps etc.
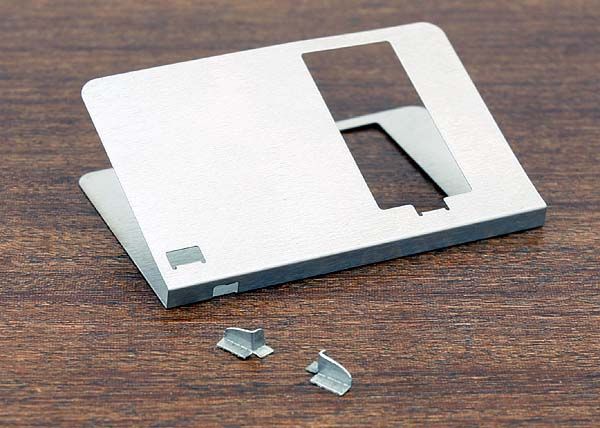
The two flaps for the radiator extractor ducts cut, filed and folded to shape.
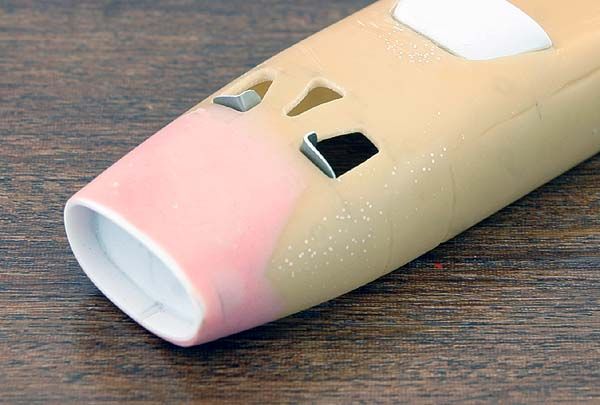
In position.
The metal is even easier to cut and file than brass and looks realistic without the need of painting.
David |
|


