Post by Andrew Rowland on Nov 2, 2015 3:16:59 GMT -5
So Chris has seen some bots of this on other fora and suggested I pop it in here too.... With a little more detail.
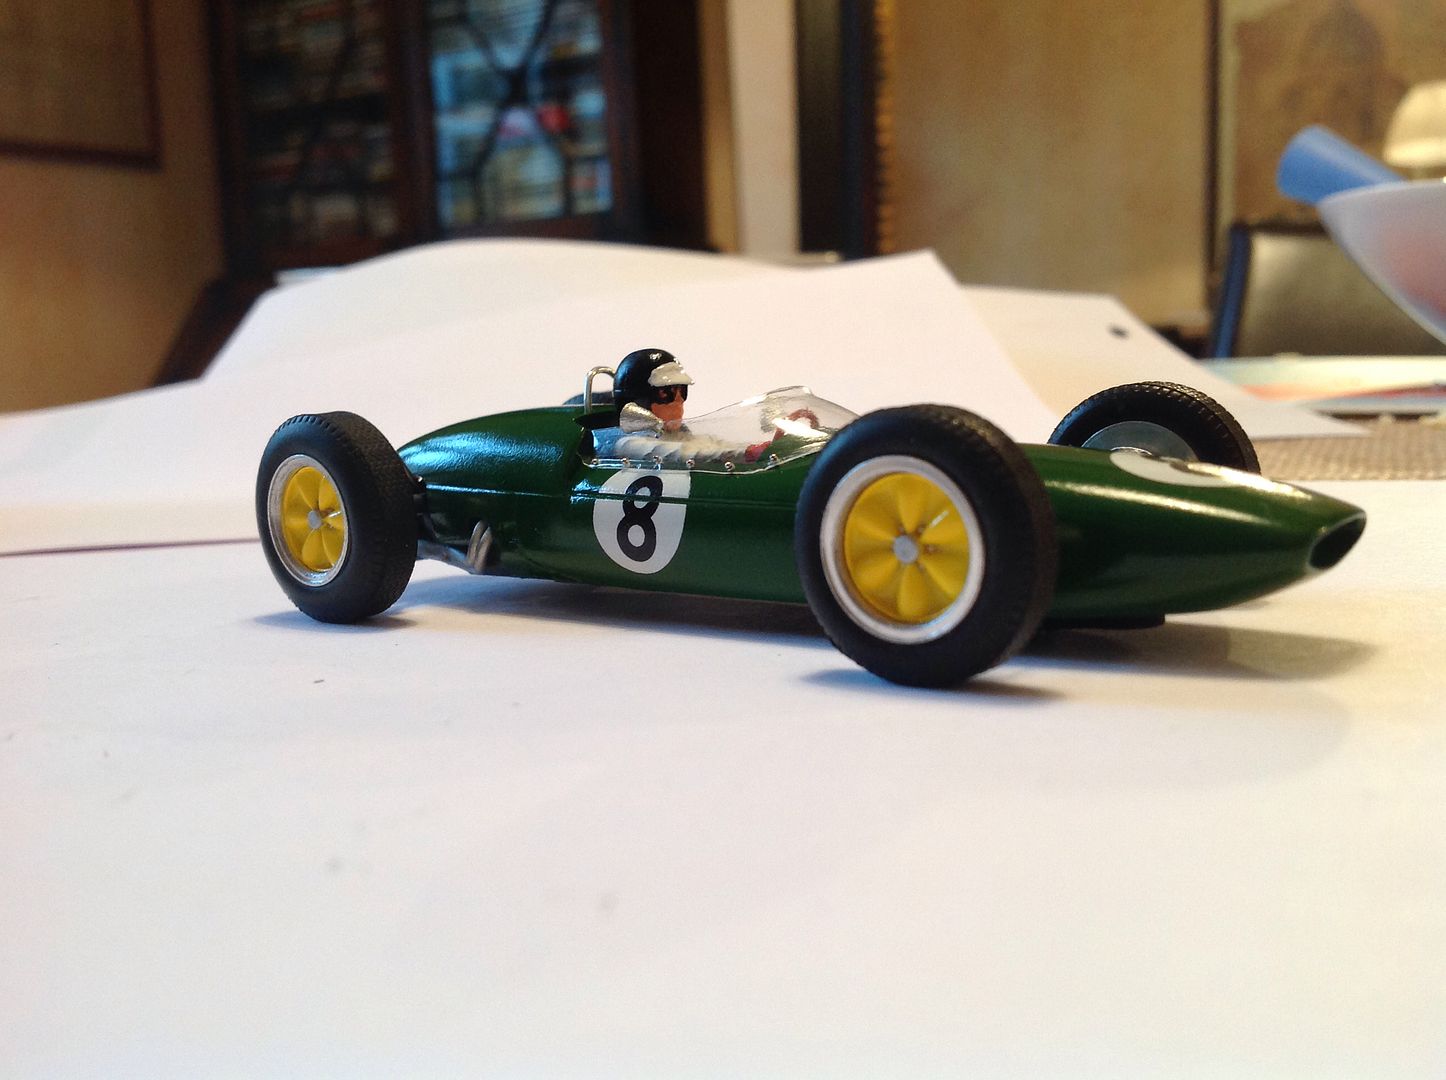
I have entered the Wolves 1.5 litre event in Novemebr and of course need an appropriate car. I've no cars from the '60's but had a few kits I bought many years ago at Early Birds. Its a Dave Jones Lotus 21 that i've chosen.
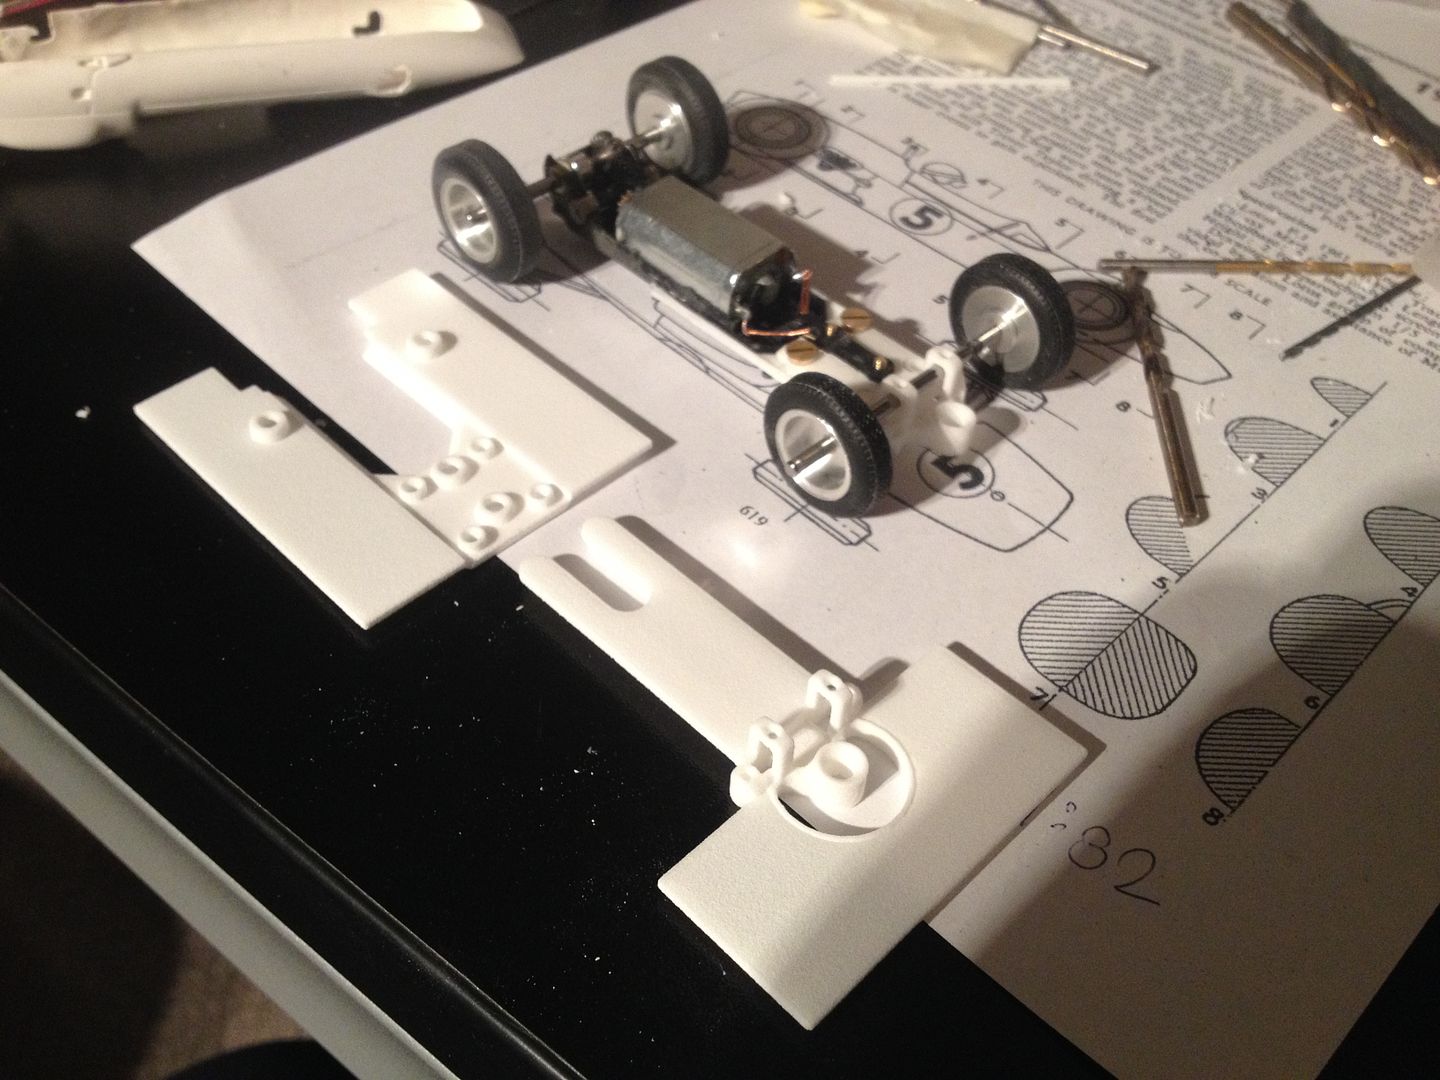
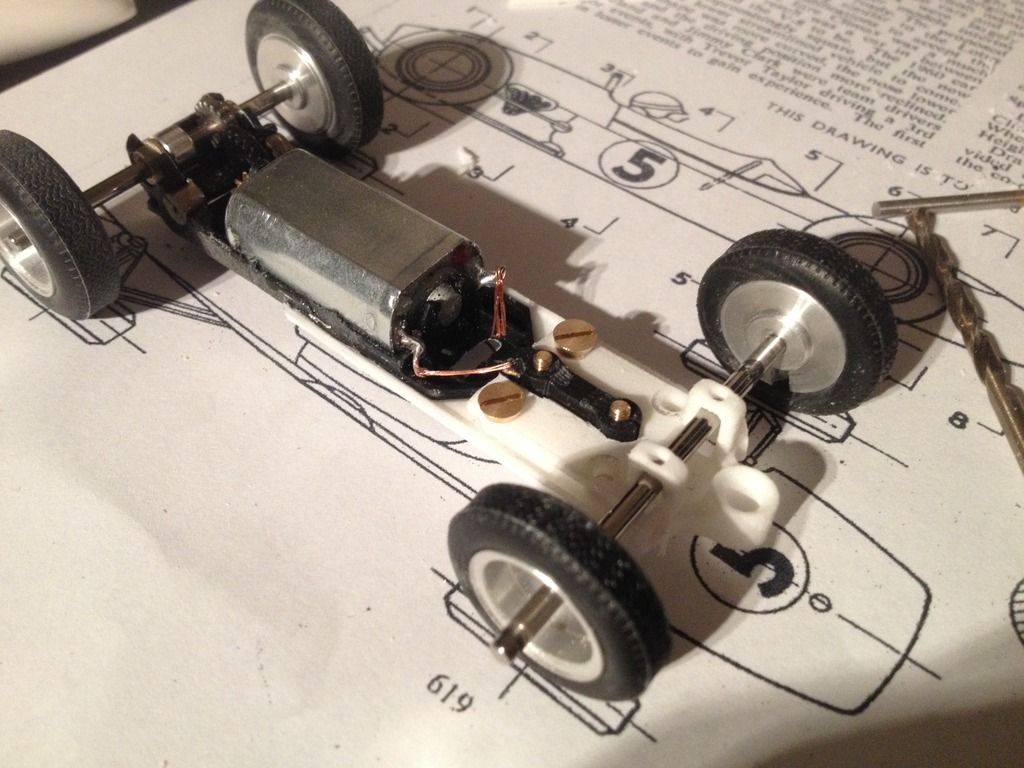
The rules are very open so there is no problem with me using my Policar Universal chassis and gearbox. I wanted to test whether it would fit into these little cars anyway so this was a good way to check that.
Admittedly the Lotus 21 is not the absolute thinnest car of the era and I doubt that the super fine Lotus 25 would work but this one fits like a glove.
I cut off most of the chassis for 1979's cars and have simply glued the remains of the chassis to the motor mount. Both glue well and it feels really strong.
Underneath:
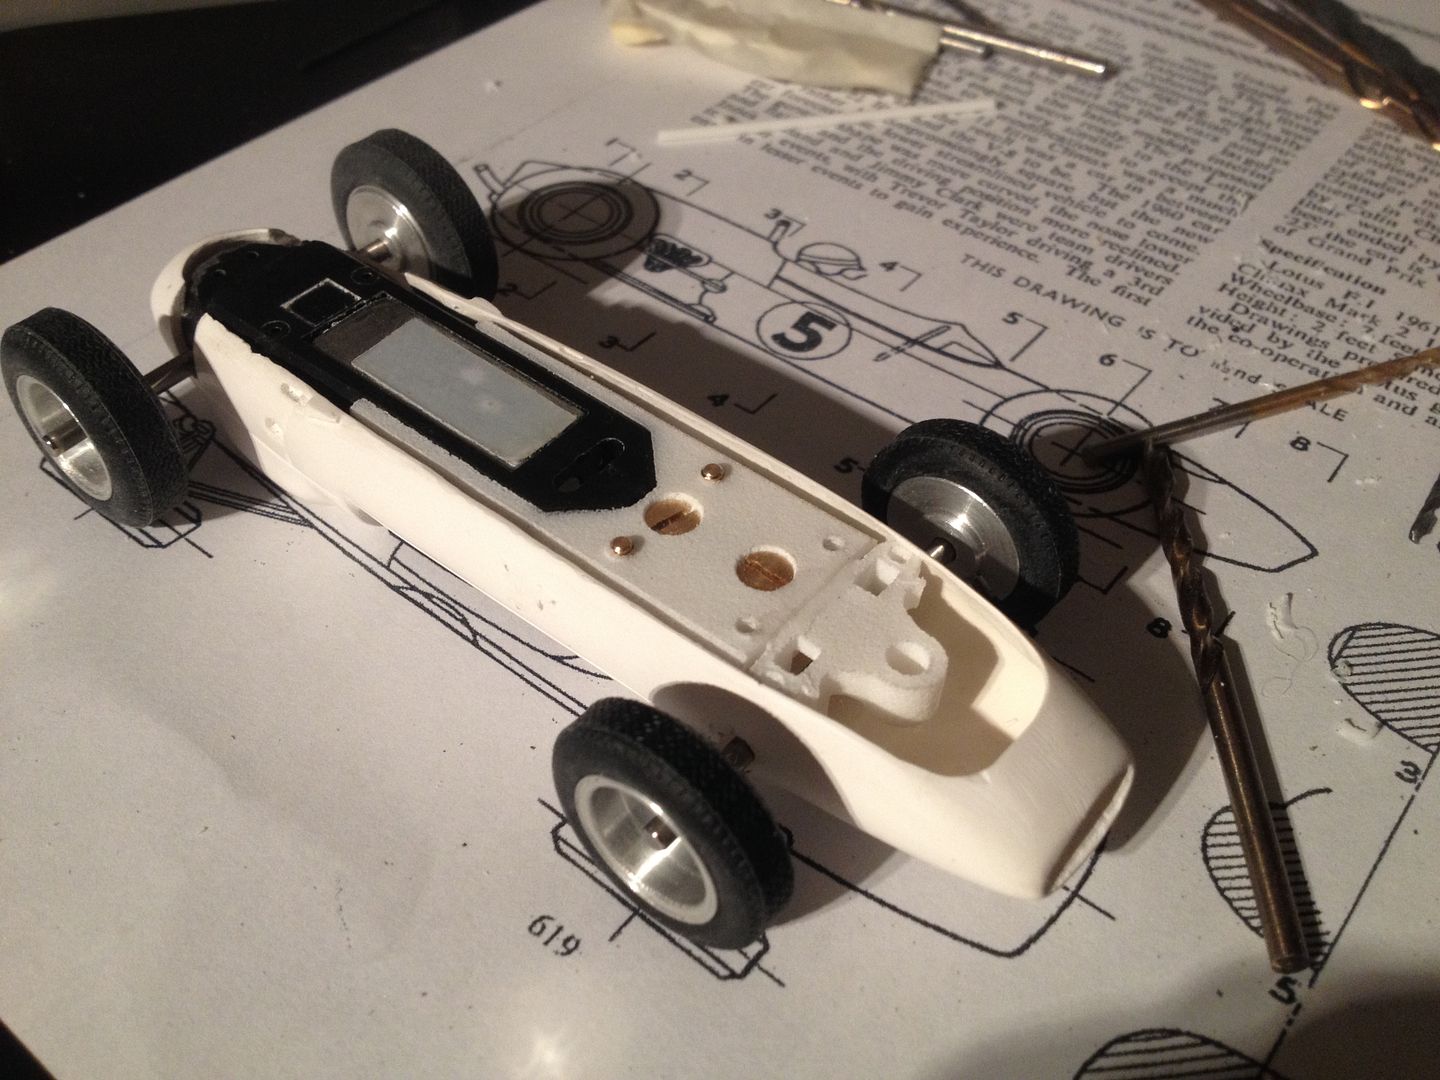
One fundamental change between the '60's and '70's is the front tyre diameter. This means my chassis sits rather too high at the front for the guide. Actually the chassis is not bad as it ran much higher back then but therefore an extension downwards is required for the guide. I extended the guide mounting cylinder down by 2-3mm to get everything aligned. I think that it might be as well to have two basic chassis designs for production or at least an additional extension piece for this purpose.
Overall I spent some time getting the car to sit with the correct posture. In those days the car sat quite high compared to how we now imagine. I've noticed this effect with the Lotus 72, people assume the cars of these eras ran lower than the photos actually show and this seems exacerbated by the fact that cars in modern 'classic' races are often set up in quite a false position. Equally some photos show the cars in corners where they were braking hard which also gives a false nose down stance.
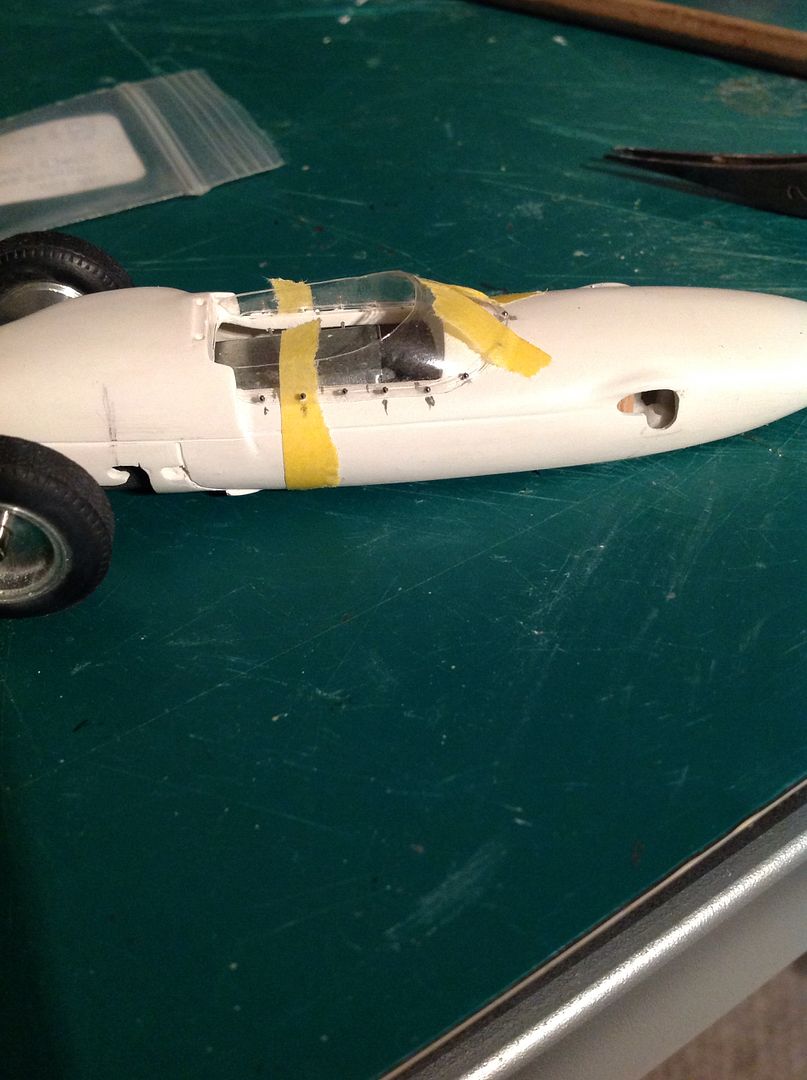
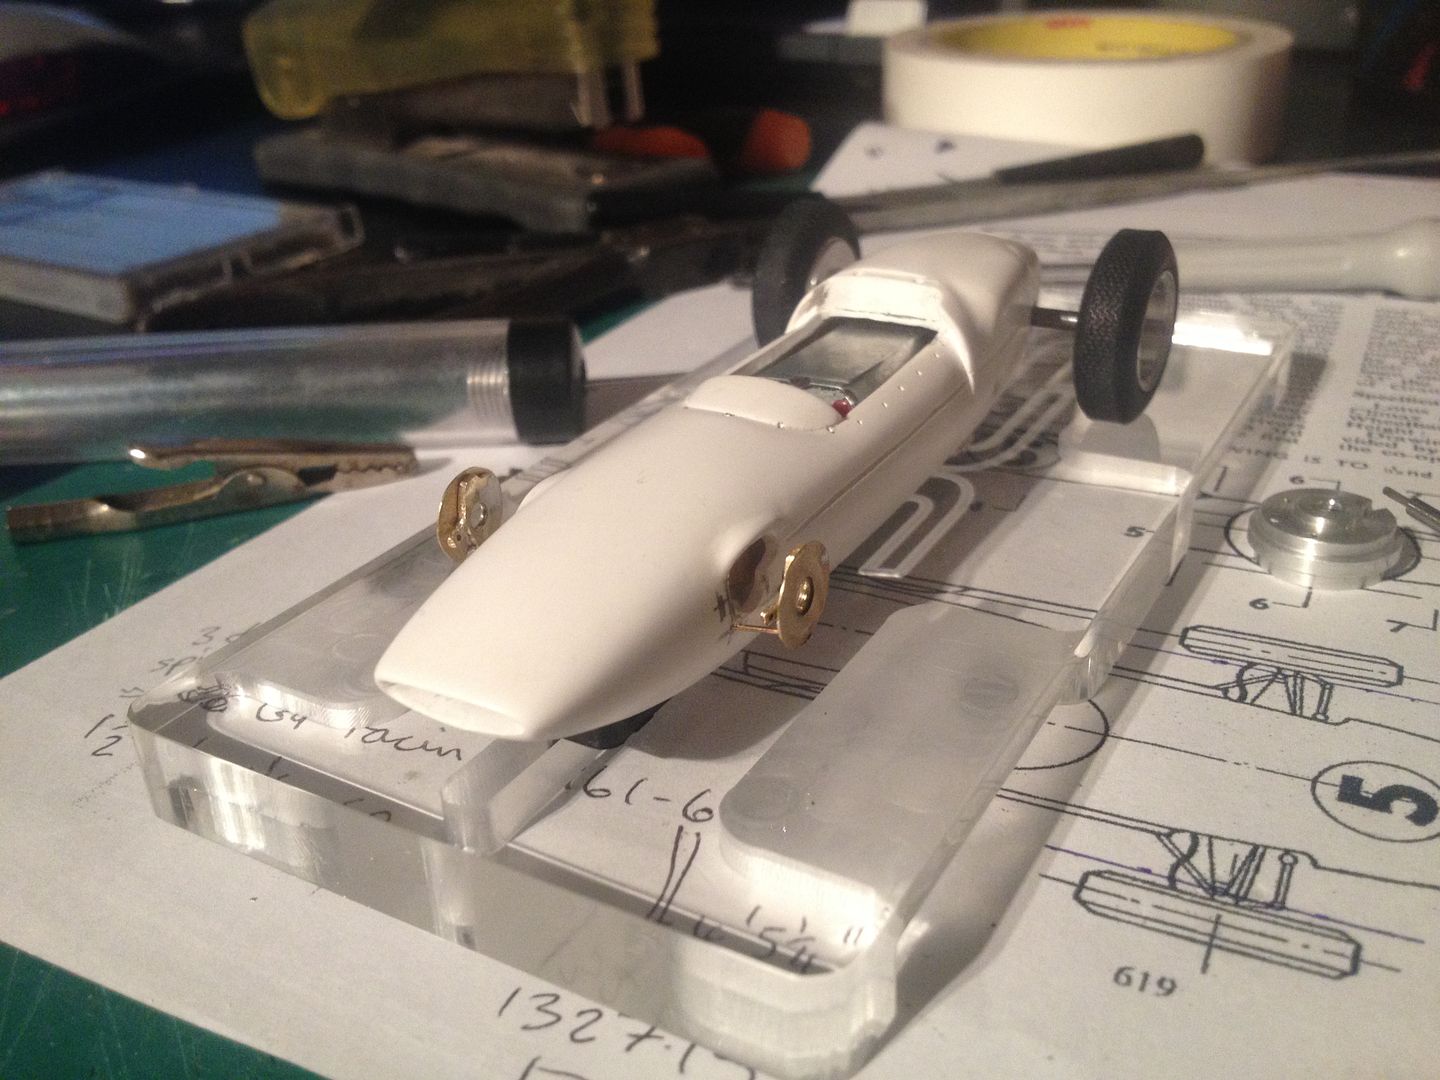
Once I had things looking more or less right I drilled the front of the body out to allow the front axle through. I like to leave the body whole under the opening to keep the strength in the nose and prevent it snapping off in accidents.

Next I worked on the area behind the cockpit. I noticed that the real car had air intakes either side which on the model just finished flat. I spent some time cutting out to give the impression of those air intakes and allow the screen to run on into those intakes. Unfortunately the screen was designed to work with the flat back so wasn't long enough to get this perfect but there was just enough plastic to give the impression even if the screen wasn't entirely flat.
The screen has a slight orange peel which is a pity but for this build I will not be attempting to remake it. For me each build has certain areas of experiment and I rarely find the time or energy to get EVER detail right.....
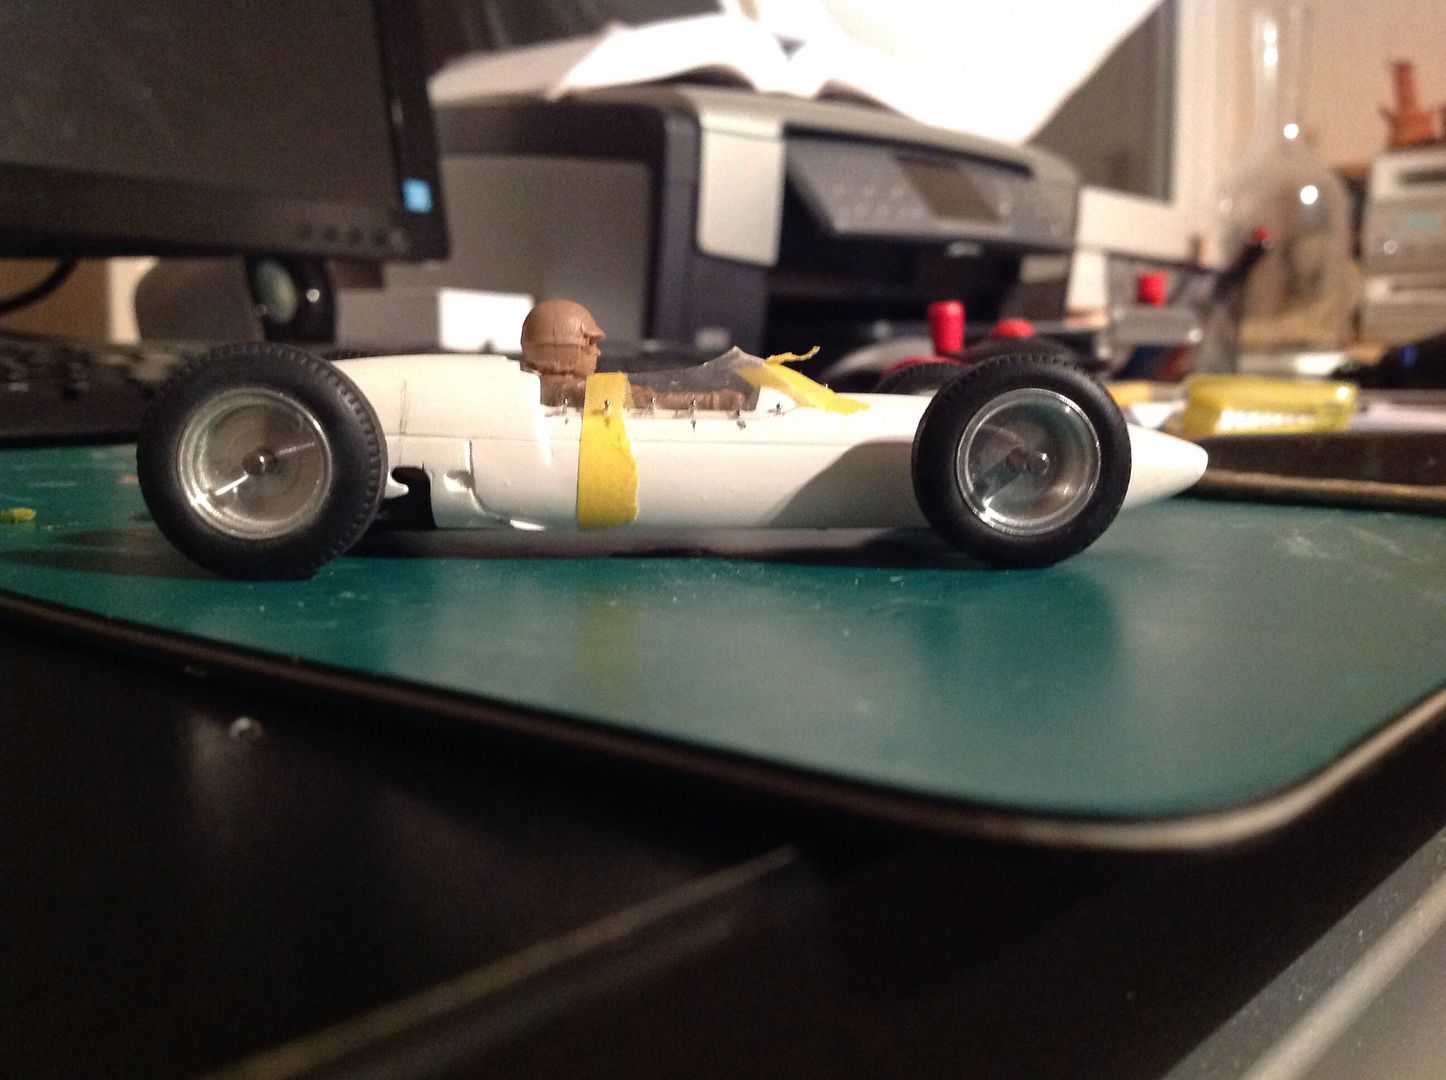
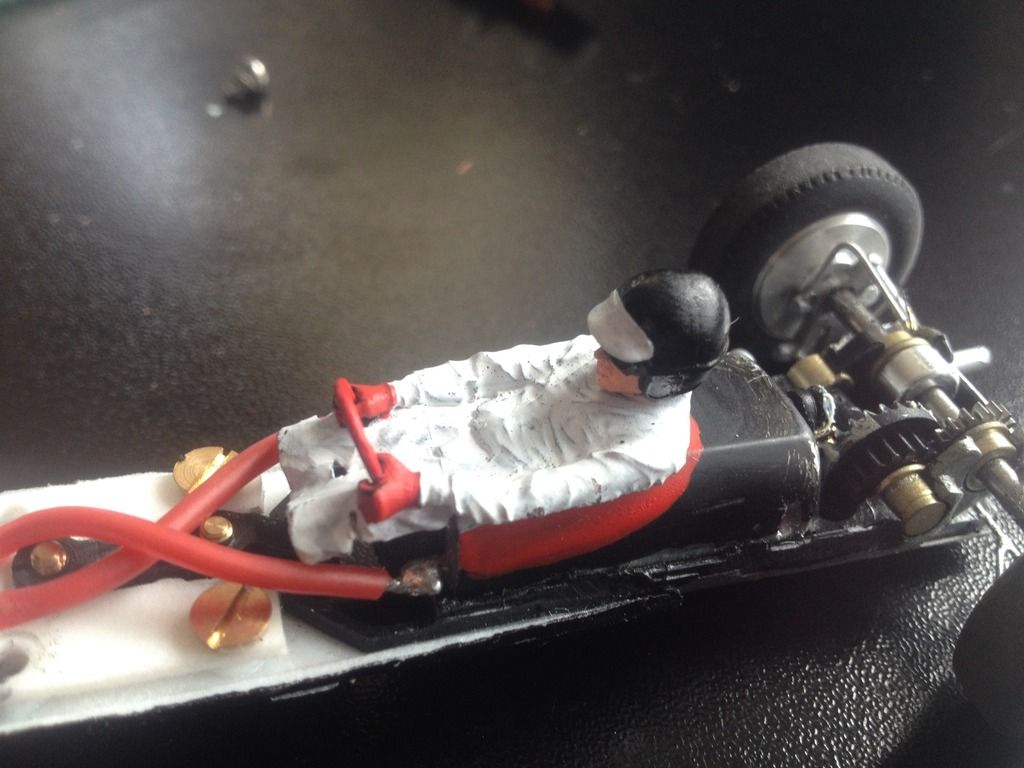
Next I turned my attention to getting the driver in. The Policar gearbox has vertical offset which lowers the motor to underside of chassis but it also pushes the motor forwards making the motor fill most of the cockpit!
I cut pretty much the whole of the torso off underneath such that it just covers the motor when looking down. I cut the lower legs off and then bent the ends of the legs down slightly from the hands. This allowed a very reclined driver but I think the overall effect just about works.
I did a lot of research into driver stance and particularly Jim Clark's. His head sat lower than other drivers in the same car, making my job even harder. I also think that the Immense Miniatures head might be a shade too large for Jim. Was this guy very small or what?
Anyway I got him down by removing most of his neck and collar so his chin rests on his chest which given his stance still looks 'natural'.
Other details were added at this point such as roll over bar and exhaust system. It took me time to adjust to the exhaust pipe scale after my DFV research....
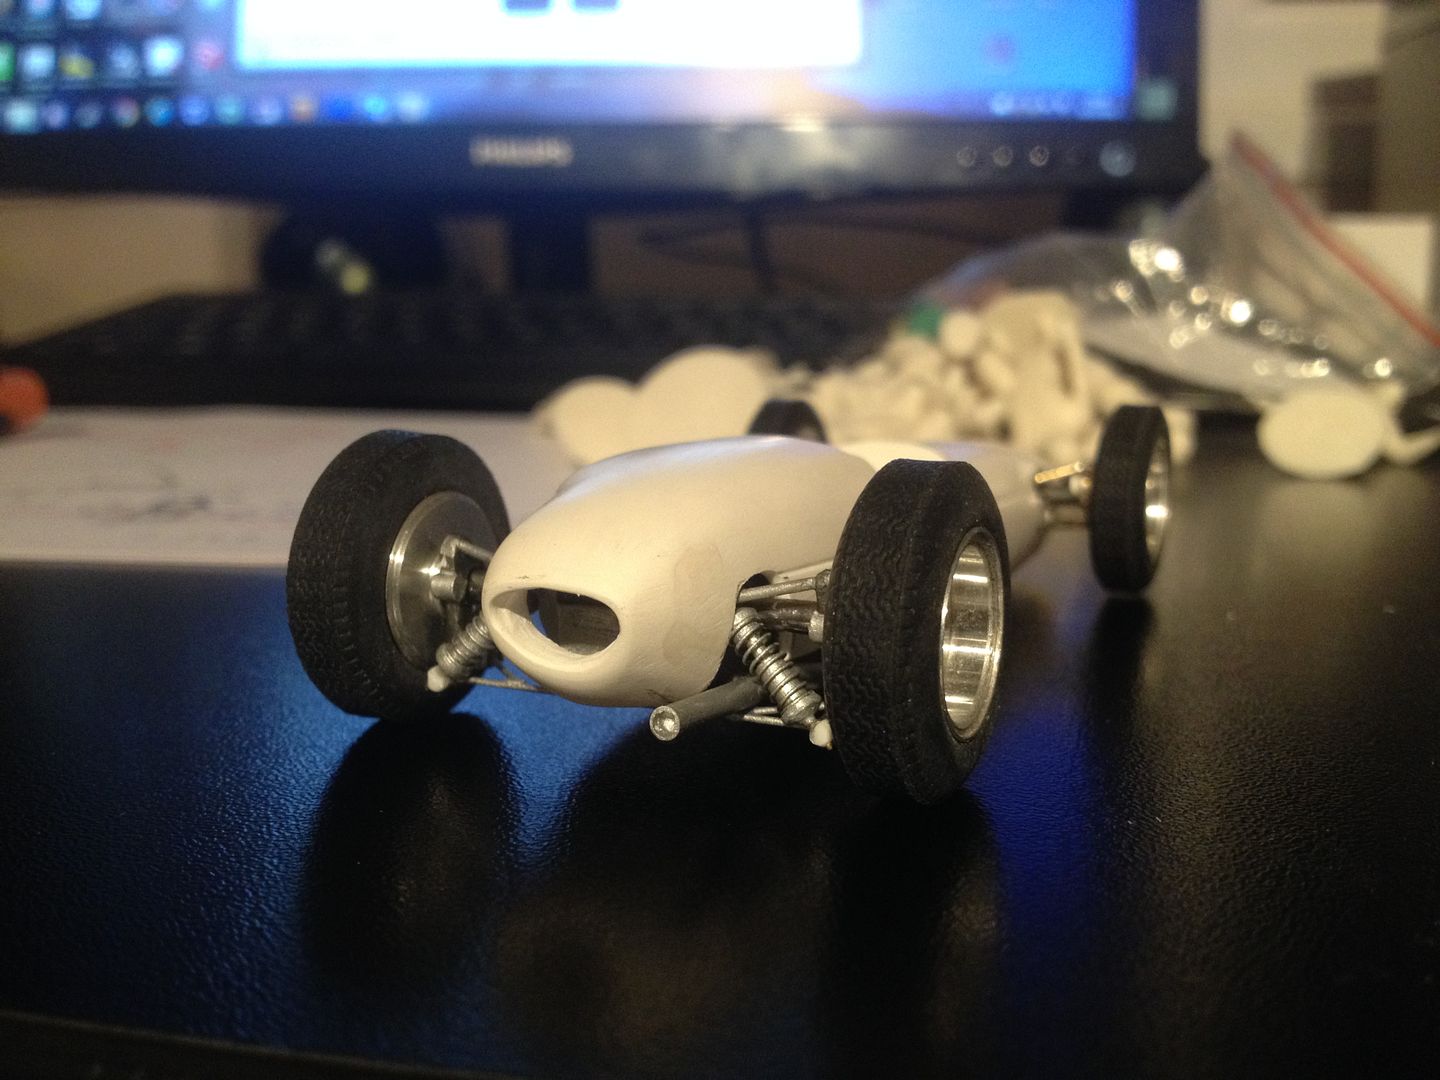
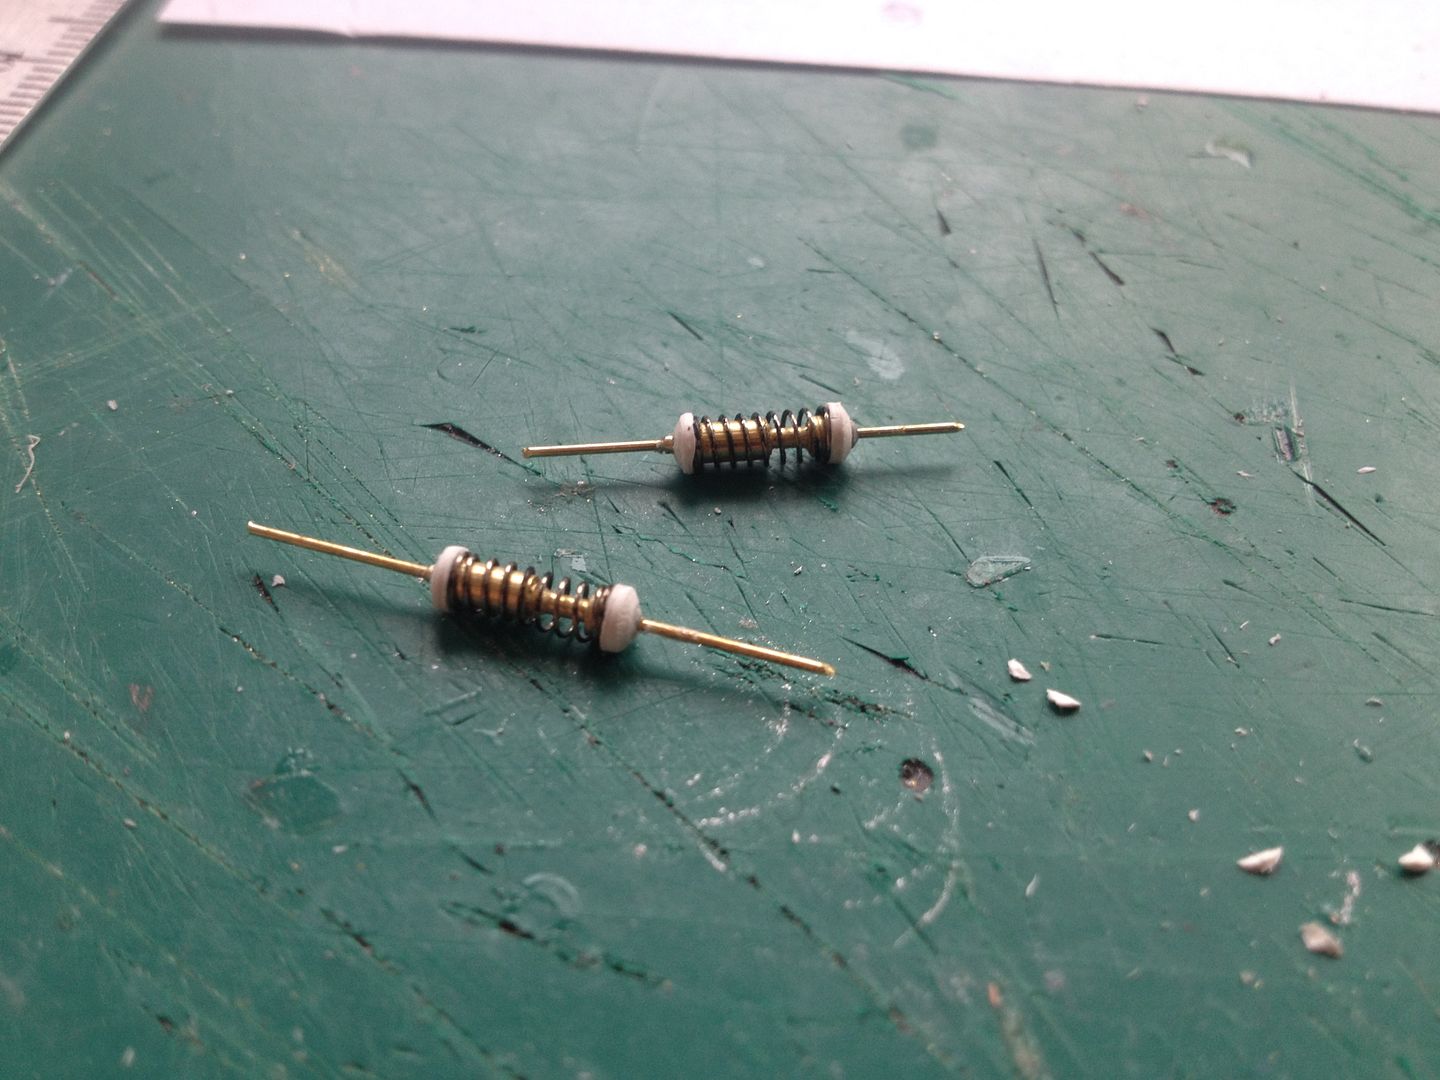
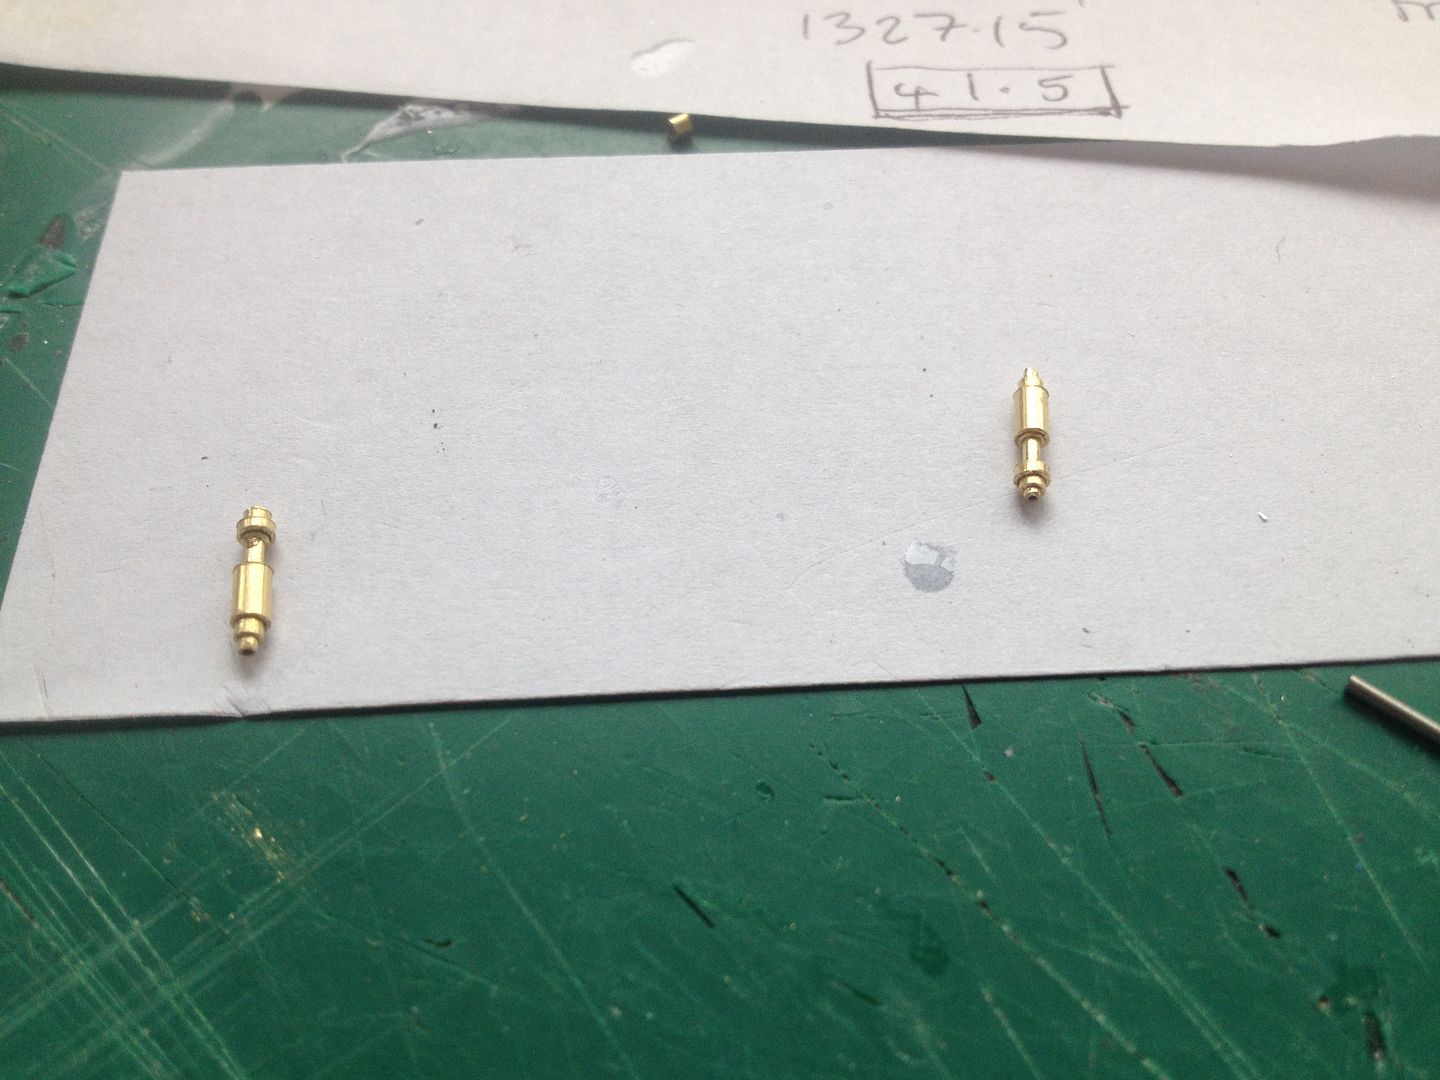
The next major undertaking was the front suspension. I needed this in brass as it will take impact during racing.
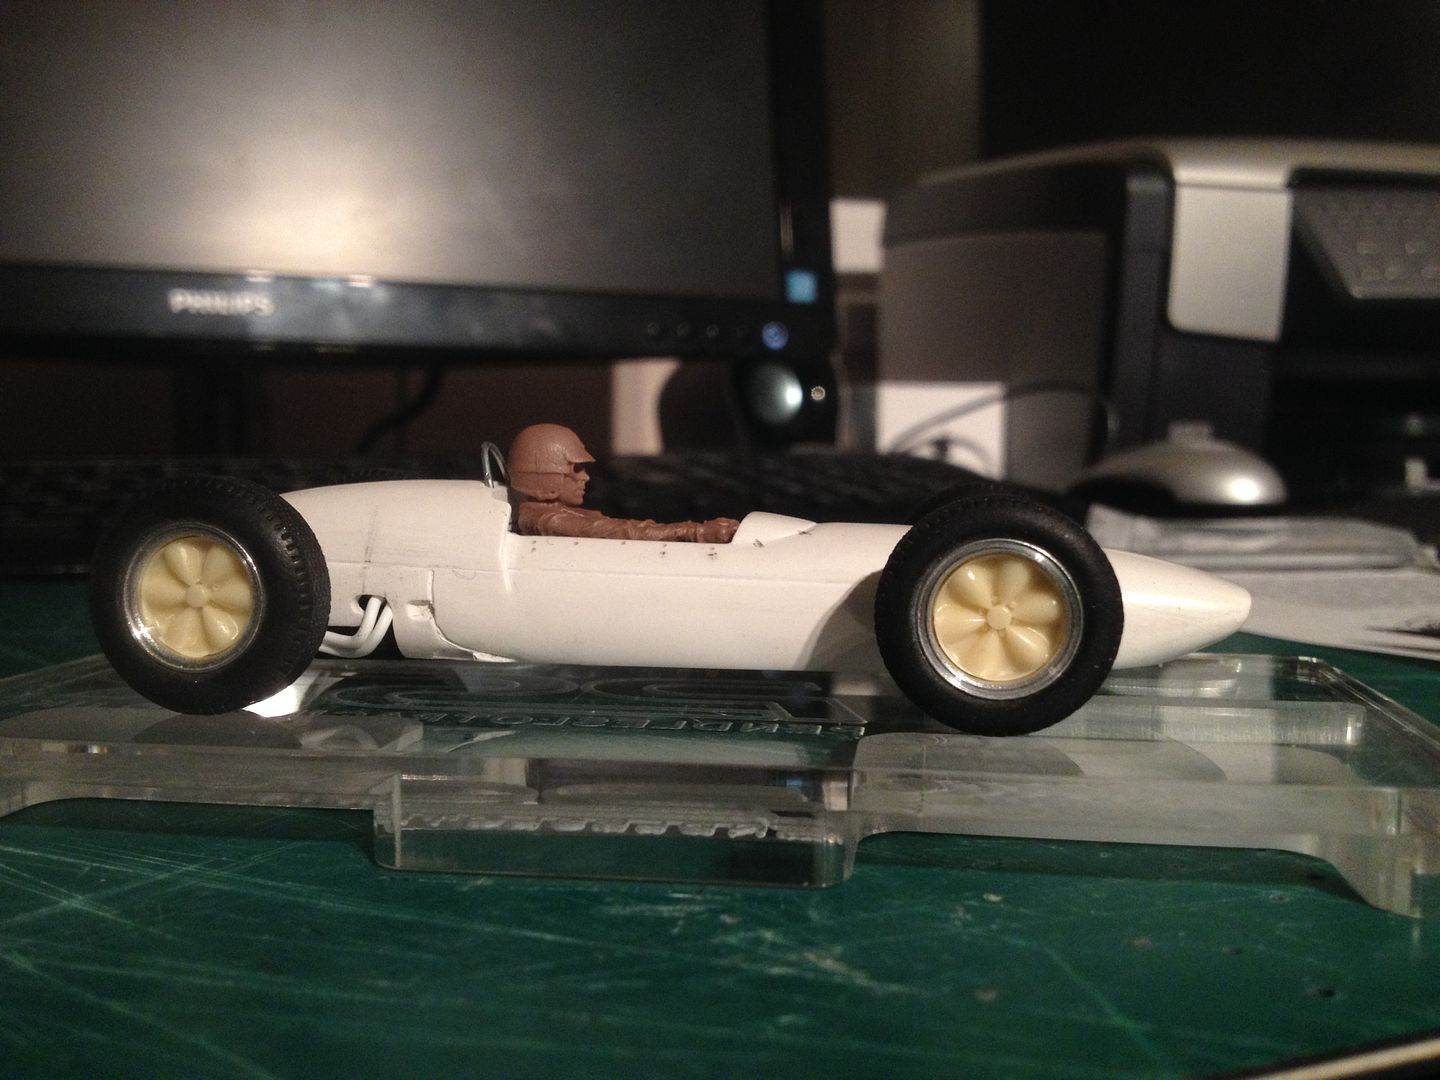
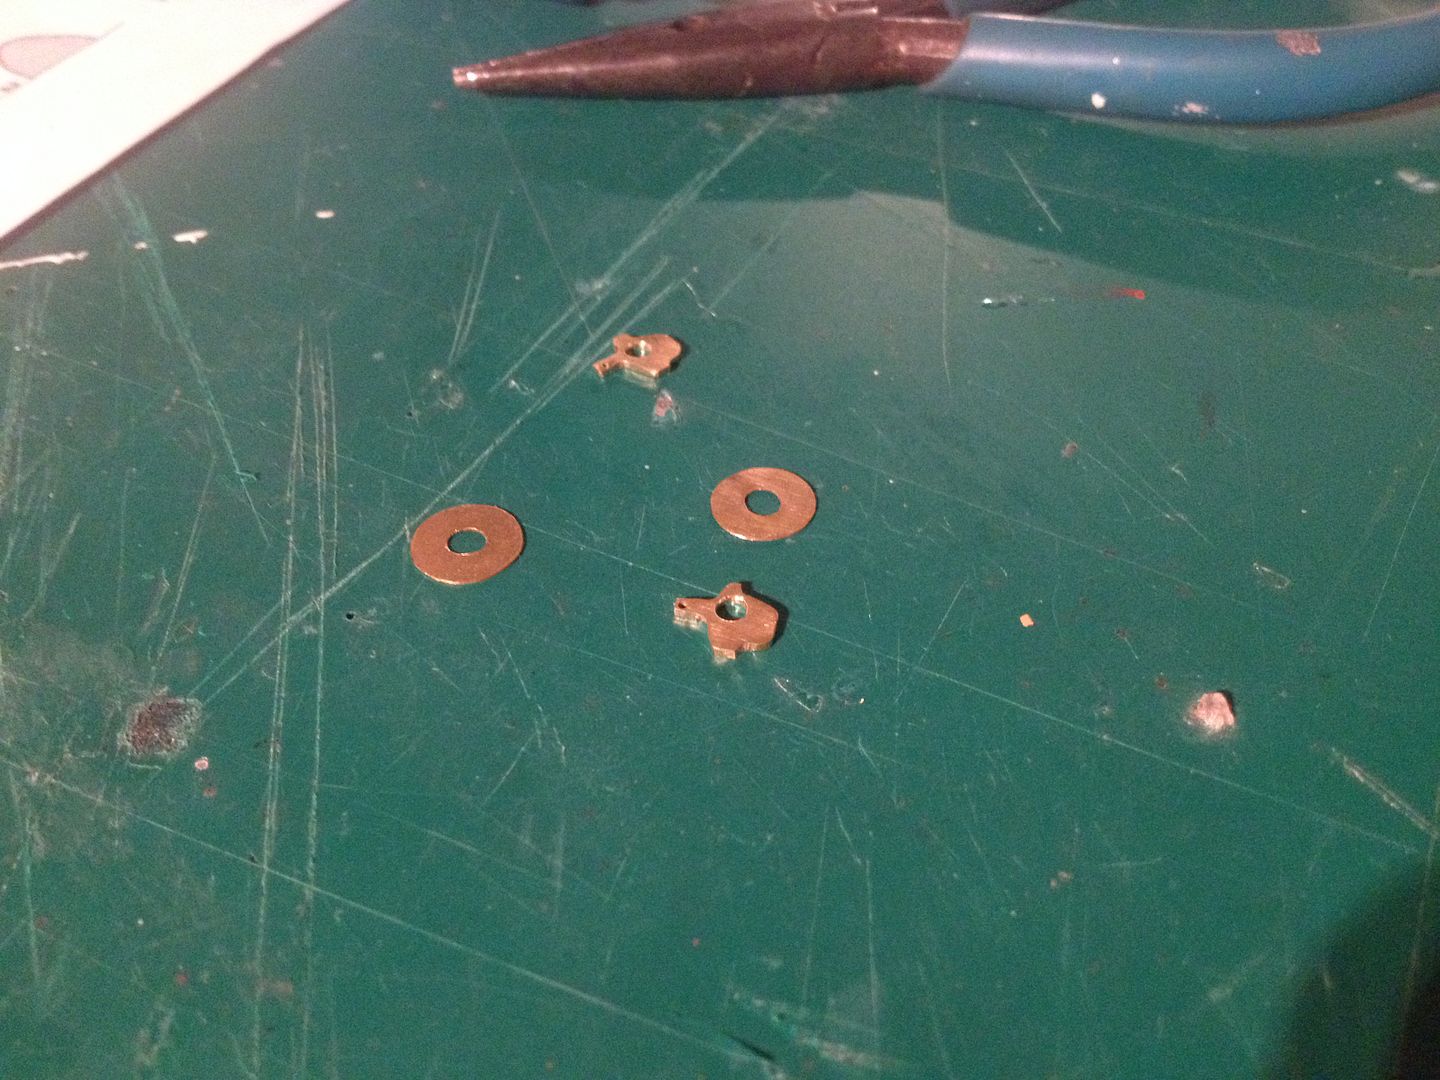
My pet hate with these cars are the wheels. Why does noone yet make them without that silly hub? The set screw needs to be in the centre and we need a rebate both sides so the brake and hub assembly can be further in.
Anyway I drew the front brake and hub:

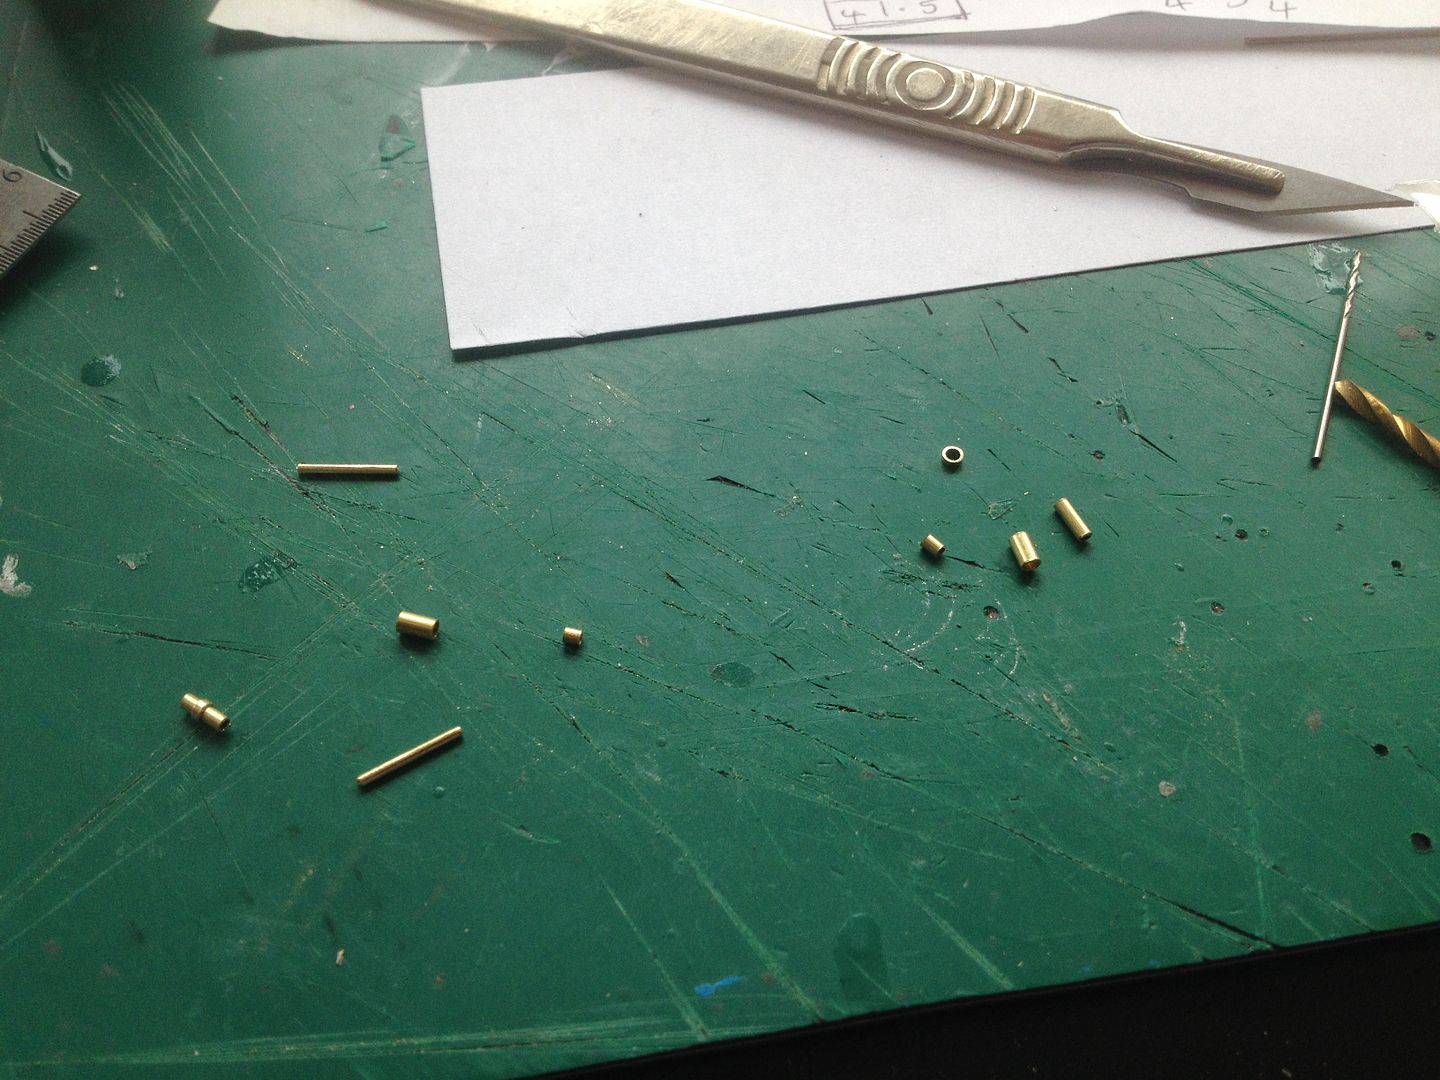
Then cut them out of brass with my tin snips. Drilled some holes and slowly got them soldered and glued in. This nearly drove me mad but eventually it looked like this (lower wishbone and steering without the top wishbone).
(Drawing above also shows rear suspension hub assembly to be seen later.)
Having got the front completed I moved to the back. The rear assembly is fixed to the chassis unlike the front which fitted to the body.
Unlike the front this is non structural as the body, chassis and tyres protect it during racing. To simplify the build and make it light I make the hubs from plastic. This also reduced soldering around the crucial gearbox components.
Now I just need to get the anti roll bars in and add the hydraulic hoses to all corners and we can progress to the paint shop.
I have entered the Wolves 1.5 litre event in Novemebr and of course need an appropriate car. I've no cars from the '60's but had a few kits I bought many years ago at Early Birds. Its a Dave Jones Lotus 21 that i've chosen.
The rules are very open so there is no problem with me using my Policar Universal chassis and gearbox. I wanted to test whether it would fit into these little cars anyway so this was a good way to check that.
Admittedly the Lotus 21 is not the absolute thinnest car of the era and I doubt that the super fine Lotus 25 would work but this one fits like a glove.
I cut off most of the chassis for 1979's cars and have simply glued the remains of the chassis to the motor mount. Both glue well and it feels really strong.
Underneath:

One fundamental change between the '60's and '70's is the front tyre diameter. This means my chassis sits rather too high at the front for the guide. Actually the chassis is not bad as it ran much higher back then but therefore an extension downwards is required for the guide. I extended the guide mounting cylinder down by 2-3mm to get everything aligned. I think that it might be as well to have two basic chassis designs for production or at least an additional extension piece for this purpose.
Overall I spent some time getting the car to sit with the correct posture. In those days the car sat quite high compared to how we now imagine. I've noticed this effect with the Lotus 72, people assume the cars of these eras ran lower than the photos actually show and this seems exacerbated by the fact that cars in modern 'classic' races are often set up in quite a false position. Equally some photos show the cars in corners where they were braking hard which also gives a false nose down stance.
Once I had things looking more or less right I drilled the front of the body out to allow the front axle through. I like to leave the body whole under the opening to keep the strength in the nose and prevent it snapping off in accidents.

Next I worked on the area behind the cockpit. I noticed that the real car had air intakes either side which on the model just finished flat. I spent some time cutting out to give the impression of those air intakes and allow the screen to run on into those intakes. Unfortunately the screen was designed to work with the flat back so wasn't long enough to get this perfect but there was just enough plastic to give the impression even if the screen wasn't entirely flat.
The screen has a slight orange peel which is a pity but for this build I will not be attempting to remake it. For me each build has certain areas of experiment and I rarely find the time or energy to get EVER detail right.....


Next I turned my attention to getting the driver in. The Policar gearbox has vertical offset which lowers the motor to underside of chassis but it also pushes the motor forwards making the motor fill most of the cockpit!
I cut pretty much the whole of the torso off underneath such that it just covers the motor when looking down. I cut the lower legs off and then bent the ends of the legs down slightly from the hands. This allowed a very reclined driver but I think the overall effect just about works.
I did a lot of research into driver stance and particularly Jim Clark's. His head sat lower than other drivers in the same car, making my job even harder. I also think that the Immense Miniatures head might be a shade too large for Jim. Was this guy very small or what?
Anyway I got him down by removing most of his neck and collar so his chin rests on his chest which given his stance still looks 'natural'.

Other details were added at this point such as roll over bar and exhaust system. It took me time to adjust to the exhaust pipe scale after my DFV research....
The next major undertaking was the front suspension. I needed this in brass as it will take impact during racing.
My pet hate with these cars are the wheels. Why does noone yet make them without that silly hub? The set screw needs to be in the centre and we need a rebate both sides so the brake and hub assembly can be further in.
Anyway I drew the front brake and hub:

Then cut them out of brass with my tin snips. Drilled some holes and slowly got them soldered and glued in. This nearly drove me mad but eventually it looked like this (lower wishbone and steering without the top wishbone).
(Drawing above also shows rear suspension hub assembly to be seen later.)


Having got the front completed I moved to the back. The rear assembly is fixed to the chassis unlike the front which fitted to the body.
Unlike the front this is non structural as the body, chassis and tyres protect it during racing. To simplify the build and make it light I make the hubs from plastic. This also reduced soldering around the crucial gearbox components.


Now I just need to get the anti roll bars in and add the hydraulic hoses to all corners and we can progress to the paint shop.