|
|
Post by Taffy on Dec 11, 2016 8:03:33 GMT -5
After a long time something new on my building desk! The last „Vintage 32 day“ held at the Arnsbergring was the last race of this years racing season and that means, any changing of the rules concerning the next years season have to be discussed. So we decided to spread the range of cars by dividing our „1.5l-class“ into an early (1958-1961) and late (1962-1965) division. That means, to mix the last front-engined cars of that era with rear-engine cars in the earlier division. We hope, to get so more exciting races That is the reason, why I I took the something dusty MacPinches kit of the FERRARI D246 out of my storage rack. I like the shape of that body very much and I was happy to get the chance of building AND racing that car after having stored away the kit for many years. I will build the car #30 driven by Jean Behra in the 1959 GP of France. Technical basis for this car is (along the rules) the Penelope-Pitlane-chassis SM1M or -S ,(now distributed by Pendleslot), using a slimline-motor. Wire wheels are Ninco-spare parts, so I have to use 2,5mm-axles instead of the usual 3/32´´ parts. Having collected all bits and pieces: 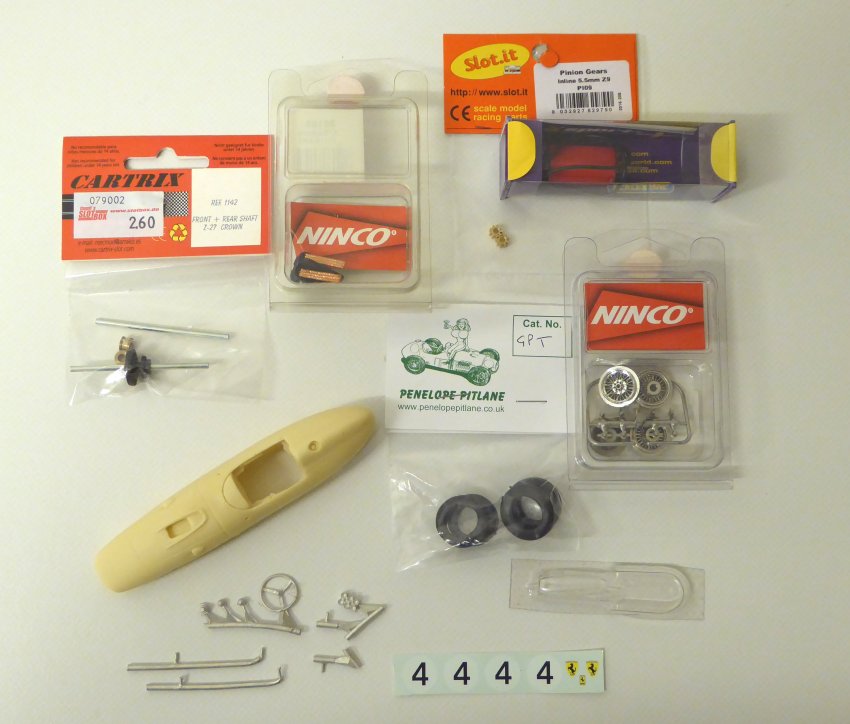 I started to build the chassis, what is business as usual.. soldering the rear axle bushings, stiffening the chassis by some solder. I do not bend the anterior motor mount into its correct position until the chassis isn´t raceready to avoid a break because of bending it too often: 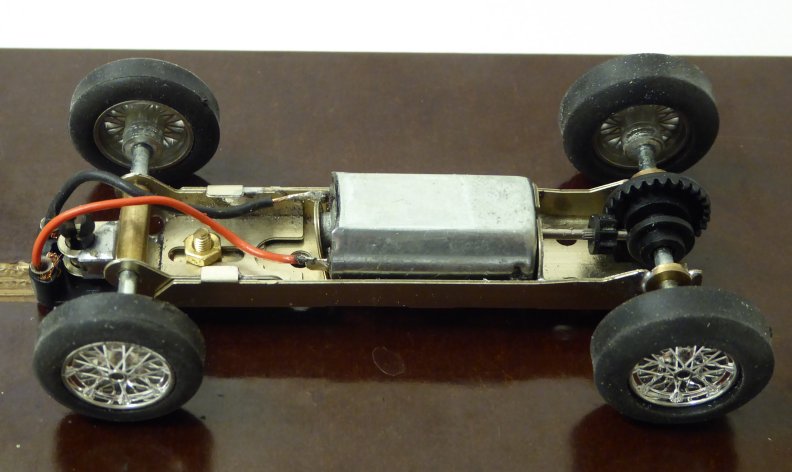 I wanted to build the car with some rear suspension details, so I used copper wire in different diameters and parts of empty cigarette-lighters to do that. 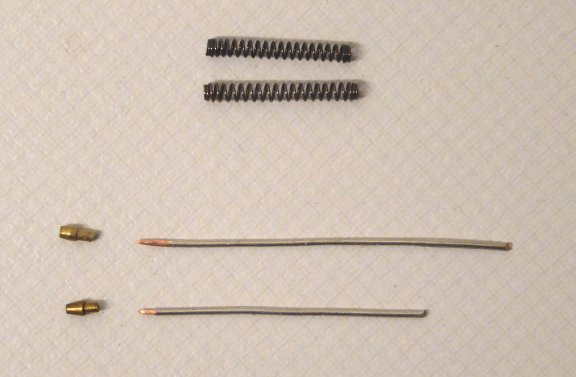 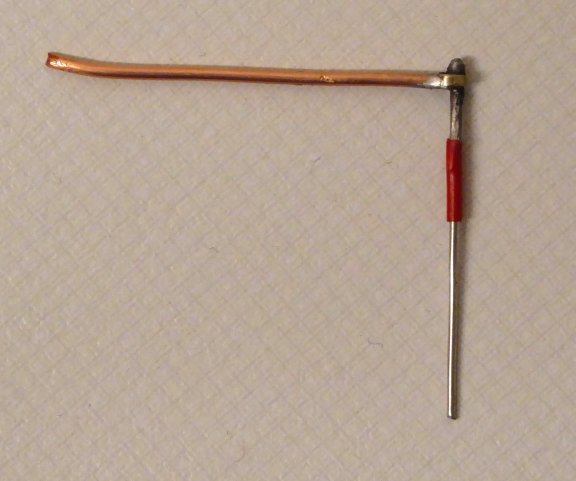 Left side ready: 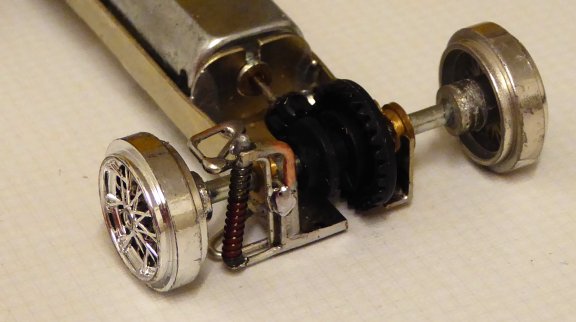 Both sides ready: 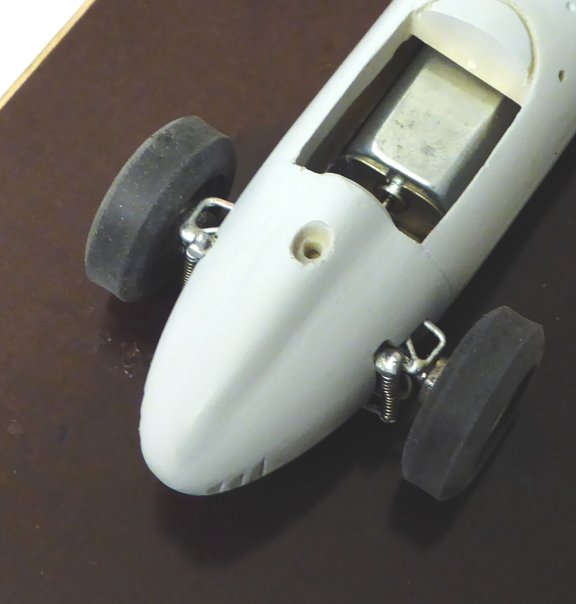 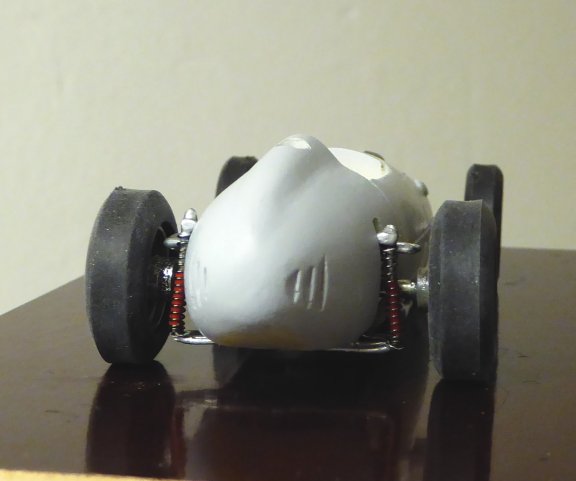 The body is primed yet and ready to be painted. Best regards, Taffy (To be continued) |
|
|
|
Post by EM on Dec 11, 2016 12:24:08 GMT -5
Very nice - your success with the Penelope Pitlane chassis has inspired me to try them - first example is a 750 Monza on the anglewinder chassis - initial impressions are very favorable although it is heavier than expected.
EM
|
|
|
|
Post by Taffy on Dec 12, 2016 16:31:45 GMT -5
Hi, Alan,
I never proved the performance of the PP-sidewinder- or anglewinder-chassis. I only use the inliner chassis (Sm1S or Sm1M) for my formula cars.
I see the following advantages and disadvantages:
Advantages: They are not expensive and relatively easy to build. Using them in a racing series, like we do in the "Vintage 32 days", gives you the chance of building all cars at a similar technical level, what makes the races more exciting.
Disadvantages: They are "wobbly", so they need to be stiffened. You cannot adjust the ground clearance. The bigger the wheels, the more the car tends to tip in the corners. The anterior "bearings" cut into the front axle after a while, even more, if not properly lubricated (not good, if you use it in a proxy series, where the car goes from venue to venue)
Best regards, Taffy
|
|
|
|
Post by EM on Dec 12, 2016 20:09:49 GMT -5
Hi Taffy
Thanks for the response. I have a couple of the in-line chassis but have not tried them yet. I did a couple of things addressing the problems you noted: Before anything was folded, I drilled out the front axle holes to 1/8" and, after folding, soldered a piece of 3/32" id brass tubing through them as an axle carrier. This makes the front section much more rigid. I noted some flex at the rear and added a brace between the motor and rear mounting platform. Finally, I assembled the front and rear sections in a chassis jig to assure that everything was lined up and then soldered them together.
Best regards
Al
|
|
|
|
Post by Taffy on Dec 14, 2016 13:09:12 GMT -5
Hello, Al, thank you very much for describing your way to make the PP-Chassis race-ready! To use a brass-tube instead of bearings for the front axle seems to be often used in the english speaking countries. I would fear, that this gives too much friction, even, if well lubricated. But it seems to work good, or all the people using this method would go wrong.... Well, after having continued my work , I can show a few more pictures. Body is painted, detailed and decaled. Unfortunately, the #-decals were too thin, so they broke by transfering them from the paper to the body. A very hard work. Now I have to make the drivers figure and I have to fix the windscreen... 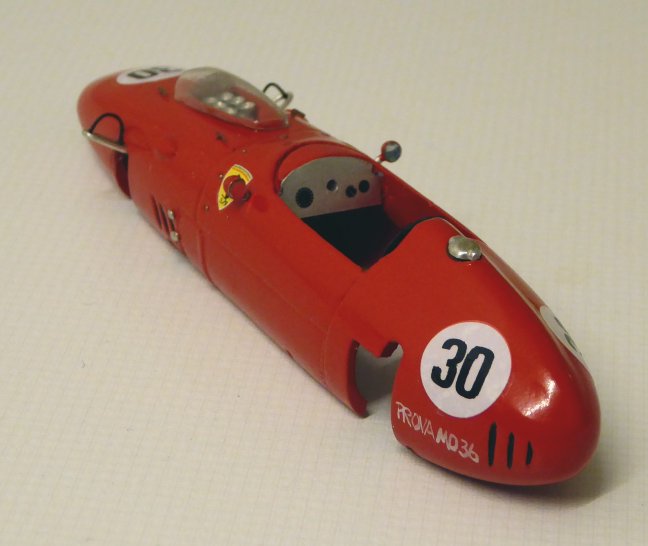 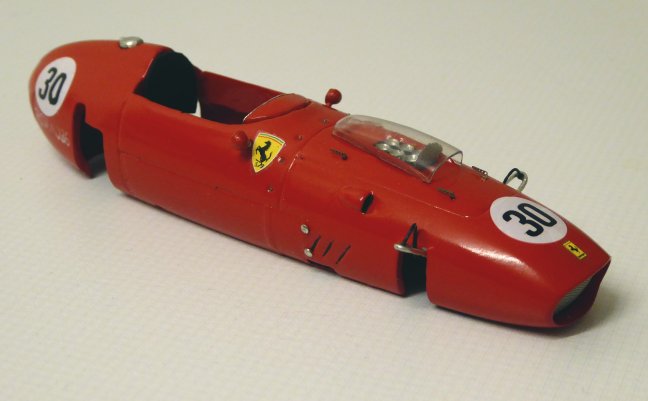 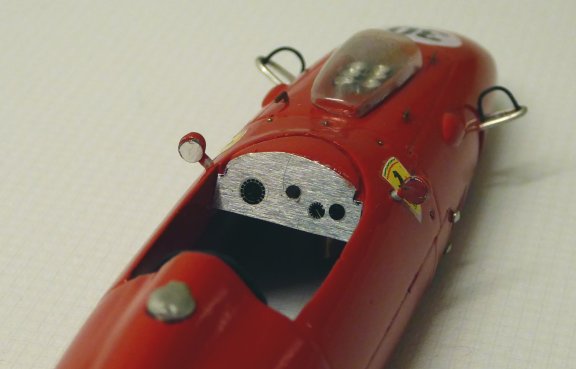 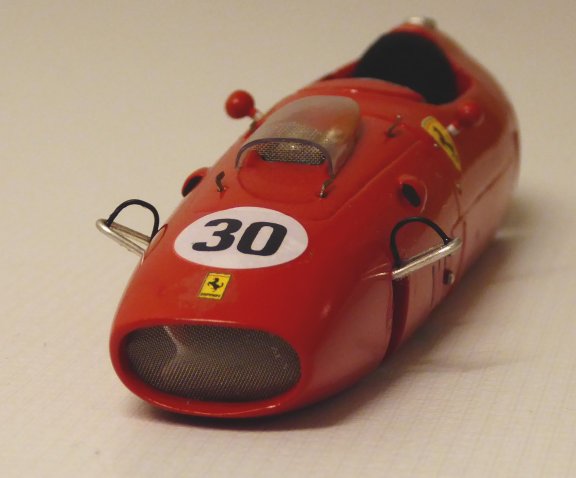 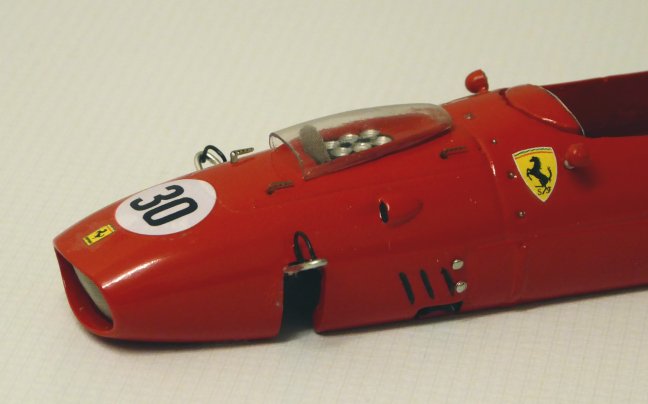 |
|
|
|
Post by David Mitcham on Dec 14, 2016 15:35:08 GMT -5
Very nice Taffy. Some great detail touches - I particularly like the mesh in the perspex carburettor cover and in the nose.
Best Regards
David
|
|
|
|
Post by EM on Dec 14, 2016 17:43:38 GMT -5
Hello, Al, thank you very much for describing your way to make the PP-Chassis race-ready! To use a brass-tube instead of bearings for the front axle seems to be often used in the english speaking countries. I would fear, that this gives too much friction, even, if well lubricated. But it seems to work good, or all the people using this method would go wrong.... W
Oddly enough, the secret to making this work is to use no lubrication. There is very little load on the front axle and the 3/32" id tubing that I use has enough clearance so that the assembly spins very freely left dry. I can see where the viscous drag of even very thin oil over a long length of tubing would add a lot of friction
Al |
|
|
|
Post by Taffy on Dec 15, 2016 13:21:53 GMT -5
@ David: the mesh...well...usually, in Germany the water, what comes from the water supply has drinking water quality. To improve the water quality in my practice even further, I have an additional filter system. The filters will be changed once in a year, and even after a year, they are clean. So last time, when they were changed, I didn´t throw them away, but stored them for use in scratchbuilding. They have a small and thin layer of very fine mesh, that I cut of the filter´s housing.
@ Al: thank you again for your explanation. What you write is really amazing! So I have learned something again (one of several good reasons, why a scratchbuilder and slotracer should be member of this forum!)
Best regards,
Taffy
|
|
|
|
Post by Taffy on Dec 16, 2016 15:13:30 GMT -5
The next steps are done. - I adjusted the driver´s figure and the steering wheel: 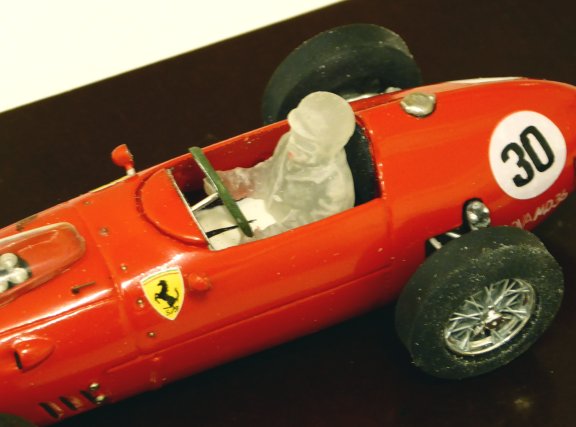 Now driver and wheel will be painted. - Dissatisfied by the bad results of the #-Decals I have scrubbed them down again and put some other new Decals to both sides of the body. 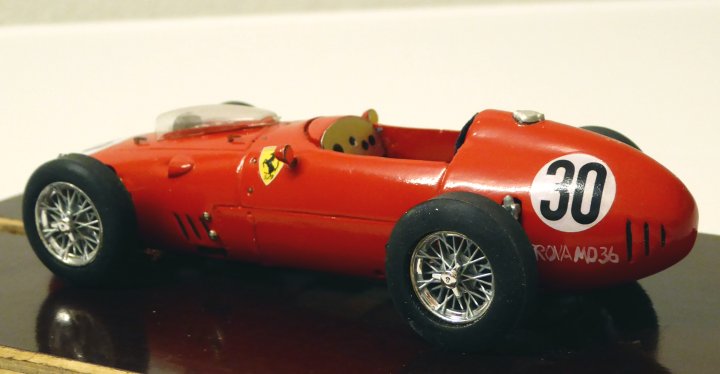 |
|
|
|
Post by f143 on Dec 16, 2016 23:30:22 GMT -5
Another lovely model Taffy, making a good case for collecting the 50's era cars.
Regards
Nigel
|
|
|
|
Post by Taffy on Dec 18, 2016 10:27:00 GMT -5
Thank you, Nigel, for your kind words! Except of the tyre trueing, which I will do immediately before the first race, the car is ready now. To paint Jean Behra´s helmet decoration was a bit of a challenge ( I had no decal for this, so I had to paint it with a fine felt-tip pen  )…. 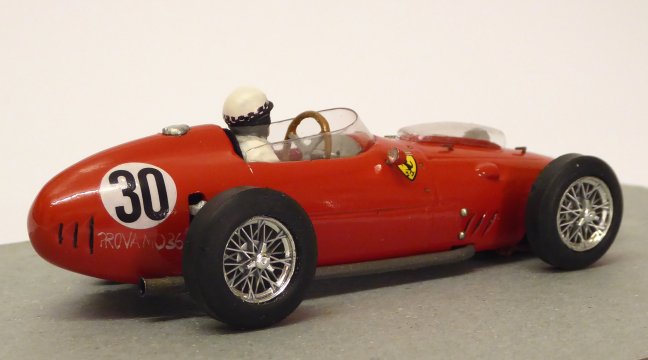  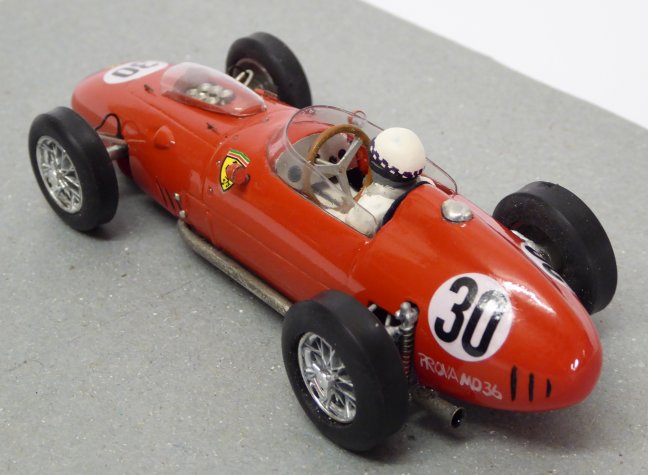 Caution, exhaust gas is dangerous! 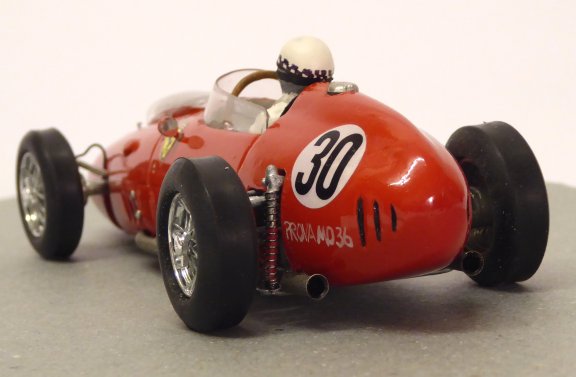 And a last, scenic picture: 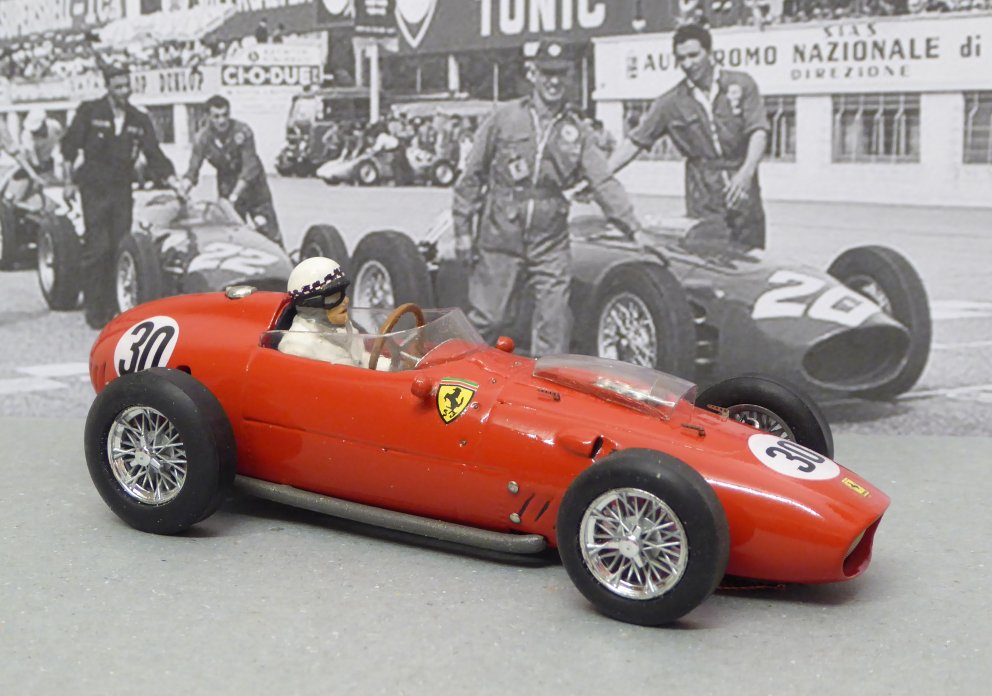 I hope, you enjoy it! Best regards, Taffy |
|
|
|
Post by David Mitcham on Dec 18, 2016 12:15:54 GMT -5
Excellent Taffy, great workmanship.
Best Regards
David
|
|
|
|
Post by richardh on Mar 10, 2017 14:33:51 GMT -5
Taffy
Fantastic build and great inspiration to me! Great photos, thank you.
Richard Hewitt
|
|


 Taffy
Taffy

 )….
)….
