|
|
Post by nuvolari on Jul 30, 2012 16:21:27 GMT -5
Hi, One of my future builds will be two pre war Alfetta's 158. The Alfetta 158 is well known as a post war race car winning the first F1 series, but development started way back in the late 1930's. My basis to start with are two Dave Jones bodies. One will stay in the shape as it came, and will be the 1939 model that has the same looks as the post war model. The other body will look like the 1938 model and will require some serious reshaping, especially the nose section. One of the biggest difficulties is making a new grill. 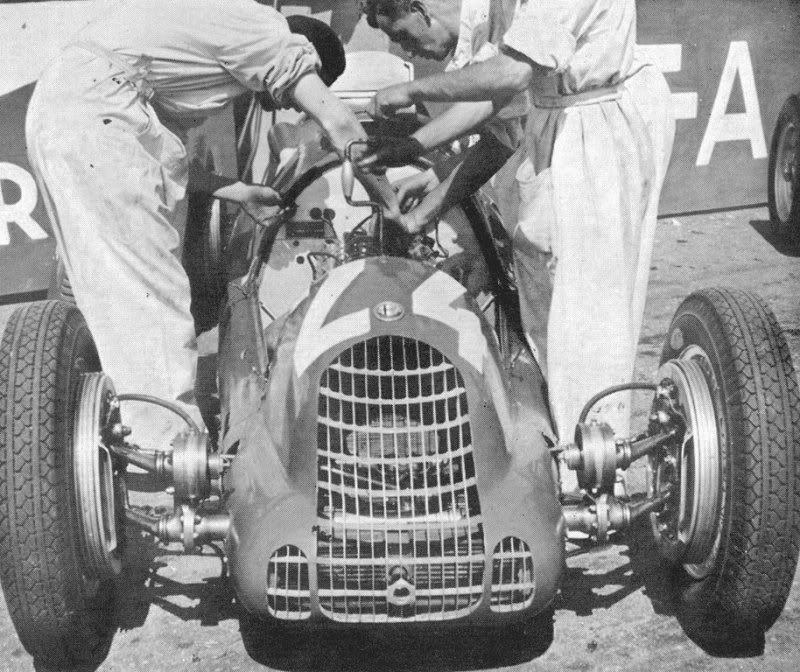 So I started to experiment withe the grill making technique as I did with the Mercedes W125 grills ( a topic that soon will appear here on the Forum). The problem with the old technique was, that the mould was made from stone, that was good for a simple oval grill as the W125, but not for a more difficult shape as the 1938 Alfetta 158. So I started looking for an other material that could stand heat and could be soldered on. I soon came up with aluminium as an ideal material. And I have to say it was even better to work on. I also redesigned my self made grill tool allowing me to exchange the mould very quickly by putting in an intern screw. So I now can screw of and on the mould very quick for change. Here are a few photos showing the grill making process. The only thing left to do now is to fit it in, in a chapped nose. But that something for later in the year 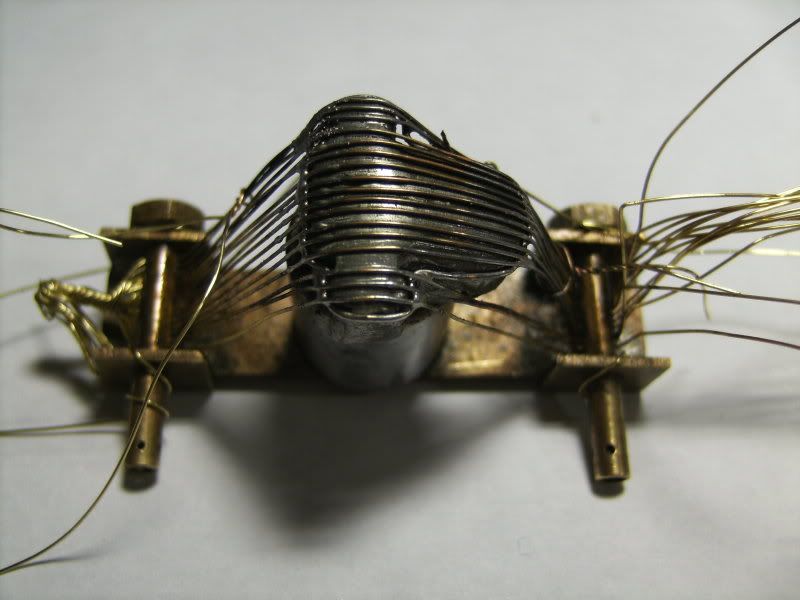 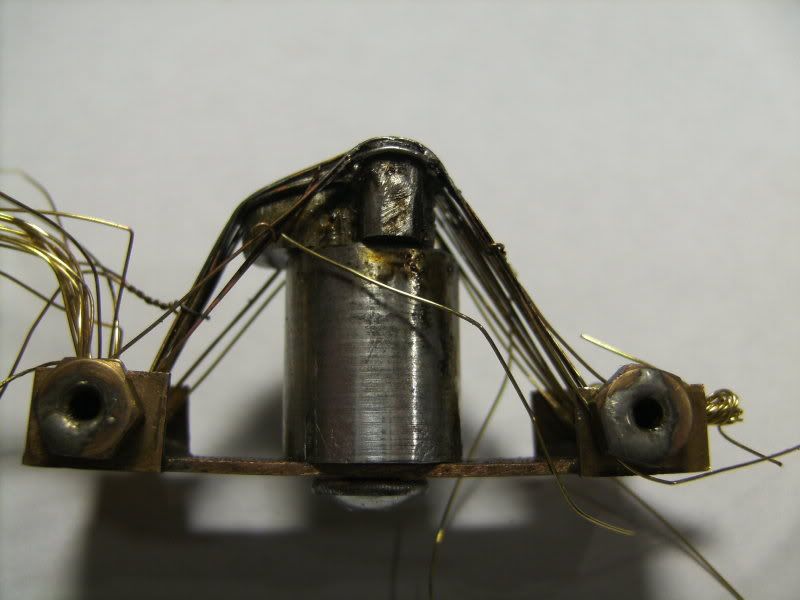 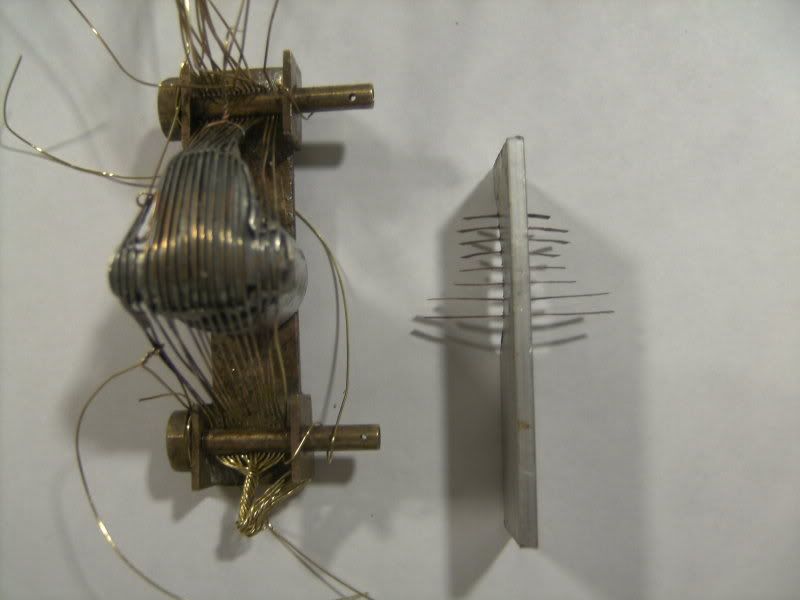 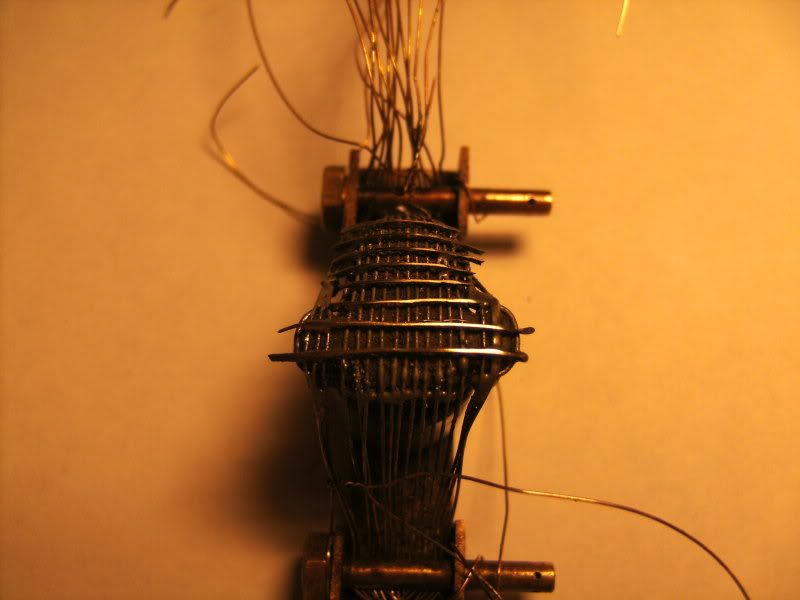 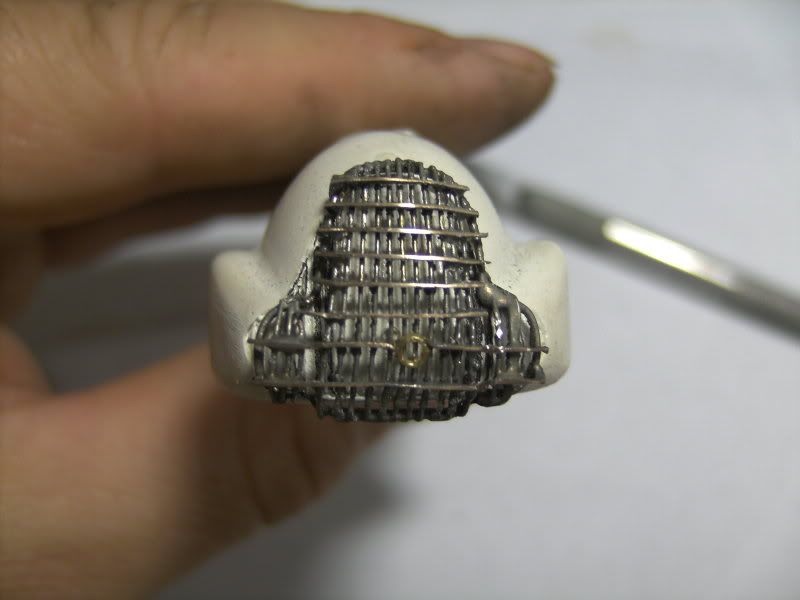 Cheers, Danny |
|
|
|
Post by Andrew Rowland on Aug 1, 2012 22:16:50 GMT -5
True SCATCHBUILDING at its best Danny.
Love it mate.
Andi
|
|
|
|
Post by Peter Seager-Thomas on Aug 2, 2012 12:18:12 GMT -5
Ah, I remember those for the Mercedes. I would guess that posts with such details are what will attract new members to this forum, not just comments of 'I did this', but more 'This is how I did it.
Well done Danny.
I thought you wern't doing any slot stuff until the summer was over....?
Peter.
|
|
|
|
Post by nuvolari on Aug 2, 2012 13:24:55 GMT -5
You know that itchy feeling, Peter, when you're to long doing no scratch building, it was becoming very itchy ;D
Besides, midsomer has past and the swarm drifts of my bees is gone. Now they really start preparing already for winter. I still got some work but it's less then in Spring.
cheers,
Danny
|
|
Deleted
Deleted Member
Posts: 0
|
Post by Deleted on Aug 2, 2012 16:16:07 GMT -5
Danny,
I made the early version of the 158 for Marlon at TRRC. Dave Capelen now has it and is supposed to be telling me what he wants done with it. Not much, as I finished it to Marlon's brief. There are very few pictures of that car and I made the master from just two and a few measurements, so if you want to do that one, it will soon be there.
Having said that, you seem to be doing just fine on your own!
Cheers,
Martin
|
|
|
|
Post by nuvolari on Aug 4, 2012 18:18:48 GMT -5
Hi, I've already started to alter one of the Dave Jones Alfetta 158 bodies into the 1938 version. The other model stays as it came just the mirrors are added and this counts for both models Quite some changes needed to be made for the 1938 model. Most difficult one is the change of the nose. But next to the nose the hips needed to be wider, the fin most also needed to be made wider and the louvres needed to be changed. At the moment the old louvre on the bonnet have disappeared, the hips and rear fin is changed but still need a fine finish. The front bulbs are cut away and roughly filed up. The place the exhaust leaves the motor compartment is also filed up because here the exhaust leaves in the 1938 model on the underside. The grill is glued in, and now needs to be sculpted. here are some photos 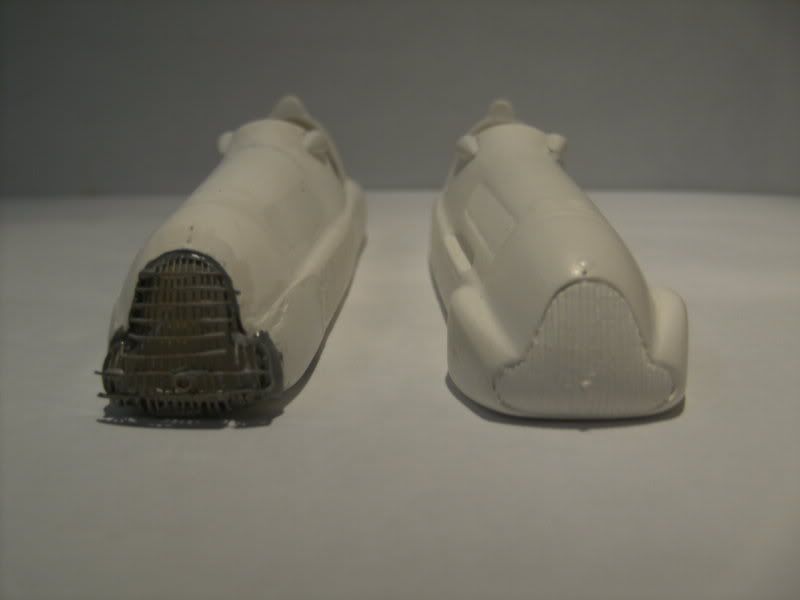 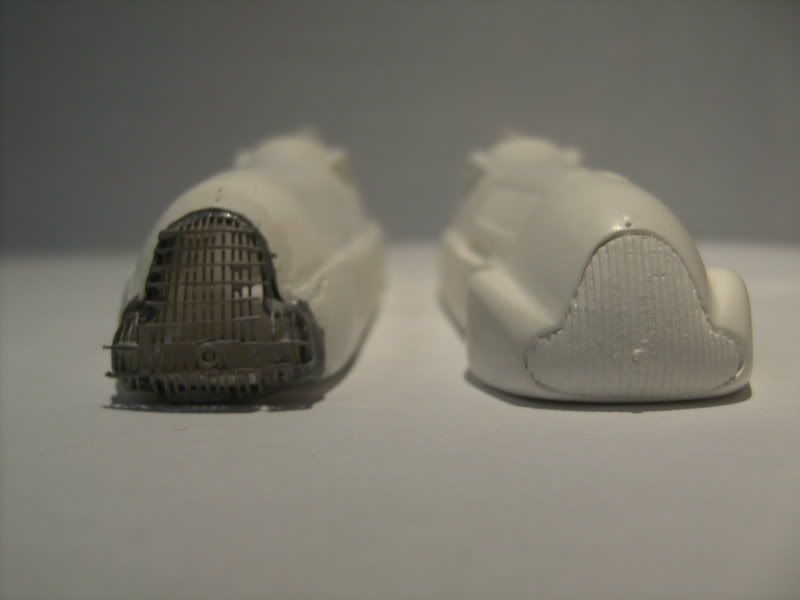 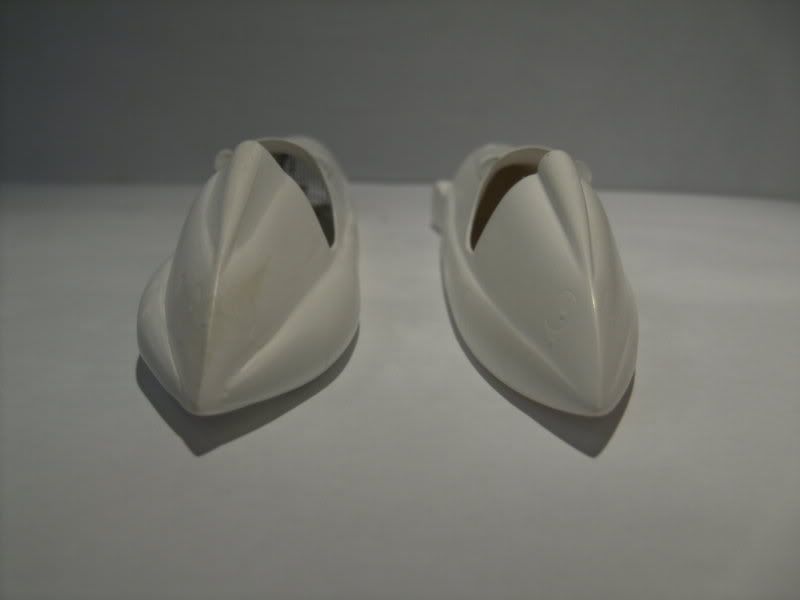 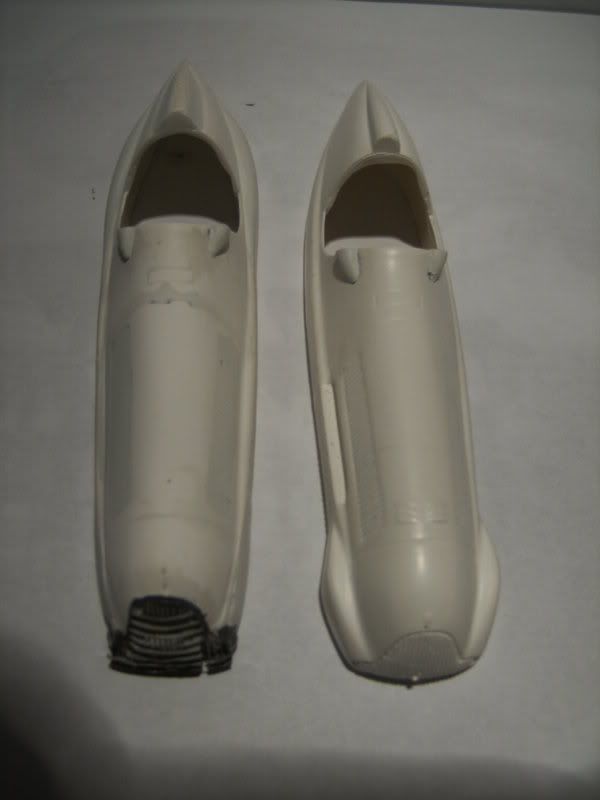 I also made a color photo cut out of a very early color film, this helps tremendously to determine the coloring of the cars. 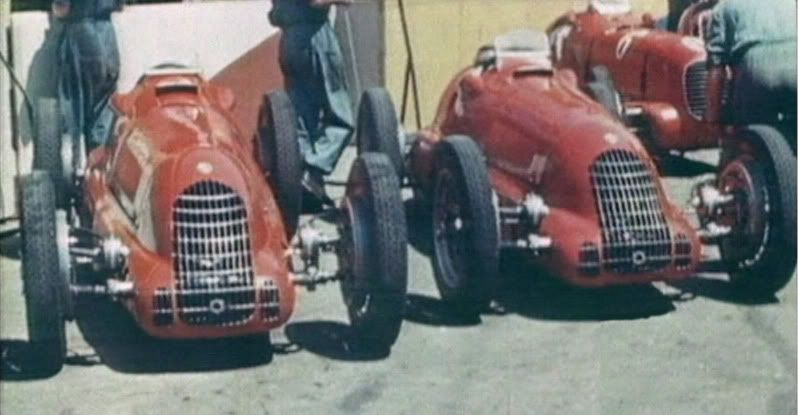 Cheers, Danny |
|
|
|
Post by nuvolari on Aug 5, 2012 13:48:26 GMT -5
next stage is fitting in the grill. this takes several days, not that it takes that much time but you must respect the drying times of several layers. Yesterday I've glued in the grill with JB Welt, a two component glue that forms liquid steel and is very strong ones it has dried, and also can be handled as steel. Today the rough form is set with white milliput and it starts to give the car it's looks. 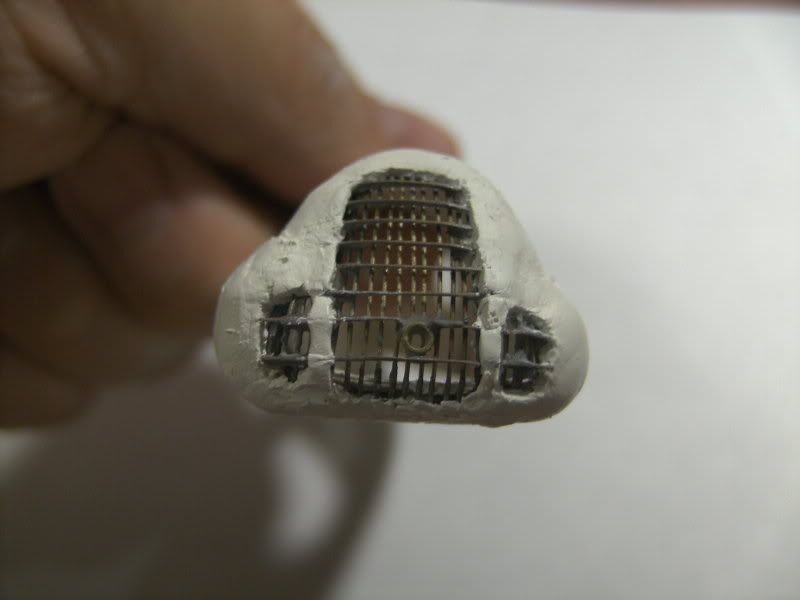 Next stage will be sanding it smooth and reaplying a second layer of milliput. Finley it will be finished with a fine layer of Tamiya modeling putty thinned with kibri plastic glue (39996). And this can also be a few layers before final result is reached. In the meanwhile also the new louvre are prefabricated. Is start with a flexible plastic sheet where I glue two strips on, with a 1Cm spacing. For the profile mould you need a suitable bottle cap.  Than you take a bit of two compound white milliput, make sure the two components are mixed very well. Than you press it in between the two plastic strips, and ones it's well smeared out, you make the surface wet with your fingers. 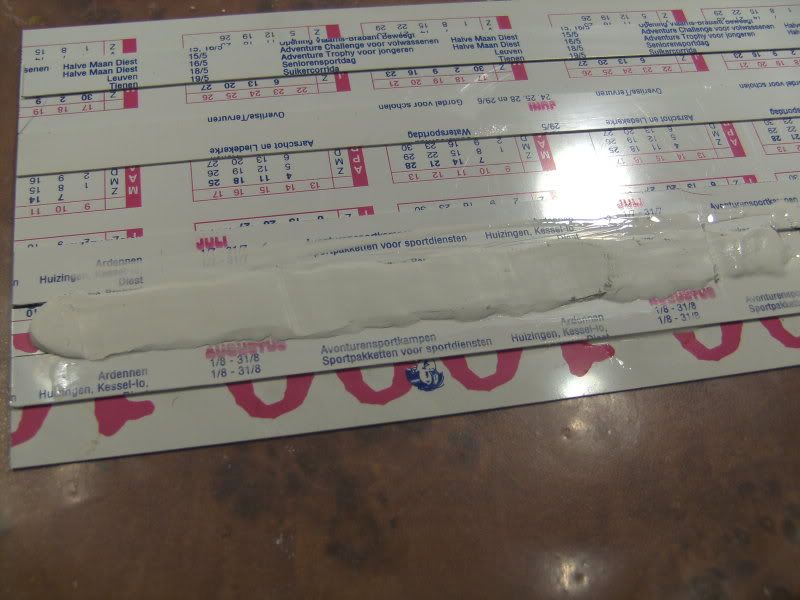 Than you make the bottle cap good wet and pres it in the milliput rolling it out using the plastic strips as a rail. Should your imprint not be satisfying, you always can make the milliput back smooth again with your finger and water and repeat the procedure until a final satisfying result is achieved. 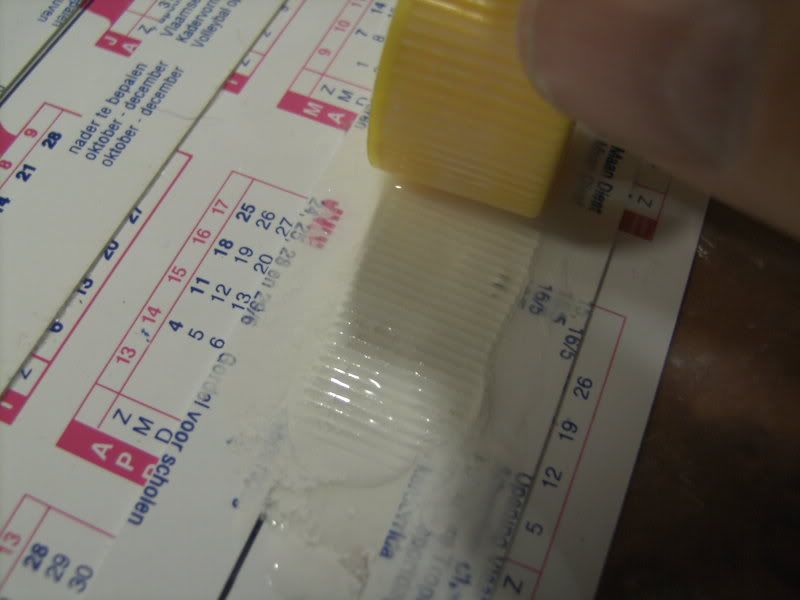 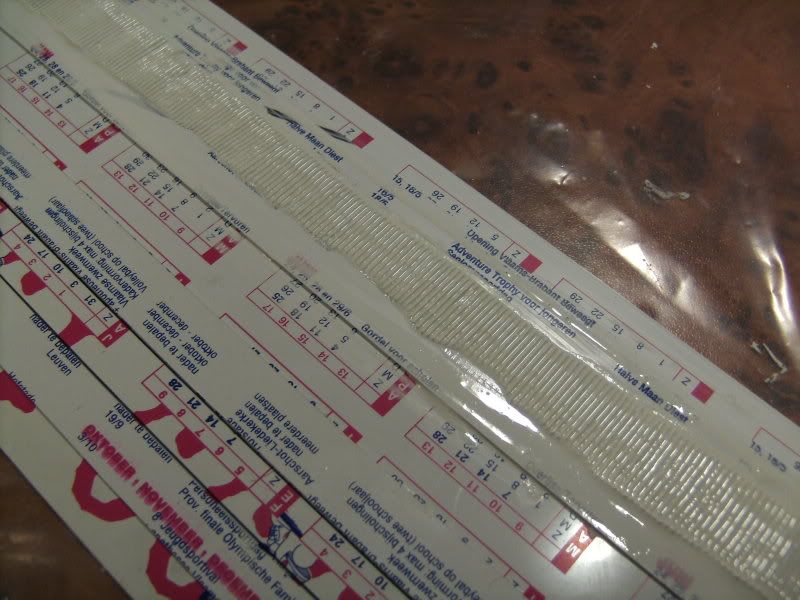 Than I take a knife and cut of the sides using the plastic strips as a ruler while the milliput is still wet and carefully remove the rests. 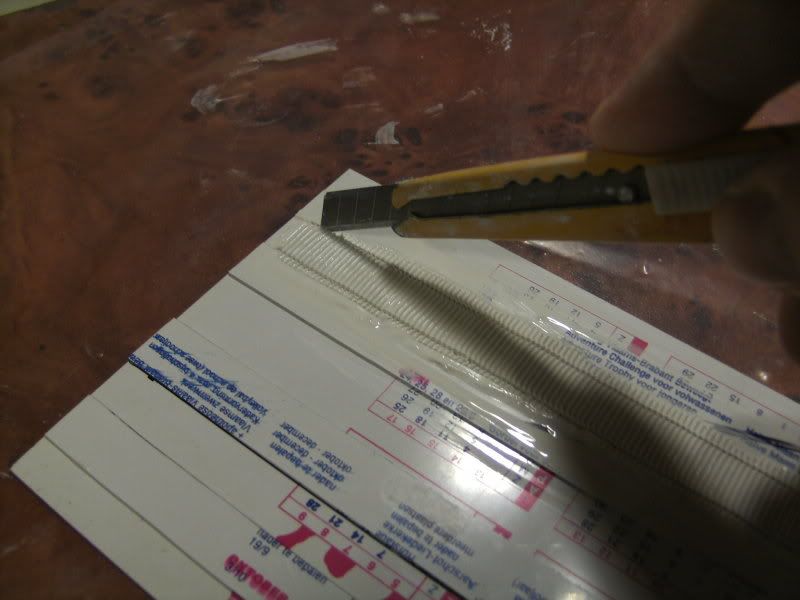 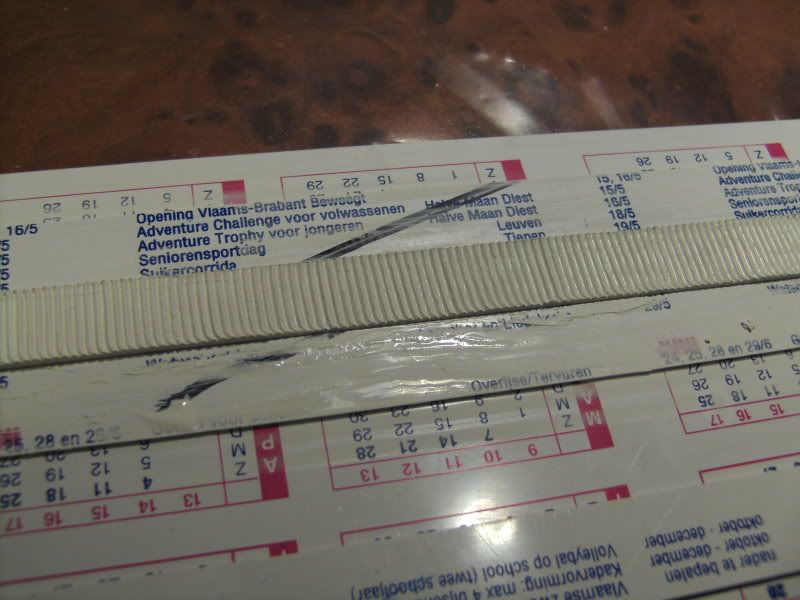 Than you leave it about 24H to dry, and carefully bent the plastic card, and the ready louvre pups out. then you just have to cut it to size and it's readdy. Should you have an other system to make louvres we're always interested to hear about it. Cheers, Danny |
|
|
|
Post by nuvolari on Aug 7, 2012 6:36:17 GMT -5
Here are a few updates. The grill is integrated and ready. Today the louvres where build in, but still needs to sanded smooth. The mirrors are also worked out but still need a finishing touch. 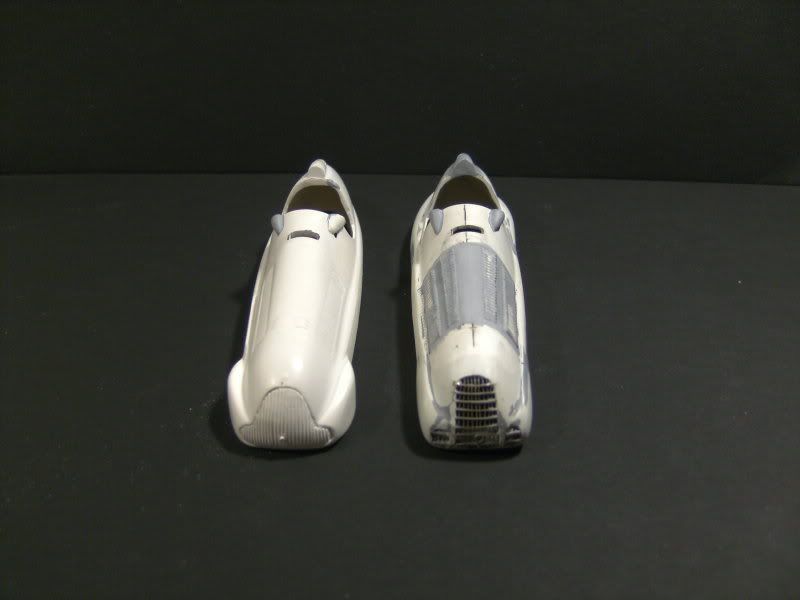 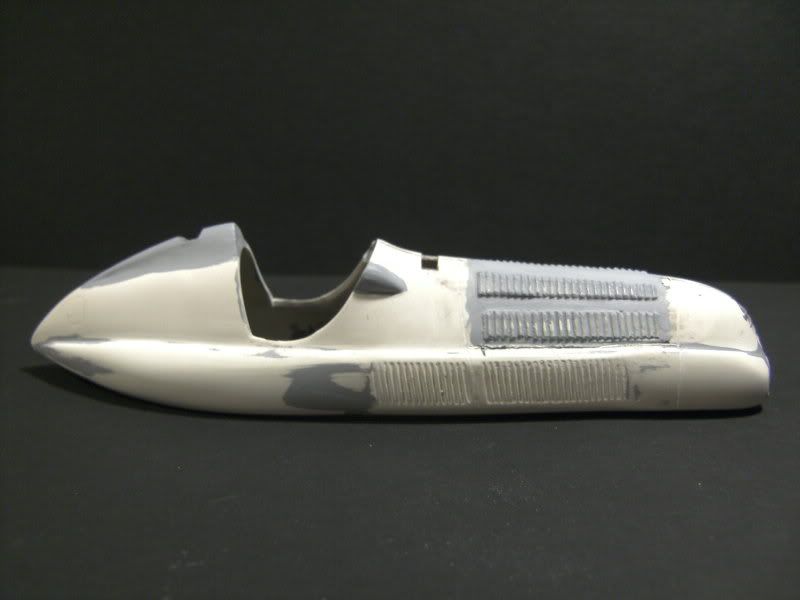 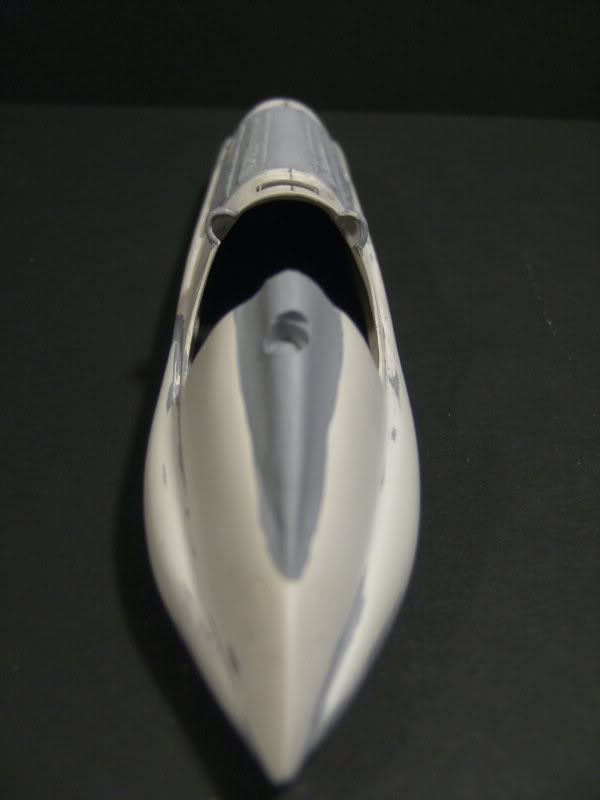 Cheers, Danny |
|
1500gp
Joakim Bonnier

Posts: 40
|
Post by 1500gp on Aug 9, 2012 7:03:26 GMT -5
wow yes, very good technik to do louvres ....  |
|
|
|
Post by nuvolari on Aug 9, 2012 7:54:52 GMT -5
Today I did a little bit of experimenting. I thought that it would be fun should the ventilating flap really open and close, so I came up with the idea to cut a plastic hinge that they normally use to attach wing flaps on RC model airplane, into size. Glue it in the inside of the body. Then make the flap itself out of bras sheet and attach it to the hinge.  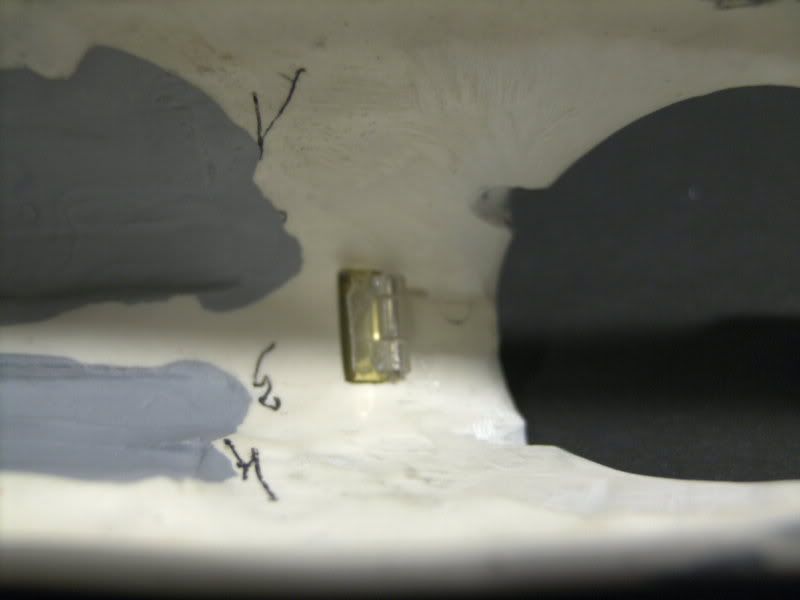 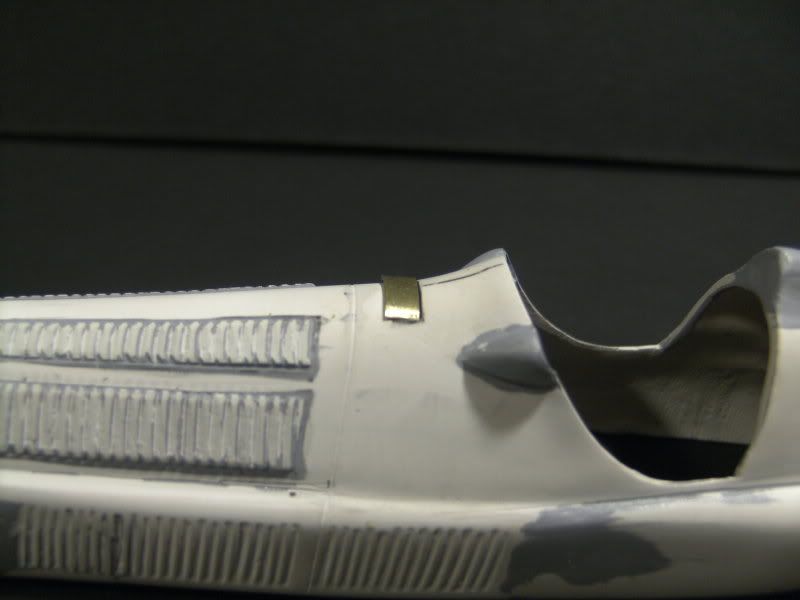 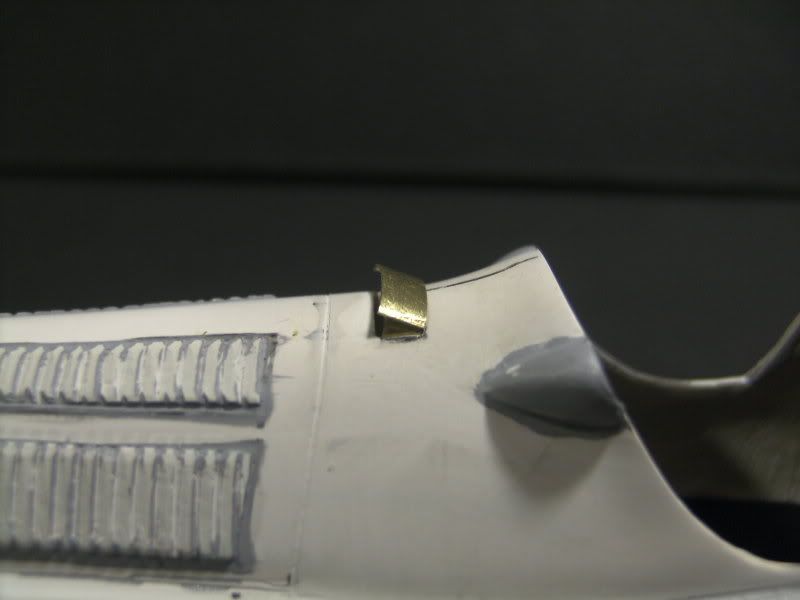 An other thing I've tried out was a way to put on the Alfa brand logo. I've got a decal sheet with Alfa logos and the smallest is about 2mm, just perfect for the cause. Than I took a needle with a 2mm head put the decal on. Made it soft with Micro Sol so it would stretch perfectly over the head. Than I drilled a fitting hole into the body, so the head will sink into the body, but still stick out enough to see that bulpy logo. Later when the body is painted the needle will be glued in. 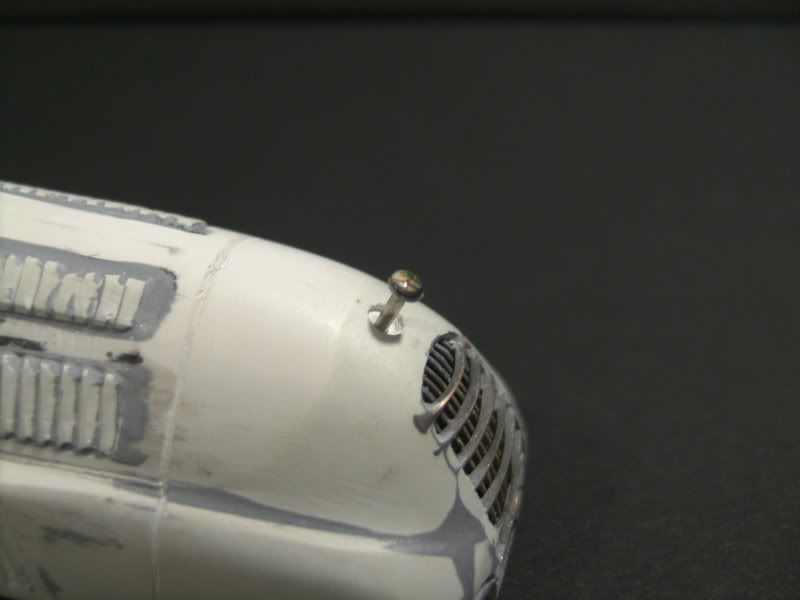 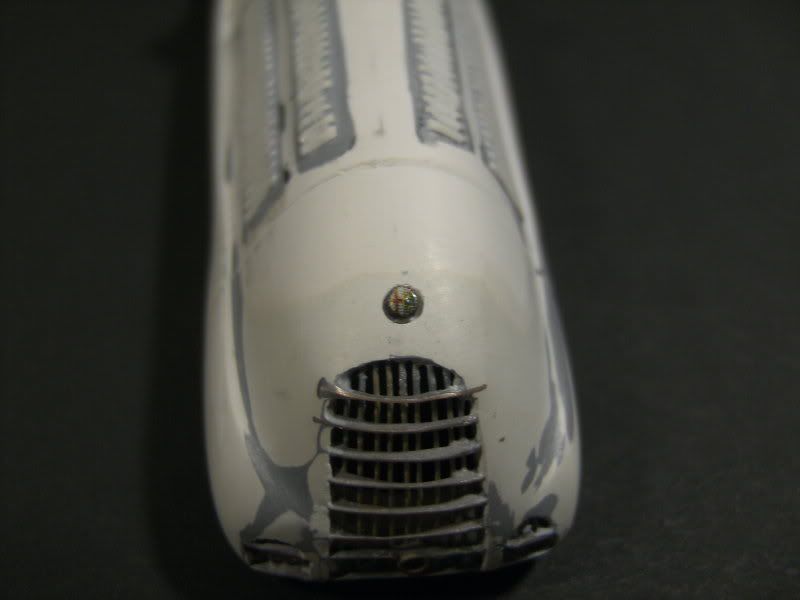 Cheers, Danny |
|


