Again a slightly longer post. The text is translated with google translator...
Since my vacation is still going on, I finally had time to build the farmhouse. It is the central point of the farm, everything else is grouped around it, so I finally had to build this first so that this part of the scenery could by and by become more attractive.
Most of the Scalescenes kits I've used so far have been half-relief constructions, so I still have a proper respect for complete buildings. In particular, the question of whether everything fits together as intended by me, and does not result in a crooked structure, always worries me a little.
In addition, of course, the effort to manufacture such a complete building is considerably higher than with a half-relief.
Well, I finally wanted to go on, since the design of the further farm area depends on the size of the house. So without the farm house I can't get any further.
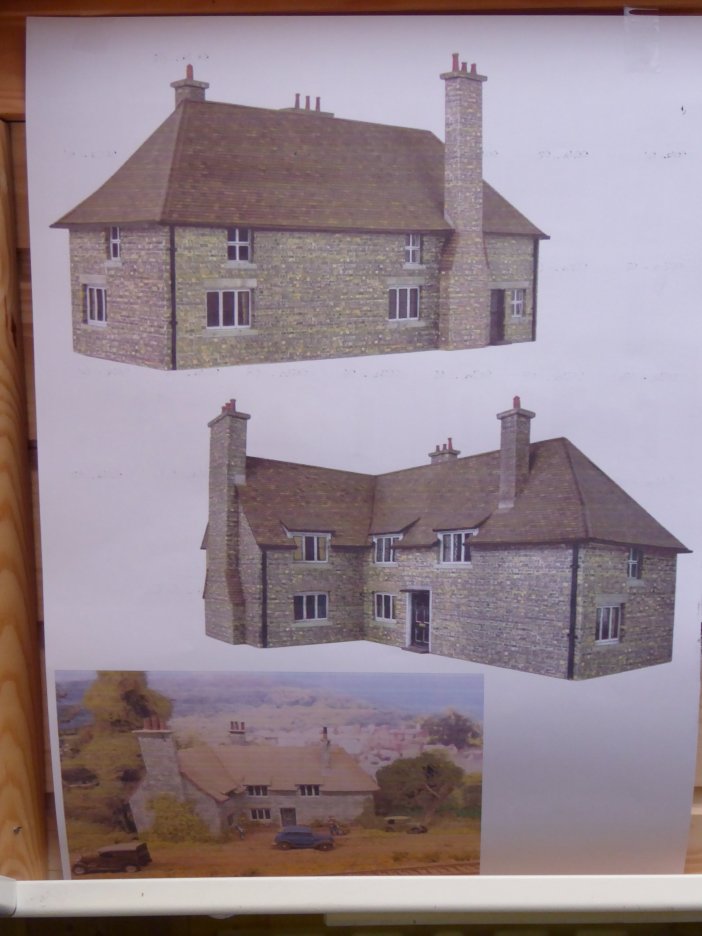
The finished house should look like this:
The Scalescenes buildings, although intended for the 1:87 scale, usually always include complete interior fittings. However, I forego this in order to reach my goal in a reasonably acceptable time.
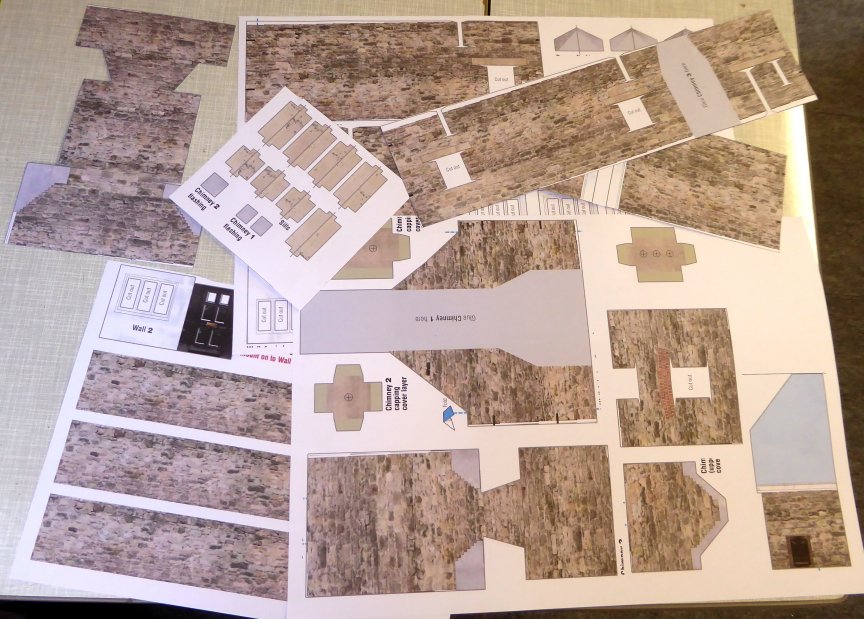
I have already described the procedure for scaling up the file sheets, which should be printed in their original format on A4 paper, elsewhere in this construction report. Enlarged to about 1:35 format, there is the problem that these "sheets" are much too large for my A3 printer, so that the first, very time-consuming step is always the disassembly of the individual .jpg into its components and the re-arrangement to the A3 format.
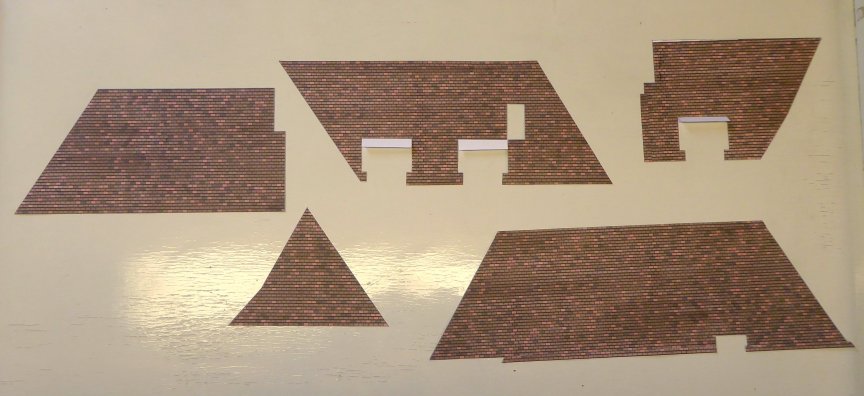
Here are the printed and partly cut parts:
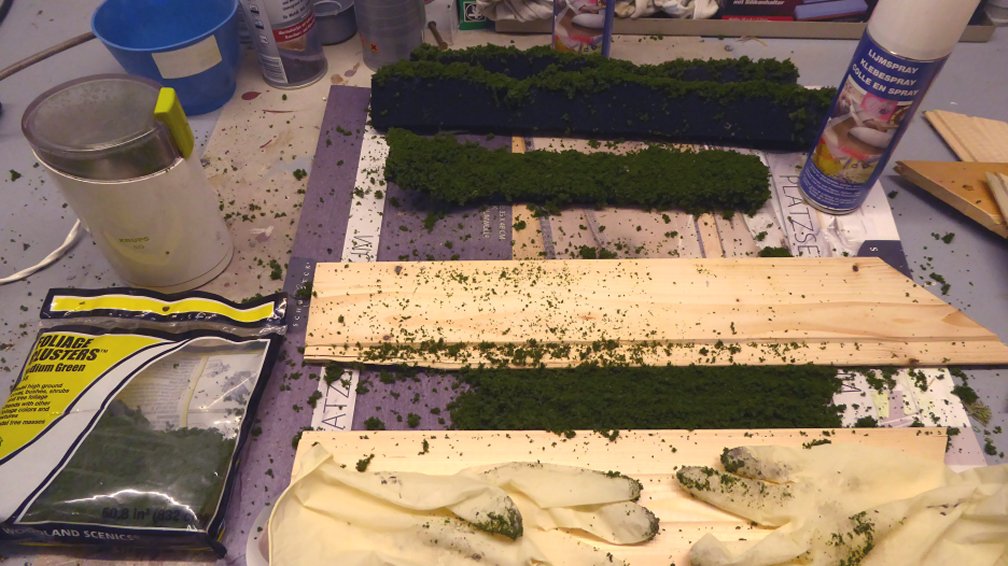
The roof parts cut out….
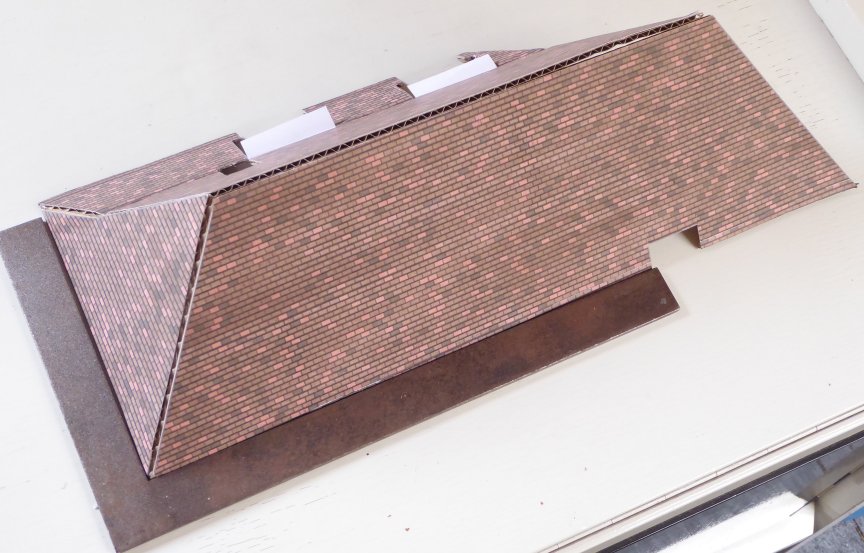
... glued to rough cardboard and the edges blackened with felt pen...

... and assembly with hot glue and with a stop bracket:
So far so good.
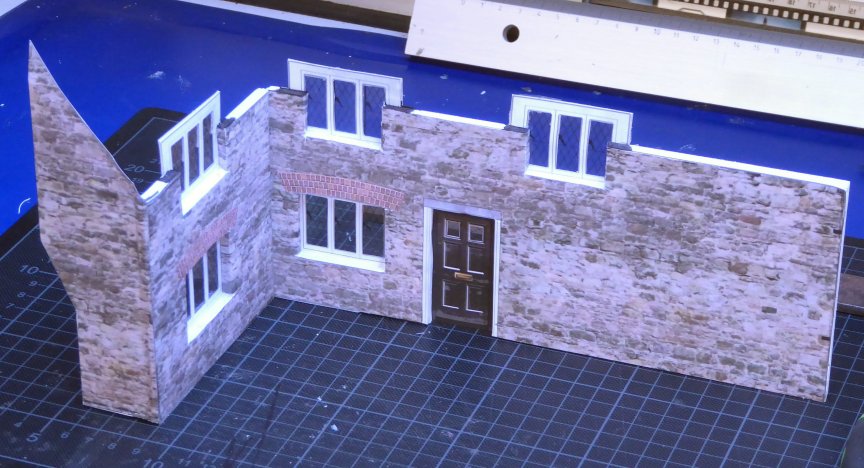
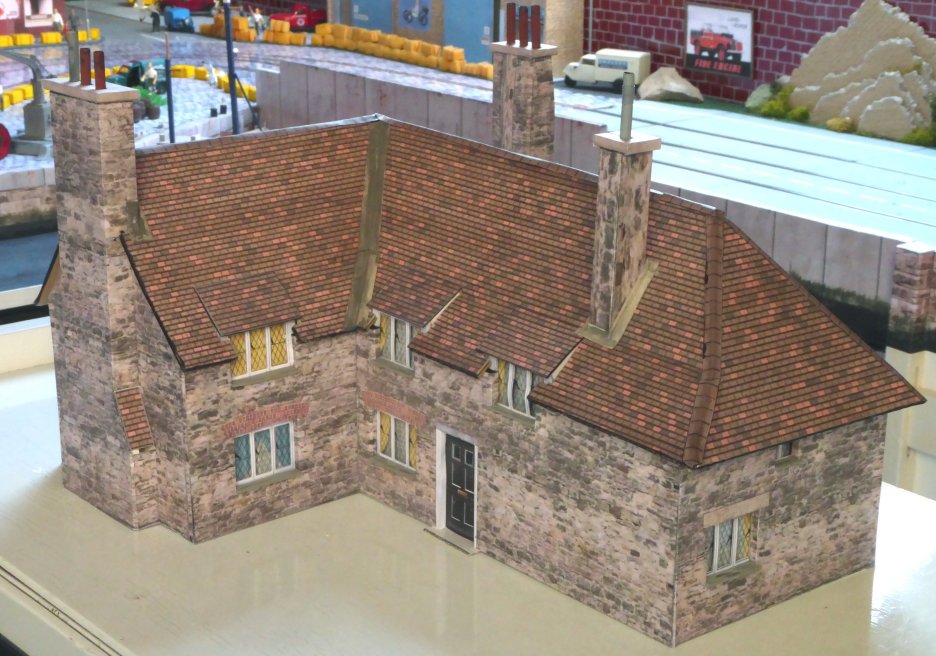
Now the wall parts. For reasons of stability and to obtain the necessary three-dimensional effect on the window reveals, they are glued onto 5mm architectural cardboard.
The window structure consists of several parts. The window frame is glued on the inside against the window cut-outs, behind it the “lead glazing” printed on transparent film. Then there is a thin wooden mixing handle on the upper edge of the window frame, so that the curtains and curtains then glued to it have a certain depth effect.
I started assembling the front, here yet without the "curtains".
My initial fears that the styrofoam liner of the architectural cardboard would melt under the hot glue had not been confirmed in the previously built houses, so that I now only join the house parts with hot glue. Cures quickly, perfect for me. You just have to be careful not to burn your fingers if you touch the glue prematurely!
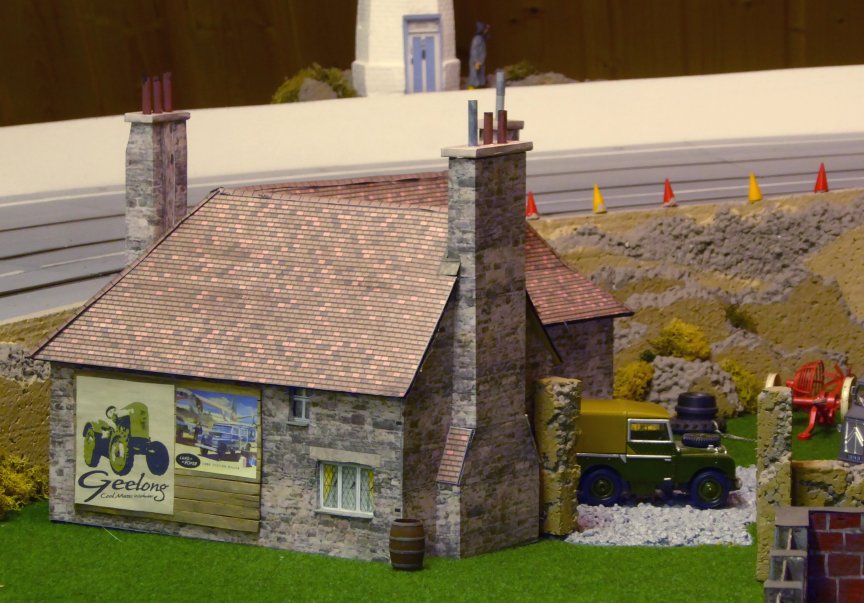
Side parts and rear wall, as well as the two outer chimneys. The latter have a complete styrofoam core so that they have enough stability. As a typical English stovepipe, I used black drinking straws, which are painted on the outside, the inside is already perfectly black. You can see that even better in later photos.
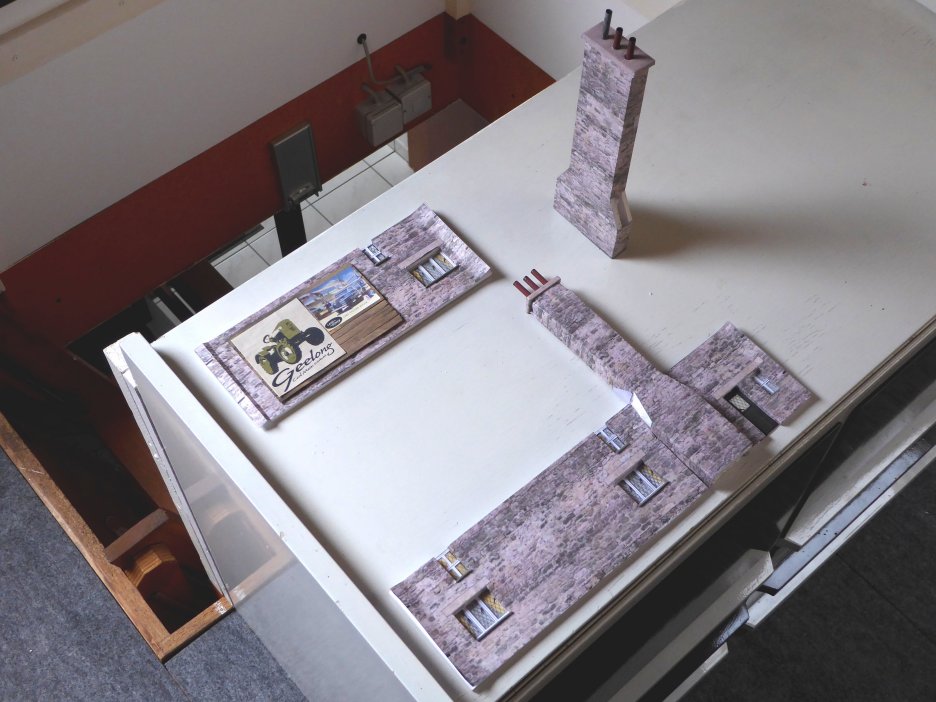
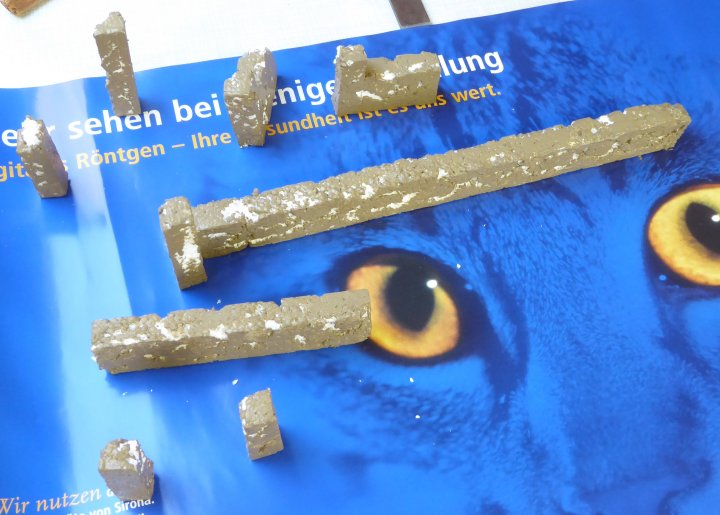
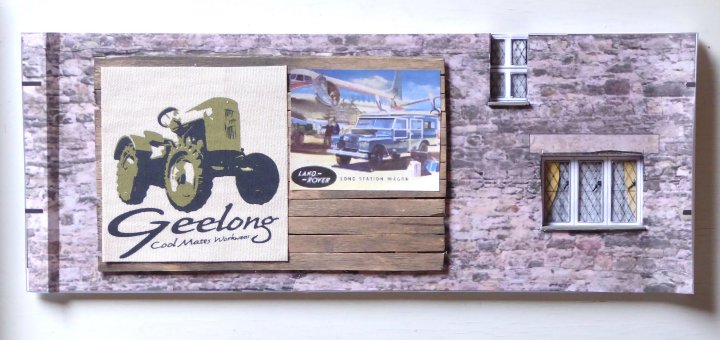
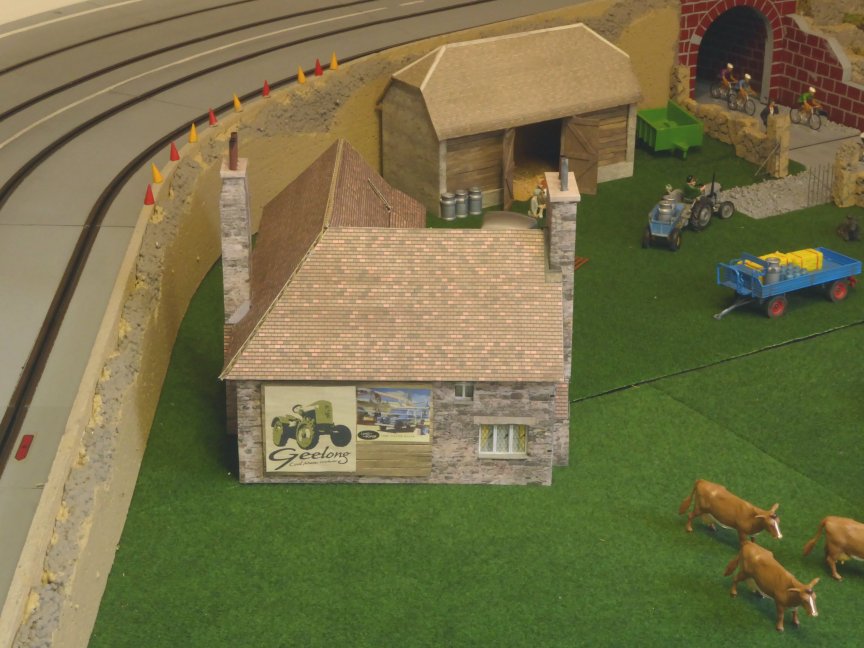
In order to "beautify" the later most visible side of the house, I stuck together an advertising board from stirring sticks and, as already described often, aged with a diluted brush sump, my all-purpose patina.
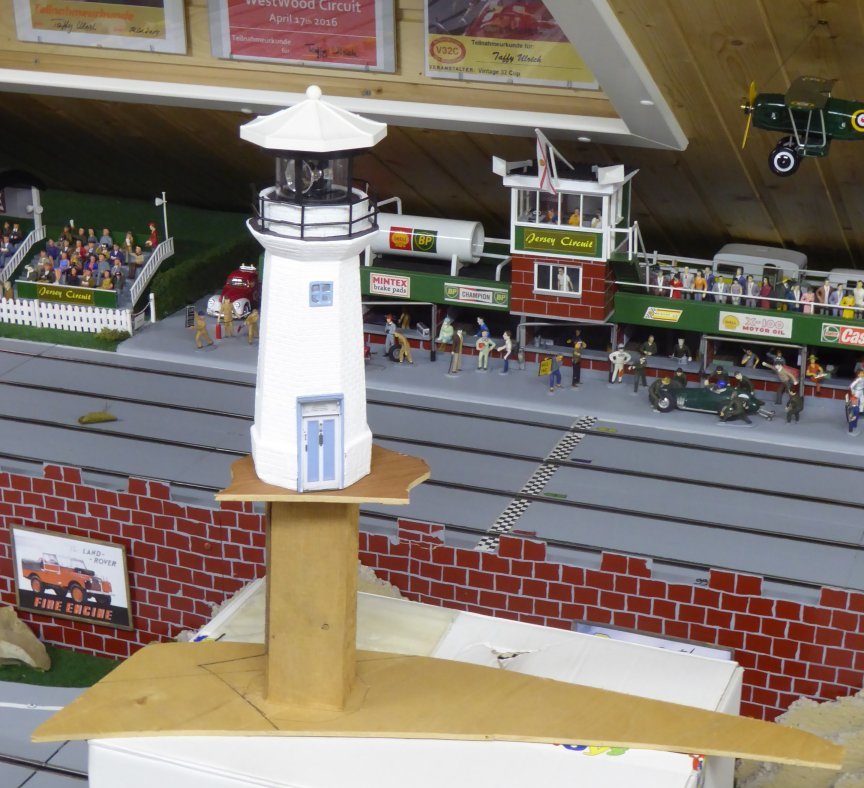
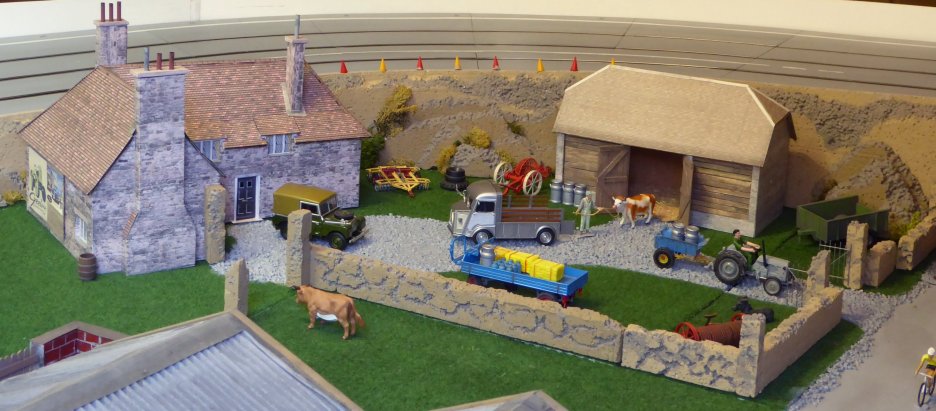
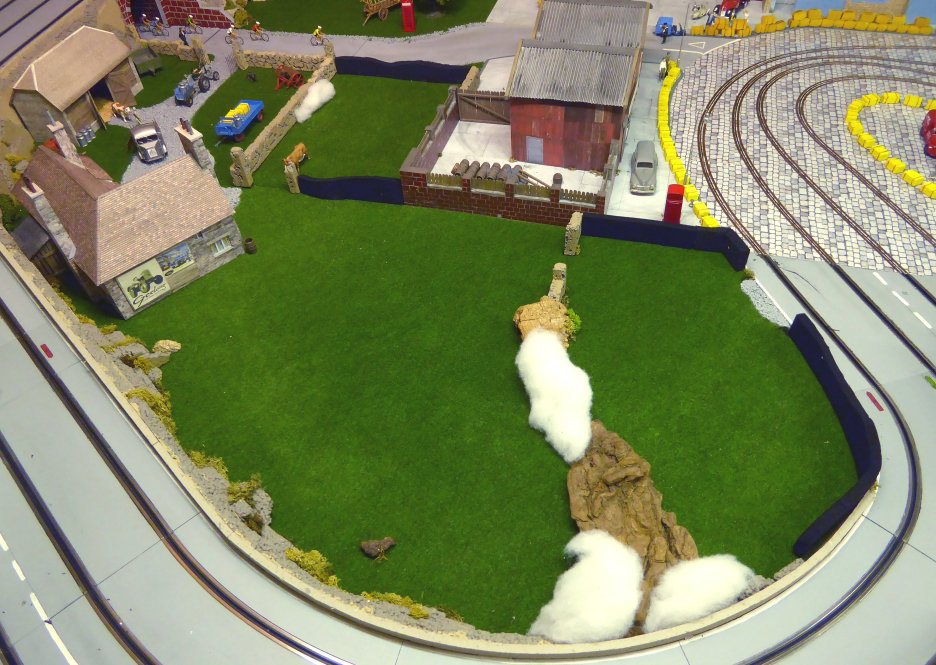
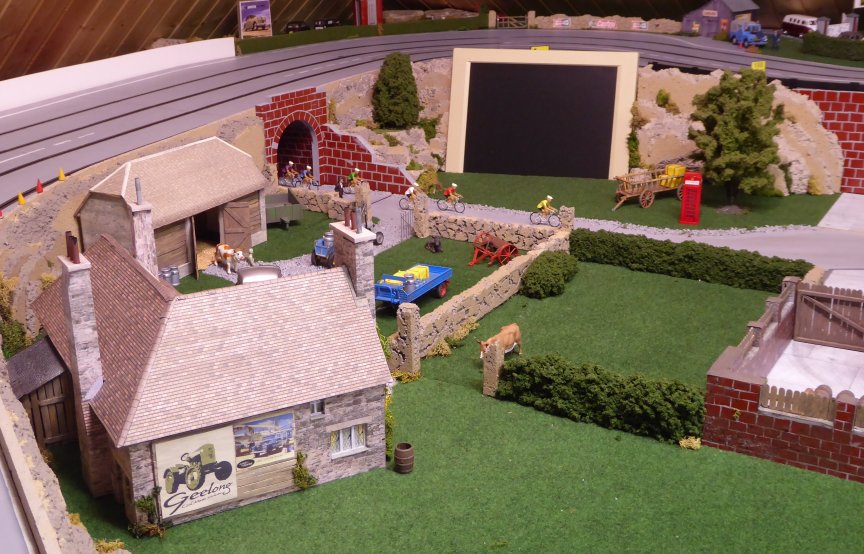
Here is the not quite finished house at a first “landscape test”:
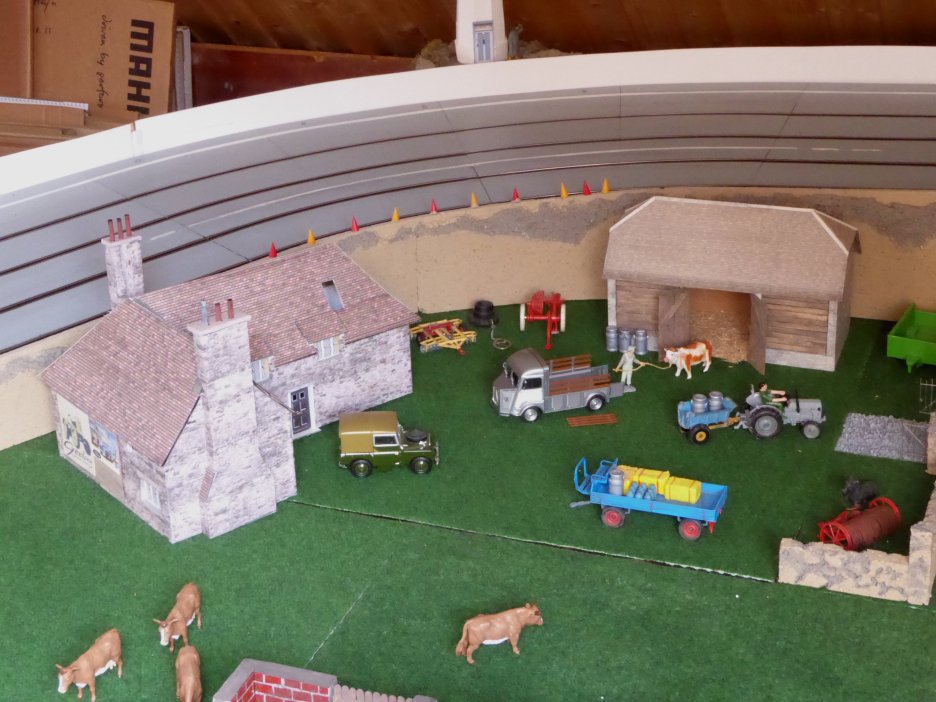
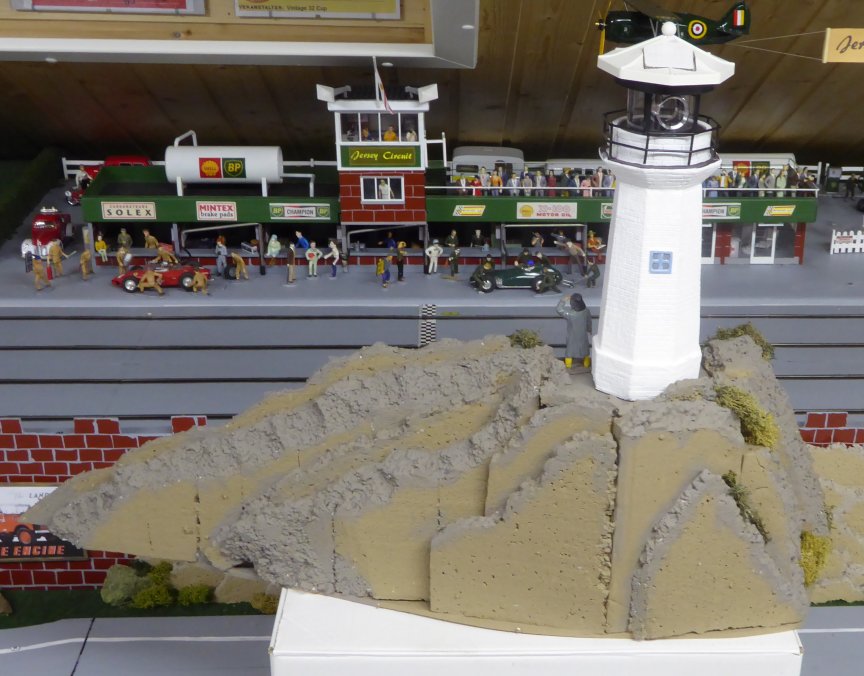
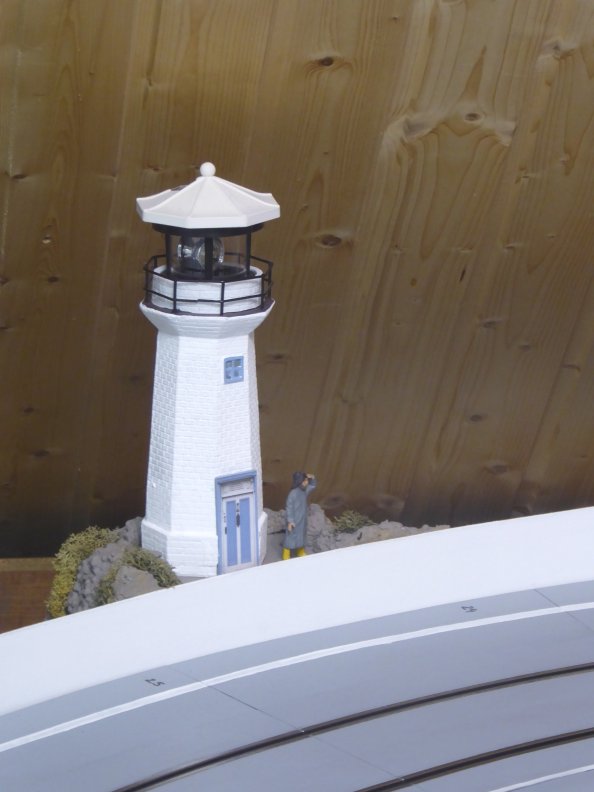
Assessment of the distance between the house and the "rocks":
Decision: The space in between should be closed by an attached shed (again: stir sticks and some corrugated cardboard), here in the picture on the right side:

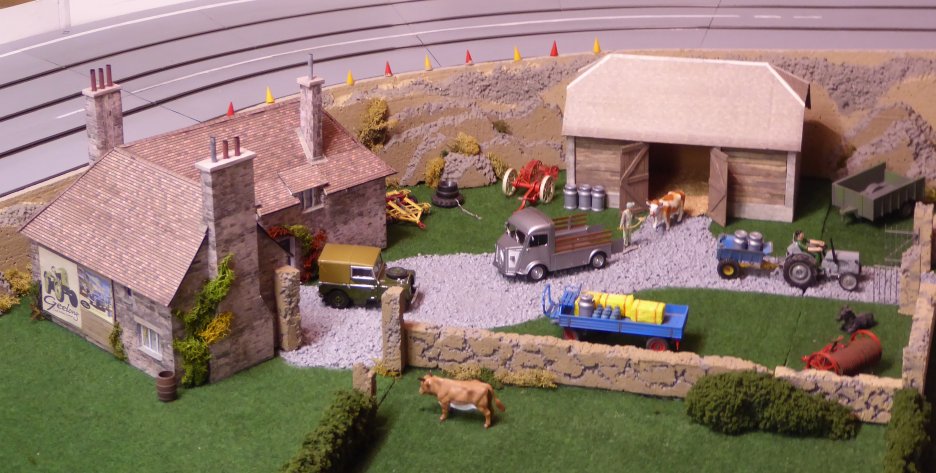
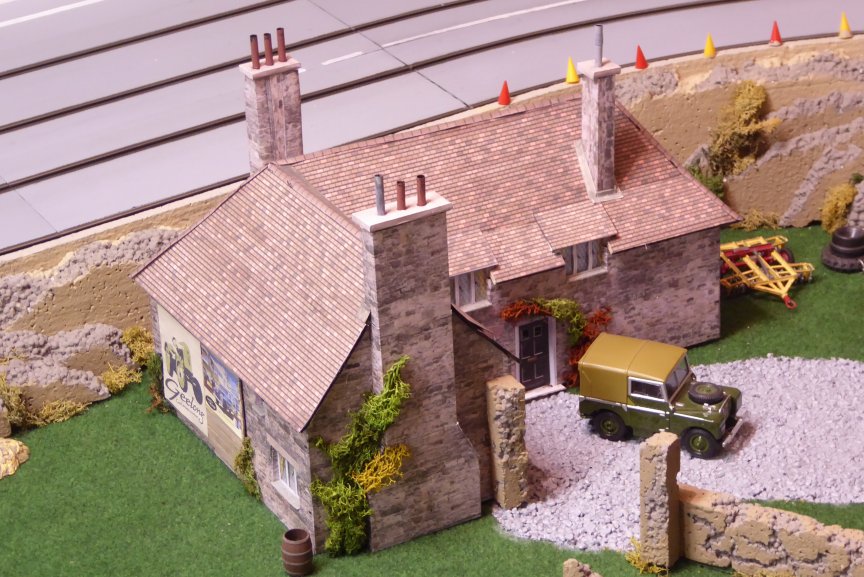
Too bad, you will hardly get to see the relatively nice front view later. Here is the finished house. I also use stir sticks for the window sills. Ridge tiles and seals of the chimneys are attached, the chimney pipes can be seen better in this picture. I do not use gutters and downspouts.
The house has a length of 40 cm (17 inch), the chimneys are 25 cm (10 inch) high. This is not a very small format, but the house on the track looks rather small (especially due to the perspective distortion in the photo):
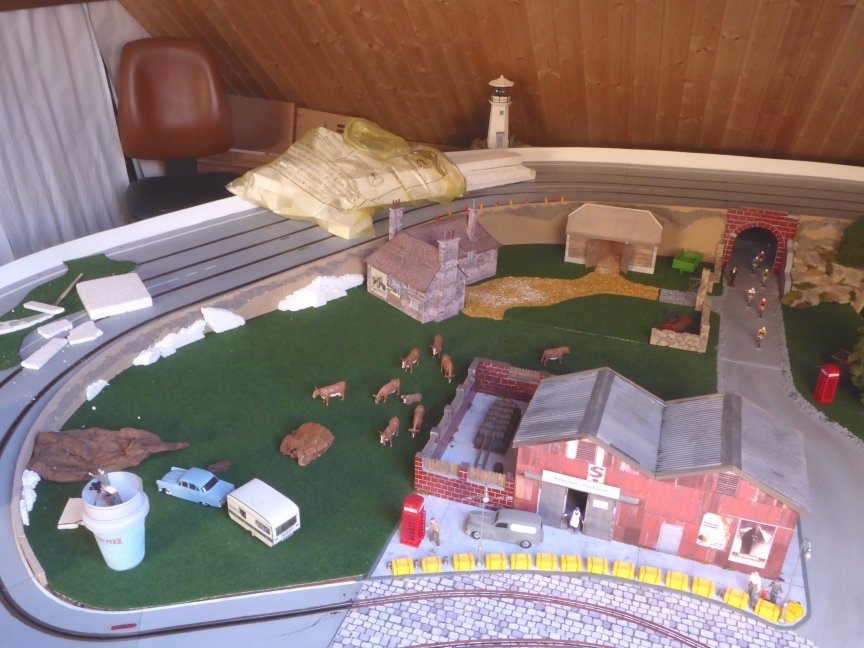
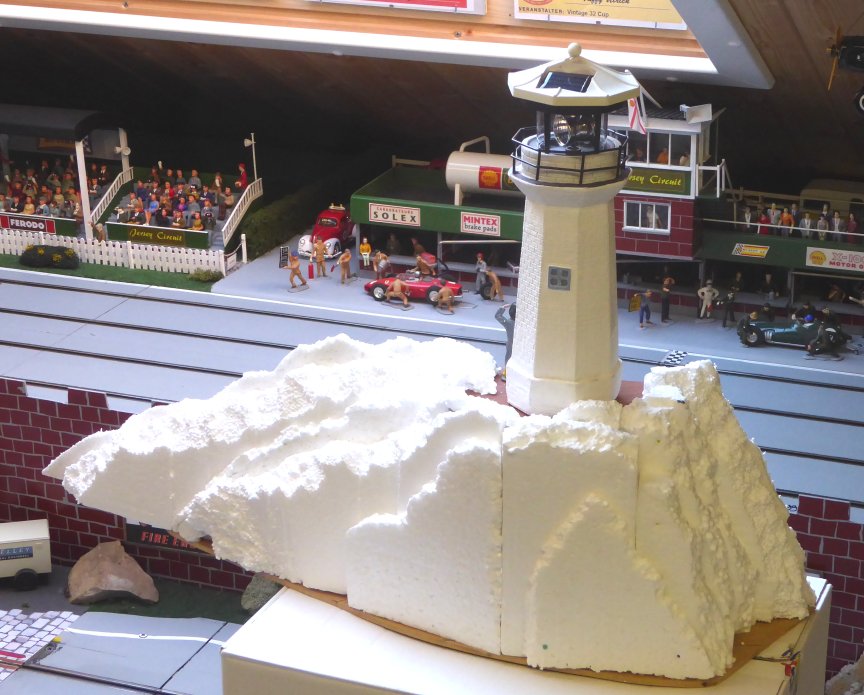
Landscaping has already started here. The lawn carpet is cut out, the interspace is generously loaded with wood glue and the gravel is strewn. After drying, I will paint it gray.
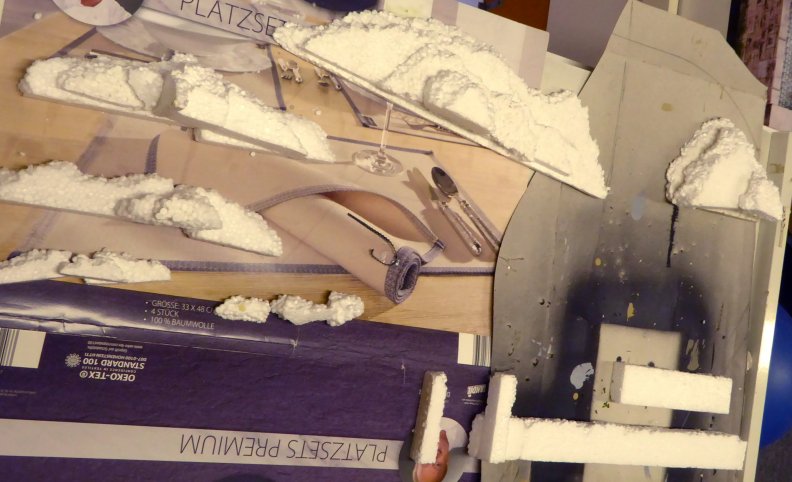
And the further design of the rocks with polystyrene begins.
I'm looking forward to continuing to tinker with it over Easter. Unfortunately, due to the summer temperatures, it is almost too warm on the roof again. I need some rain to cool down the temperature!
I wish you all a Happy Easter!
To be continued.


 Taffy
Taffy