|
|
Post by Taffy on Jun 8, 2020 13:50:58 GMT -5
Hello Richard,
thank you very much for your kind words. It gives me pleasure when my reports provide inspiration for the construction of other racetracks.
You can also imagine that it will be a lot of fun for me to continue building the Jersey Circuit - and I am sure that I will not run out of tasks in the next few years...
Best regards,
Taffy
|
|
|
|
Post by Taffy on Jun 17, 2020 7:45:51 GMT -5
It was high time to finish the farm. But sometimes you can't get to the final details…. But now I have built the pasture gates out of shish kebab skewers and aged them in the usual way. I also made the fence for the chicken yard in the tried and tested way using coffee stirrers and provided it with the same color coating to show the weathering. Now that's the result: 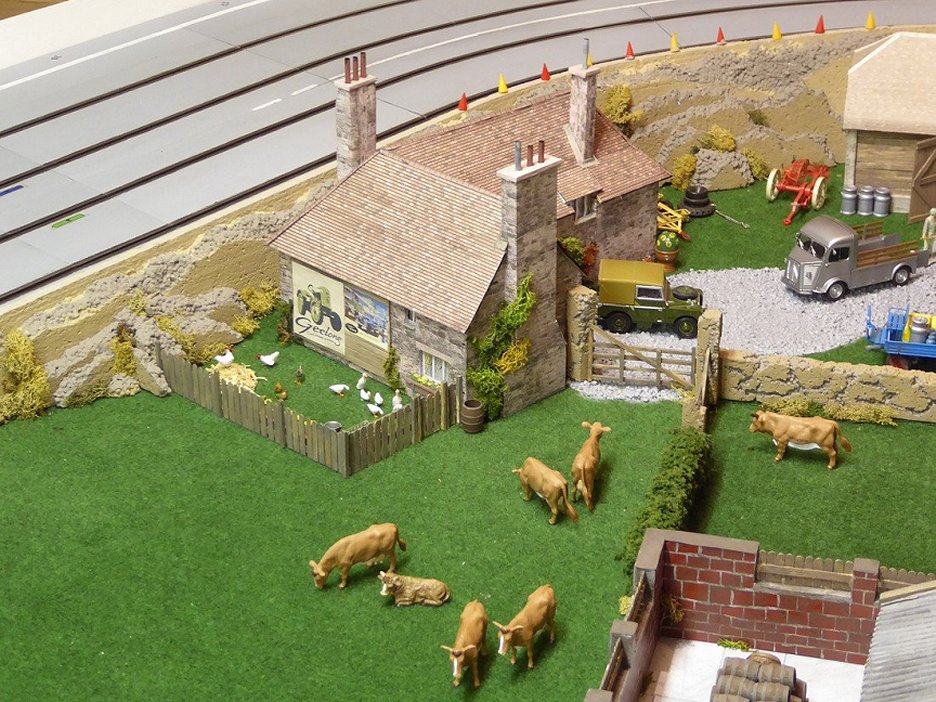 The animals of the goose and chicken farm come from a toy set, as well as from this Tamiya 1:35 kit: 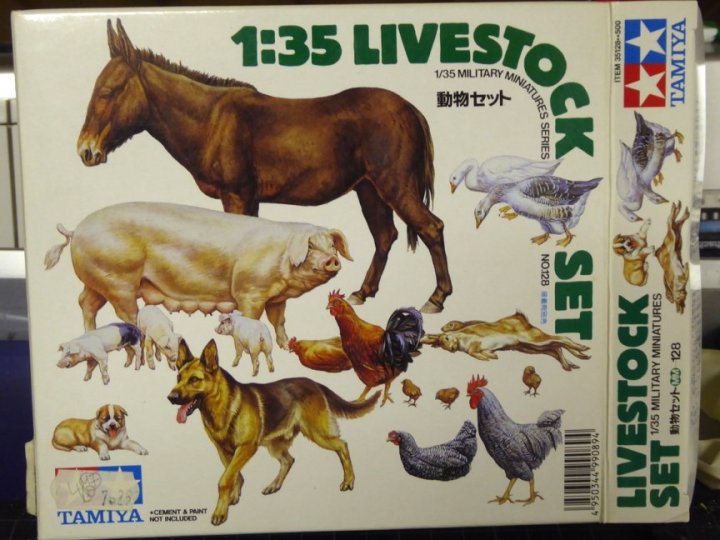 Of course, the animals from the kit still had to be painted, the ones from the toy set were already colored. A closer look at the courtyard shows the residents: 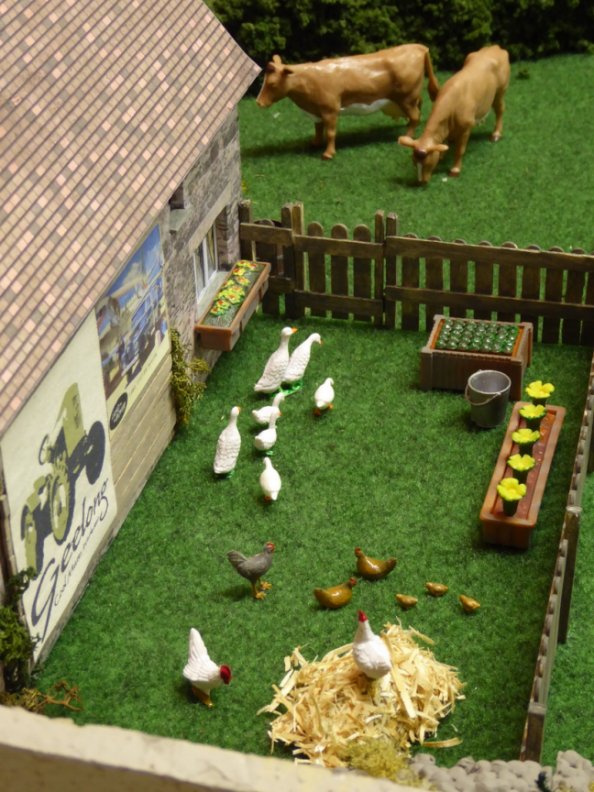 The small, separate area for the BBC racing reporter team has also been given pasture gates. 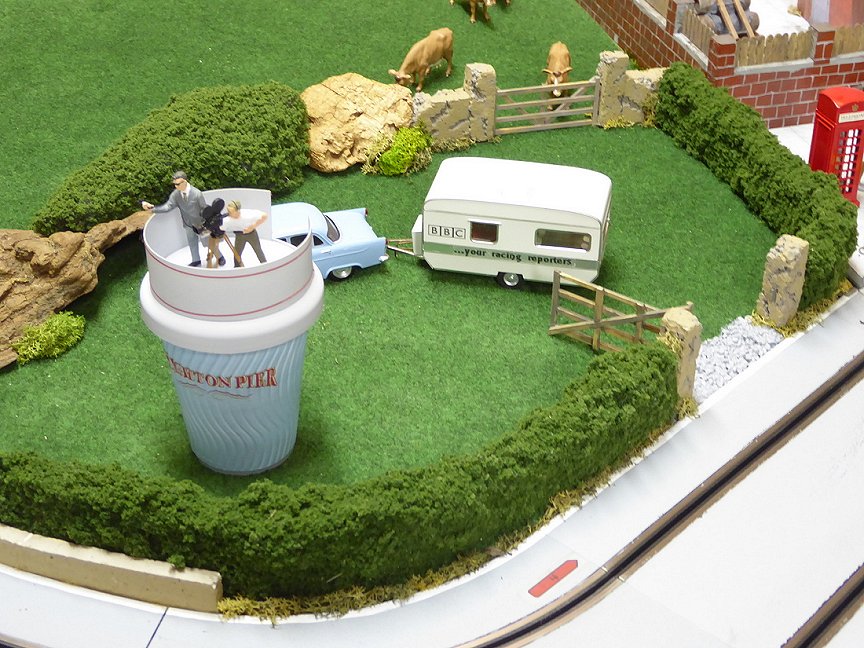 Except for one, the gates are glued in place, you usually don't get as close to them as to notice. However, I have provided the gate to the front of the track with hinges so that it can be opened and closed. 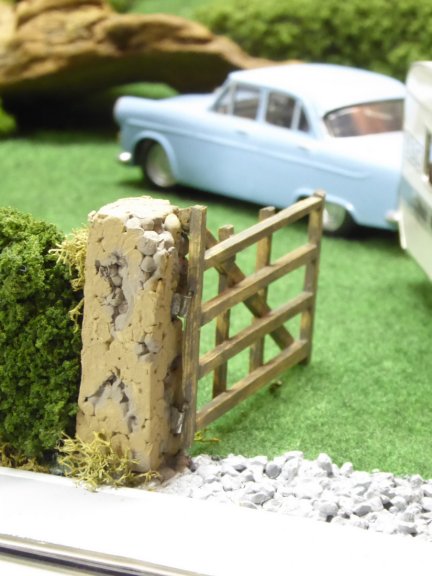 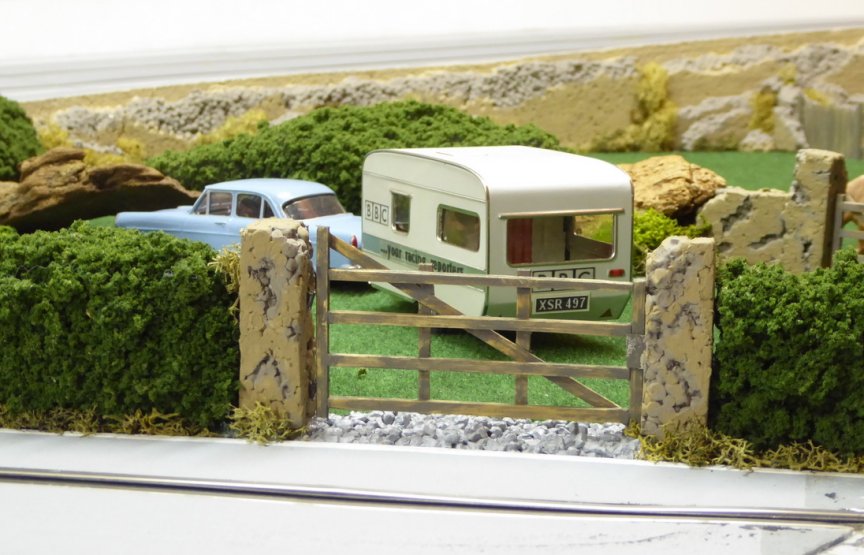 The farm is finally finished. Although not quite yet: the last detail to be made is the ladder leading up to the camera tower. To be continued... |
|
|
|
Post by 73emgee on Jun 17, 2020 10:15:52 GMT -5
Great Stuff!!!
|
|
|
|
Post by Taffy on Nov 15, 2020 14:23:05 GMT -5
A little update on how things have continued on the Jersey Circuit since summer: First of all, I once again devoted myself to the area around the track and built in room dividers and shelves so that the attic looks a bit tidier. That also gave me the opportunity to set up a small “wall of fame”. Because of my rather modest driving skills, most of them are concours prizes. But that too can make me a little bit proud. 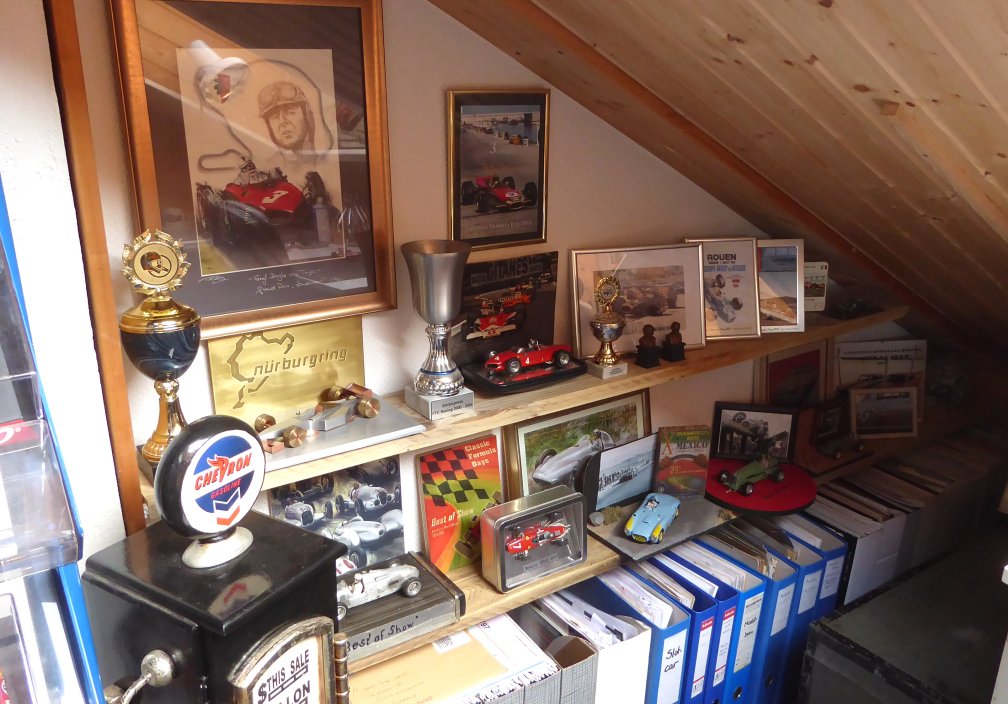 Then I finally framed my racing posters from previous and current racing series and “plastered” the sloping roof with them. 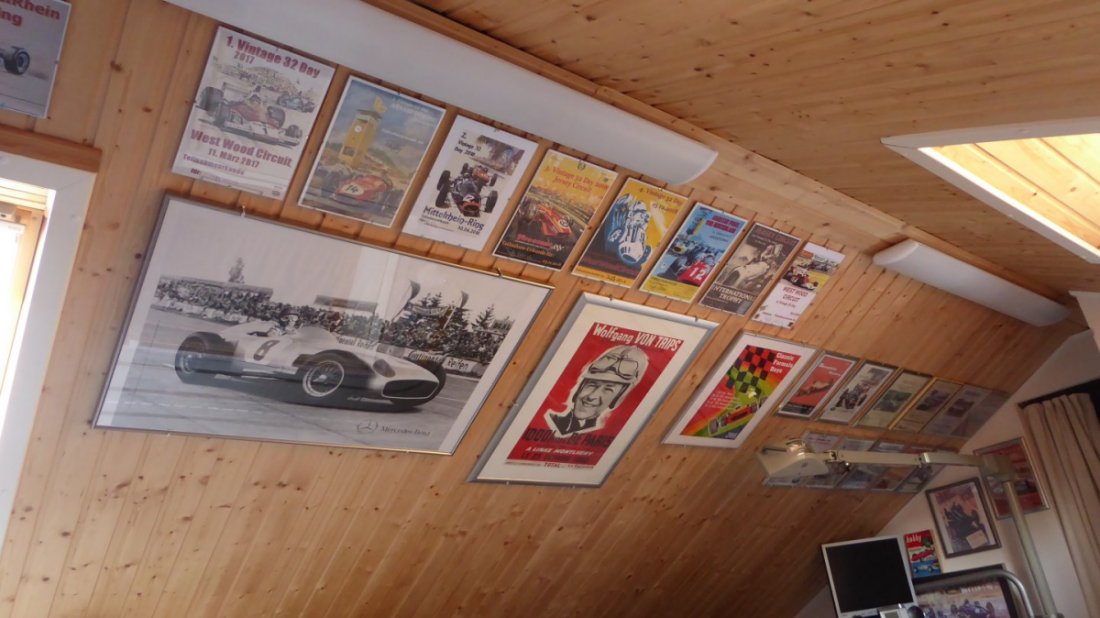 As you can see, my namesake appears everywhere.. A new visitor has arrived on the racetrack, a young pilot skilfully landed his Swedish vintage biplane on the meadow in front of the farmhouse without running over a single cow or even a chicken: 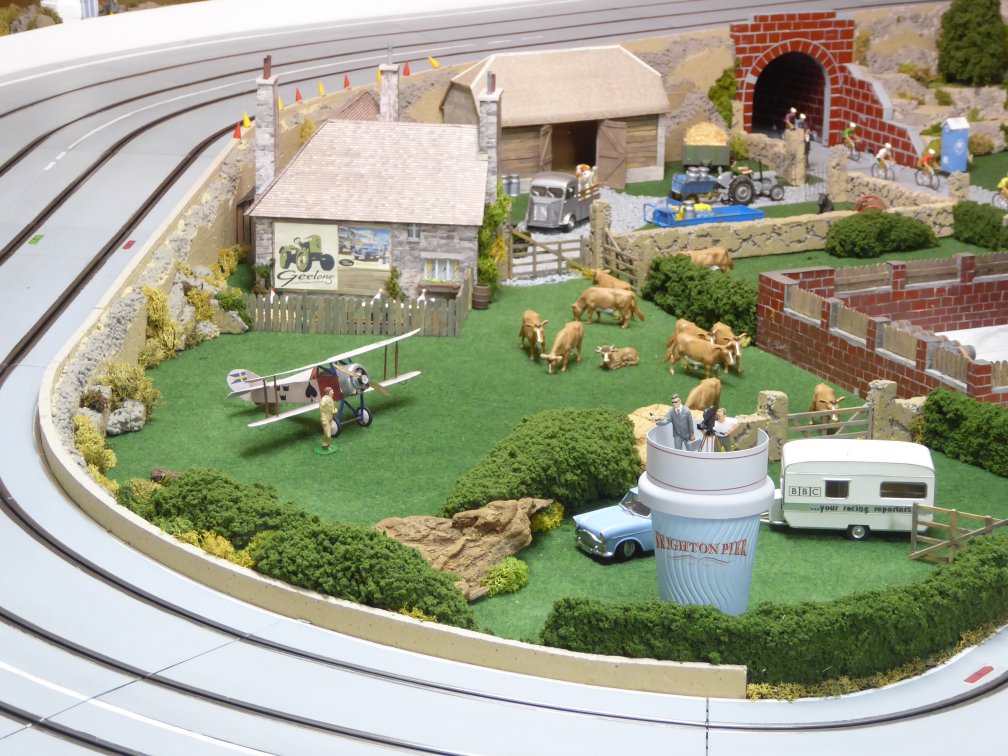  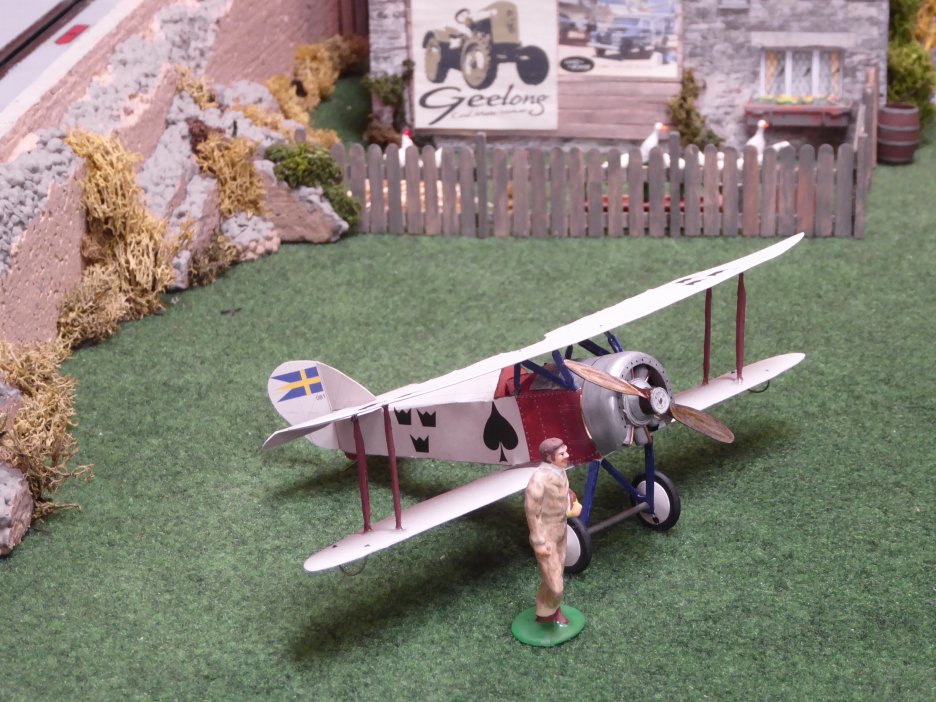 It was the first time in 40 years that I tried to build a complete paper airplane kit. It is the kit of a "Tummelisa", a training aircraft built in Sweden from 1919 to 1925 for the Swedish Air Force. Like many paper airplane kits, it comes from Poland. The widely used scale for paper airplanes is 1:33, which of course fits perfectly into the existing context. I have to admit, however, that I've forgotten a lot since then and I'm only reasonably satisfied with the result. From a distance it works to a certain extent, especially since I've added a few details, such as oil or fuel lines on the engine made of copper wire. However, with the really fragile plane, I do not dare to approach the actually intended tensions between the wings. It is quite a difference to “building houses” from paper and architectural cardboard, where you are almost exclusively dealing with straight surfaces and right-angled corners and edges. In addition, the building instructions of this kit translated from Polish using Google Translator were not always easy to understand and required a lot of knowledge. Sometimes you only notice afterwards what you did wrong. And then tear a paper kit apart again... No way! Actually, this should only be a preparation for two WW2 planes, which I want to install with a surviving fighter plane from my youth in the flyby in front of the grandstands in "Goodwood-style". But I had underestimated the degree of difficulty with a biplane with the clean alignment of the wings. With a plastic model it's somehow easier...
Unfortunately, I´m not able to update my thread in the slotforum international.
To be continued |
|
|
|
Post by Taffy on Nov 27, 2020 6:17:23 GMT -5
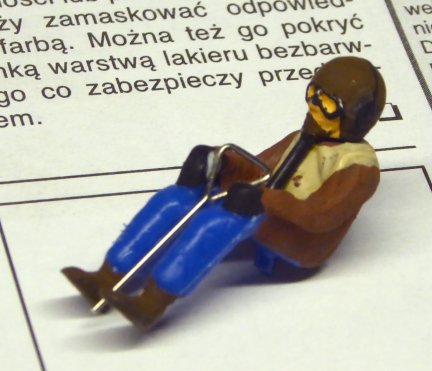
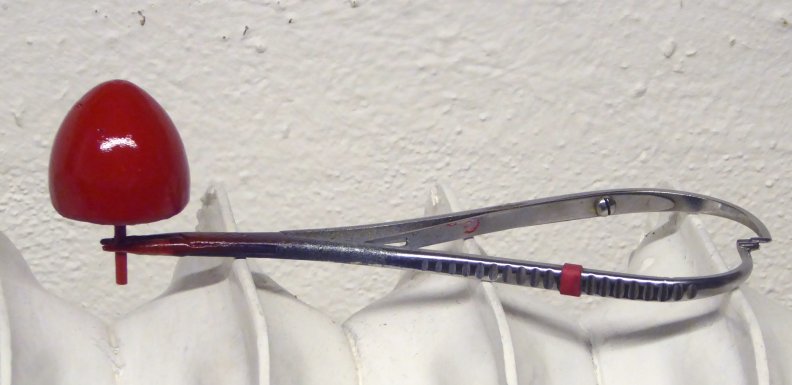
n the meantime, there has been further progress in designing the scenery. I don't want to turn this into a post about military or airplane models, but that's the topic for now. As I wrote above, part of the planned scenario is to simulate a flyby of various WWII fighters at the main stand, as will be shown as part of the program at the Goodwood Circuit Revival. As already mentioned, the decisive factor for the idea was the model of a Messerschmitt 109 that was left over from my youth. I then ordered two paper kits of Polish origin from Kartonmodellshop.de, one the English Hawker Tempest from Maly Modelarz, the other the Russian Lavochkin LA5 from Modelik in the slightly more expensive version with laser cut parts. First, I took the Hawker Tempest, which was a bit easier to build, and for which I had ordered an optional Lexan hood. The model is that of the Hawker Tempest MkII, which was developed at the end of the Second World War as the successor to the MkI and was no longer used in the war itself. The model shown in the kit corresponds to a machine that still exists today. In order not to let this get out of hand, I will restrict the building description a little. The body of the machine is made up of several segments, which are reinforced by appropriately shaped inner parts. A particular difficulty for me was to get the curve of the fuselage well according to the shape of these inner parts without causing kinks in the parts. With the help of a YouTube tutorial, that was more or less successful. 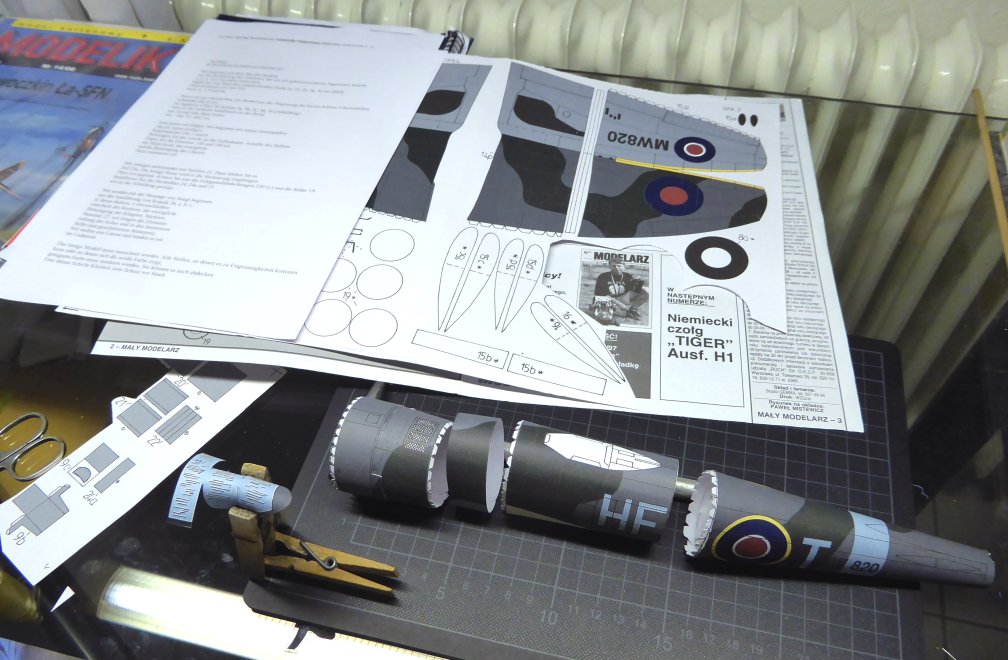 It soon became apparent that the Hawker Tempest is a real bump compared to the previously built, small Tummelisa. On further research, which I did because the aircraft seemed very large to me, I found that the Hawker Tempest was one of the largest single-engine machines in World War II. 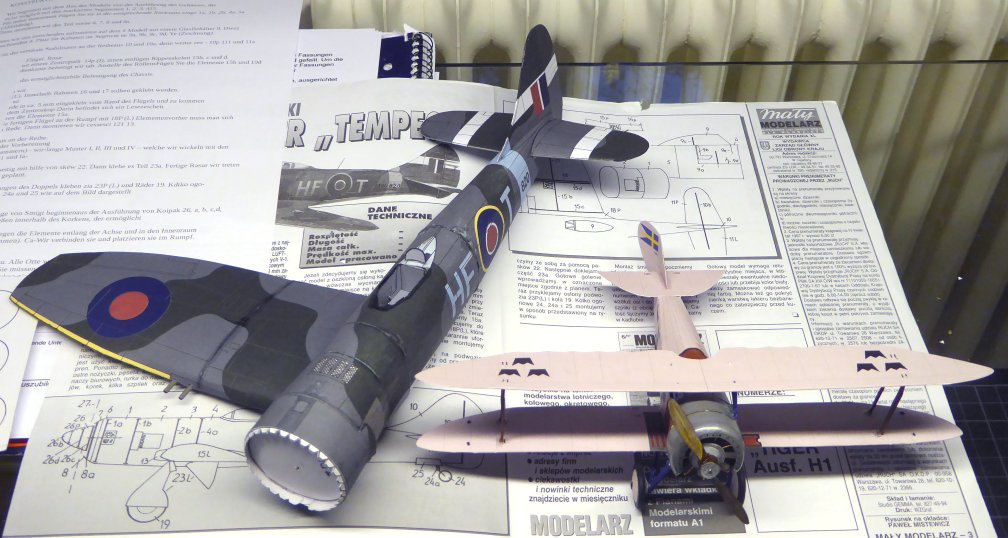 A simple cockpit design was included in the kit, so a suitable pilot had to be found, which I made from a Ninco driver figure. ![https://www.taffys-home.de/JRR/HT_MkII_10.jpg]() When installed, it looks quite passable. I didn't want to exaggerate my commitment here, as you don't see too much of it later in the flyby scene. 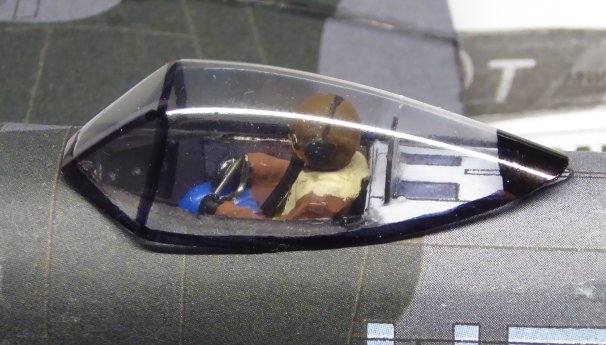 Making a clean propeller nose from several pieces of paper seemed too difficult to me, so I used a champagne cork that I cut to length, then screwed in a milling cutter and clamped it in my universal motor, twisted it off with sandpaper and then filled it and painted it. 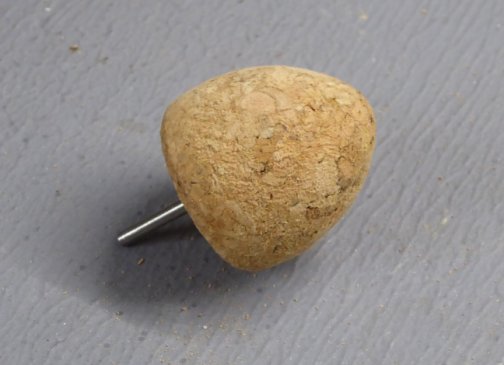 ![https://www.taffys-home.de/JRR/HT_MkII_16.jpg]() Perhaps a few more hints: With paper models, it is fundamentally important to color all the cut edges with a felt pen so that they do not stand out unpleasantly as white lines on the model. I also aged the model by partially roughening the surface with fine sandpaper and then repainting with a felt pen. I then sealed the model with semi-gloss zapon varnish from the spray can (of course, I only glued the canopy on afterwards!). I think that will be enough as a construction report. Here is the finished model:
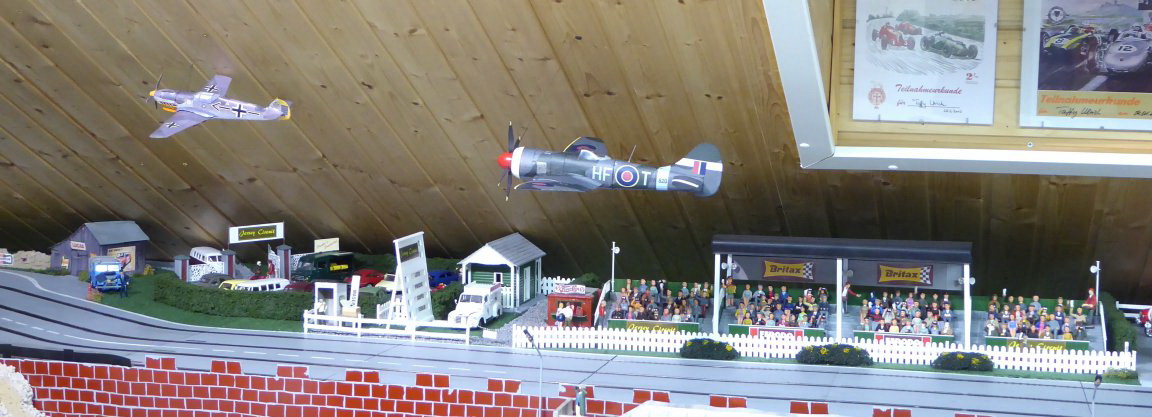
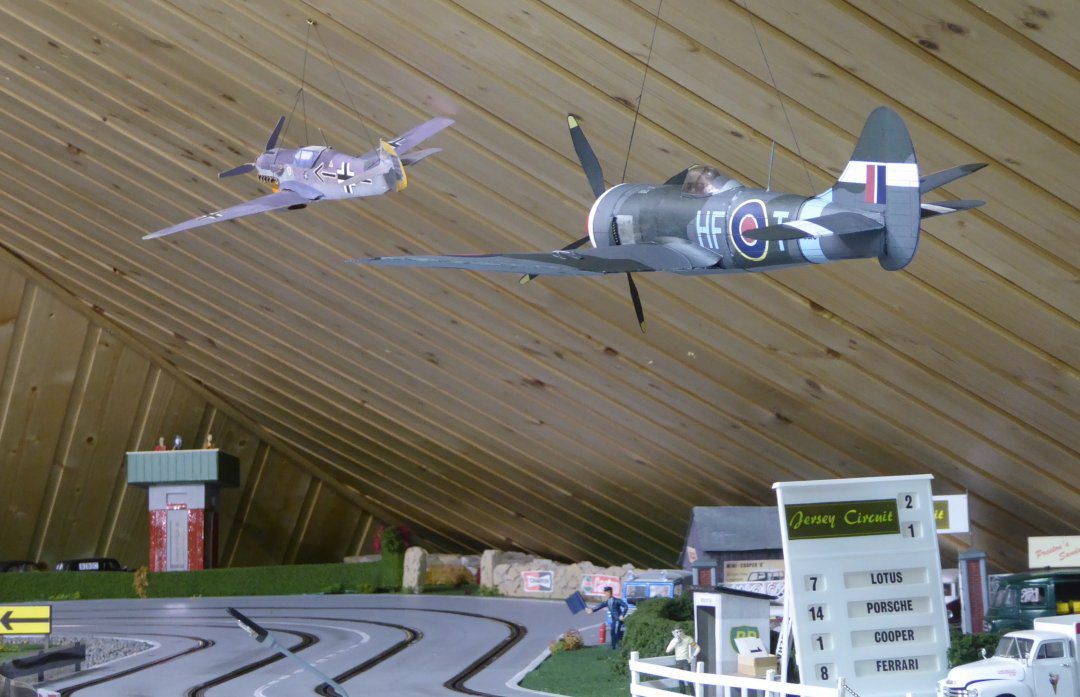
![https://www.taffys-home.de/JRR/HT_MkII_19.jpg]() And here integrated into the scenery: ![https://www.taffys-home.de/JRR/HT_MkII_20_02.jpg]() ![https://www.taffys-home.de/JRR/HT_MkII_22_01.jpg]() Unlike in the photo, the black twine that I used to hang it up is actually not noticeable when you stand in front of the models. Since the model of the Lavochkin LA5 is much more complex to build than that of the Hawker Tempest (and I have no patience for it at the moment), things will now continue "non-militarily" on the Jersey Circuit. To be continued |
|
|
|
Post by Taffy on Nov 27, 2020 6:23:30 GMT -5
I´m sorry, but I don´t know, why not all pictures are shown - unlike in the preview.... 10
16
19
20_02
22_01 |
|
|
|
Post by Taffy on Apr 6, 2021 12:20:19 GMT -5
I have to apologize for not posting any updates here for so long! The decision of what I wanted to build next for the Jersey Circuit was made for me by a stamp. A stamp shop nearby had this stamp in its shop window and sent it to me: 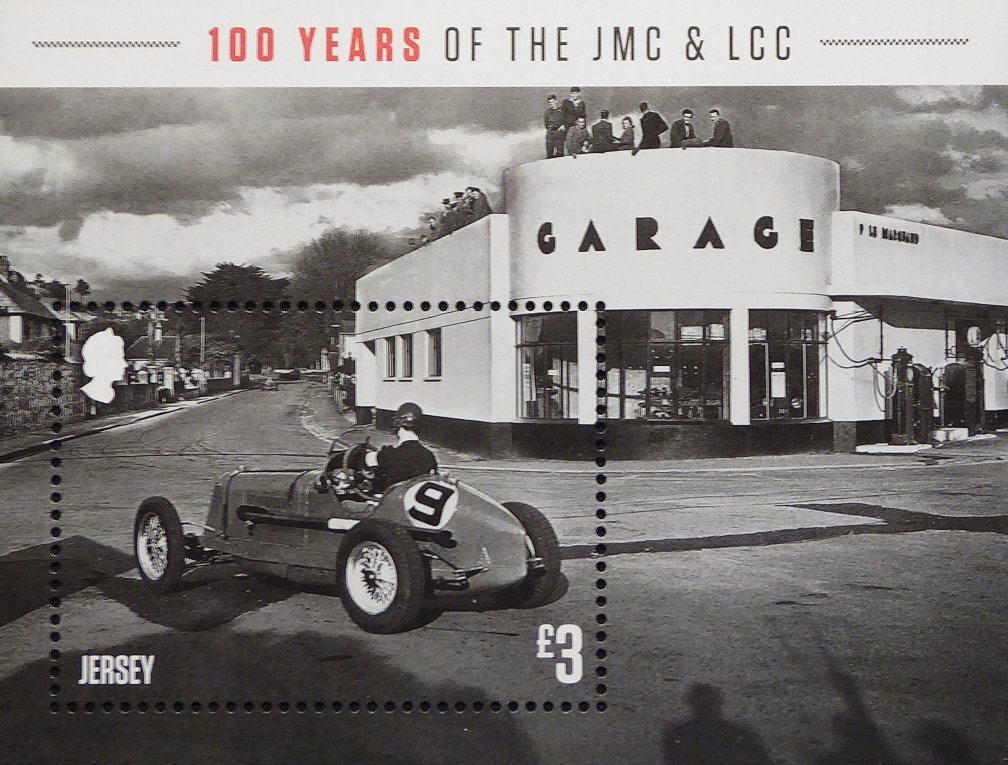 A friendly contact from Jersey gave me more information about this wonderful art deco building, which obviously still exists and has been in the hands of the owner family since the 1930s. I even got information and photos about the colors of the base and the windows! The place where the garage / gas station is to be placed on my track - it should find its place between the fish factory and the warehouse in the harbor - is unfortunately quite different from the location of the original gas station, so that, contrary to my original plan to stay as close to the original as possible, I have now chosen a slightly interpretation. But it will definitely get a corner tower! One of the deviations is that the petrol station is deseigned as part of BP, as the yellow / green of the BP group fits better than the original "french blue" of the garage. After I had made a sketch with rough dimensions, I started with printing out the wall and base structures, which I could use as a modification of existing files from my "Scalescenes range". As always, the wall parts were cut to size on 5mm architectural cardboard, which was glued with the cut-out "papers" using a glue stick. 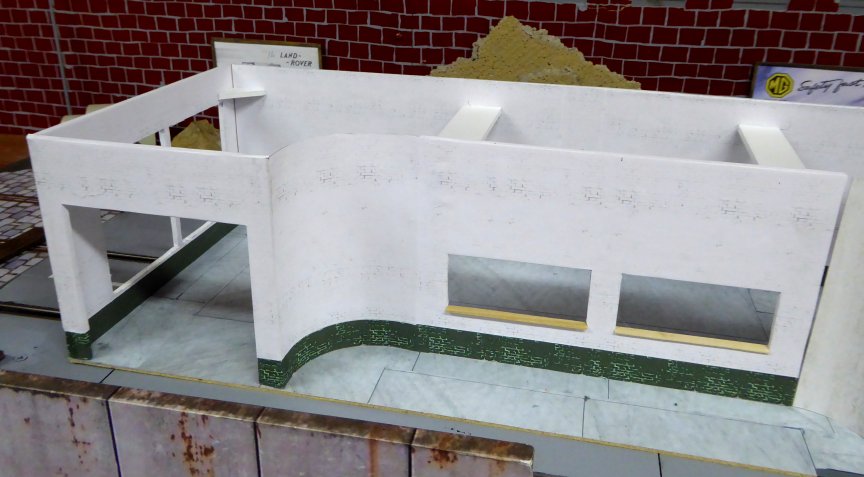 I'll be using coffee stirrers again for the window sills, because this has worked well. 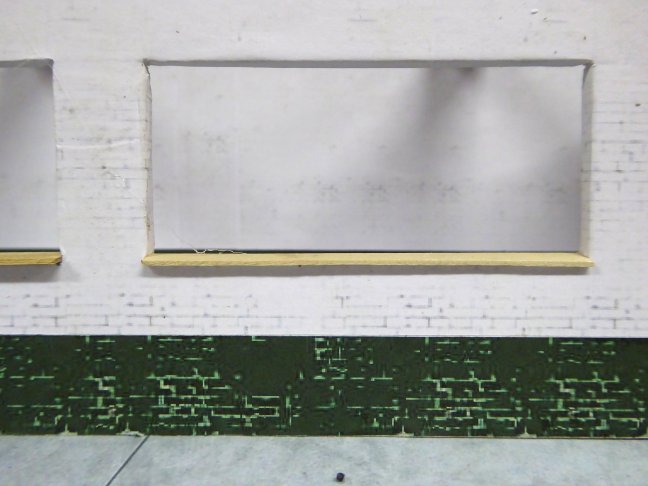 The round tower is made from an old plastic water pipe: 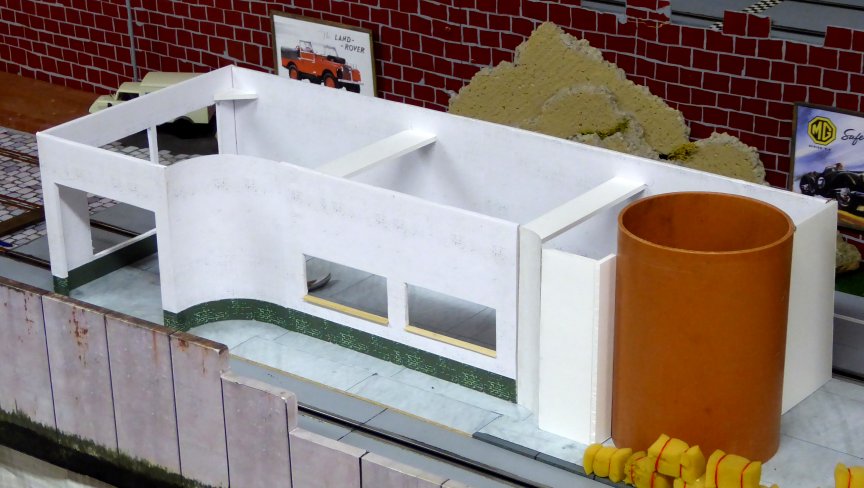 Here I have already drawn the window openings and started working on it. 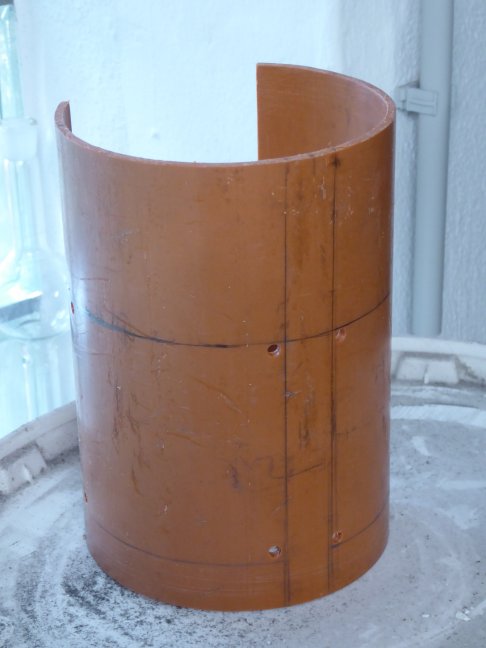 |
|
|
|
Post by Taffy on Apr 6, 2021 12:22:15 GMT -5
For the production of the windows I came up with the following: First I sketch out the windows on paper. I then stick cling film on top of it, then again as a masking film, transparent package tape, which I cut out with a scalpel so that only the window surfaces remain covered and the window frame is free.  Then I spray the “frame paint” on and after it has dried, I pull off the masking film with pointed tweezers. That worked quite well at the first attempt. 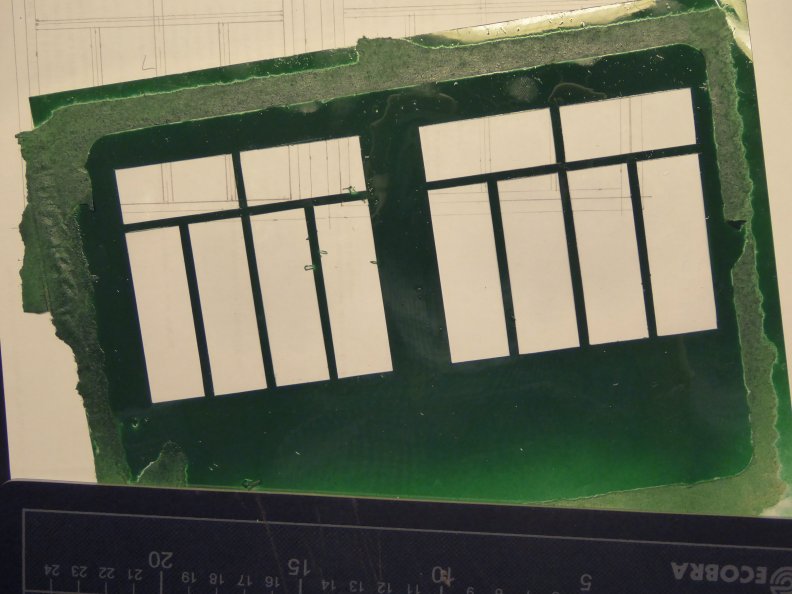 The adhesive tape peeled off easily, leaving behind some adhesive residue. On a piece of the film that has not yet been processed, I had tested whether the adhesive can be removed again without damaging the film and the paint. It worked well using gas lighter fluid. This is the completed building: [im]https://www.taffys-home.de/JRR/JC_210323_08.jpg[/img] I joined the segments of the workshop gate with duct tape as a "hinge" because I want to show them partially open. 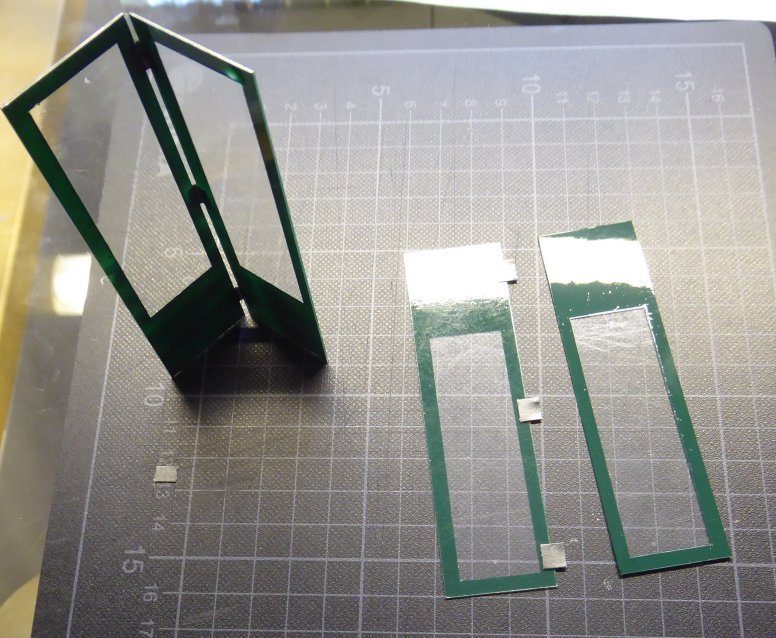 For the two large windows that are attached to the side, I made use of the adhesive residue that remained on the foil when the adhesive tape was peeled off and sprinkled dust that had been lifted up from the floor over them. The "soiling” here only appears so exaggerated due to the dark background, when installed the effect is nowhere near as clear. 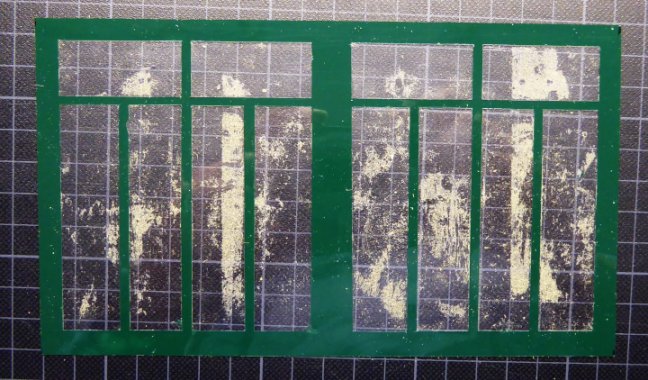 For the roof and the canopy I cut strong cardboard to which the appropriate “roof decor” was pasted. I cut the edge of the canopy from scraps of the plastic film that were left over from the window production. 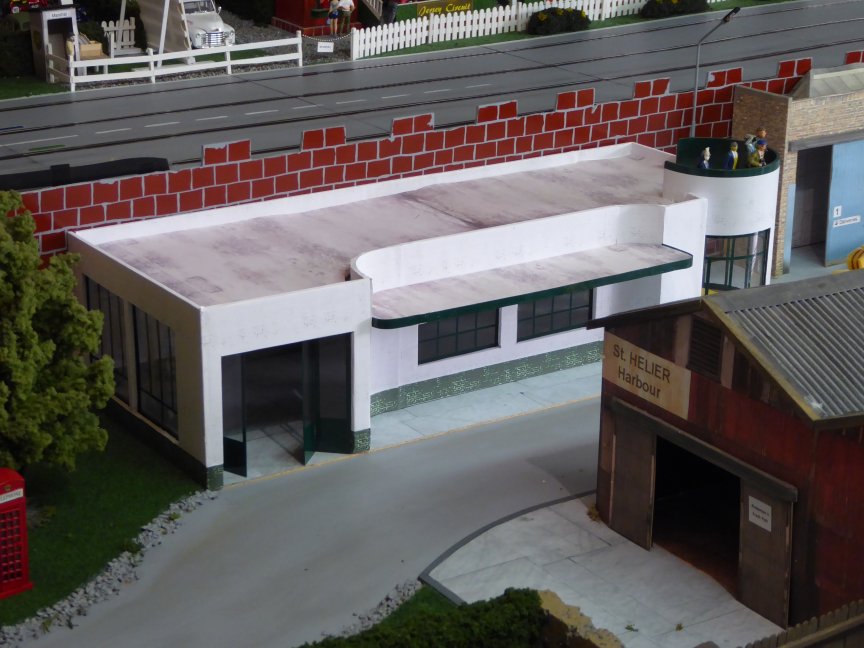 The building will gets an attachment on the roof towards the rear, similar to the warehouse to the right. 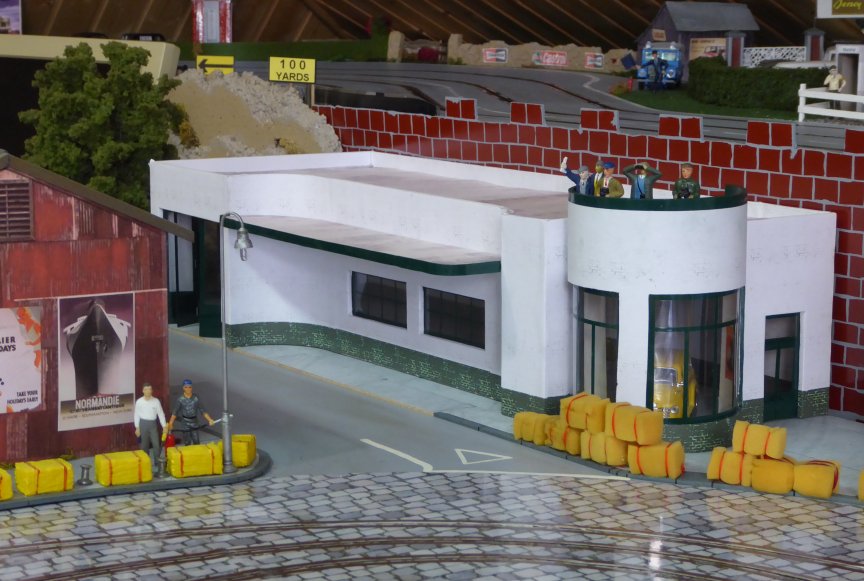 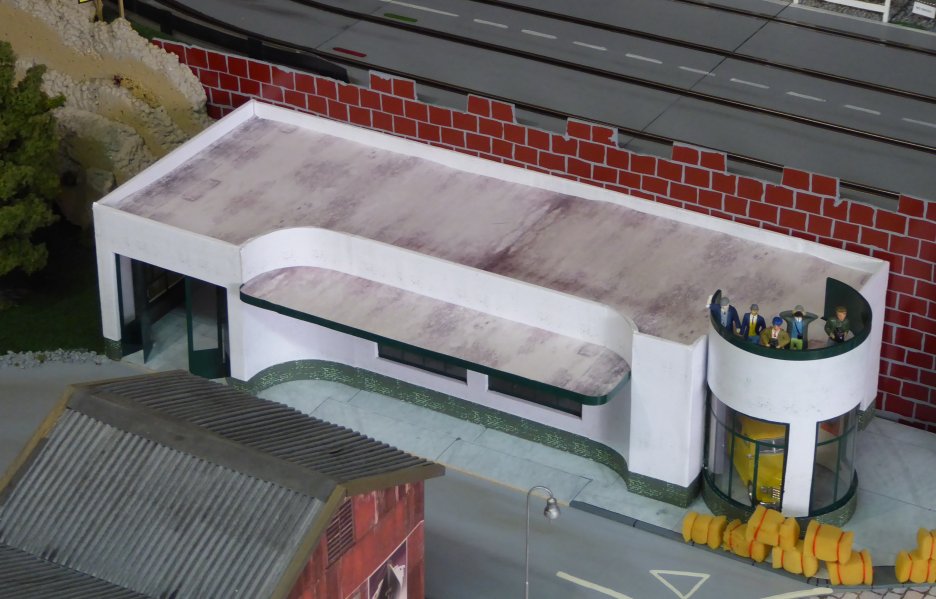 |
|
|
|
Post by Taffy on Apr 6, 2021 12:24:10 GMT -5
Continue indoors or outdoors? I decided on the interior design. You can't see them that well afterwards, but I still wanted to make an effort. The first thing to do was to look for the relevant billboards from my stock of images that had grown over the years and print them out. 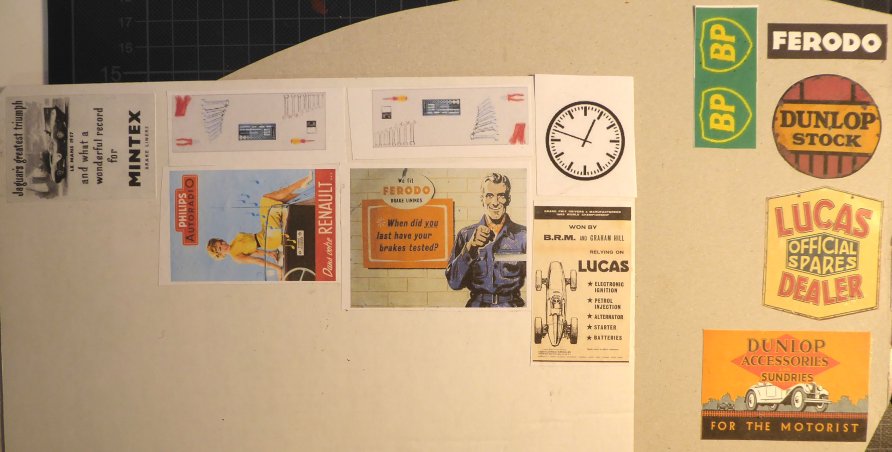 I designed most of the workshop equipment with this accessory kit: 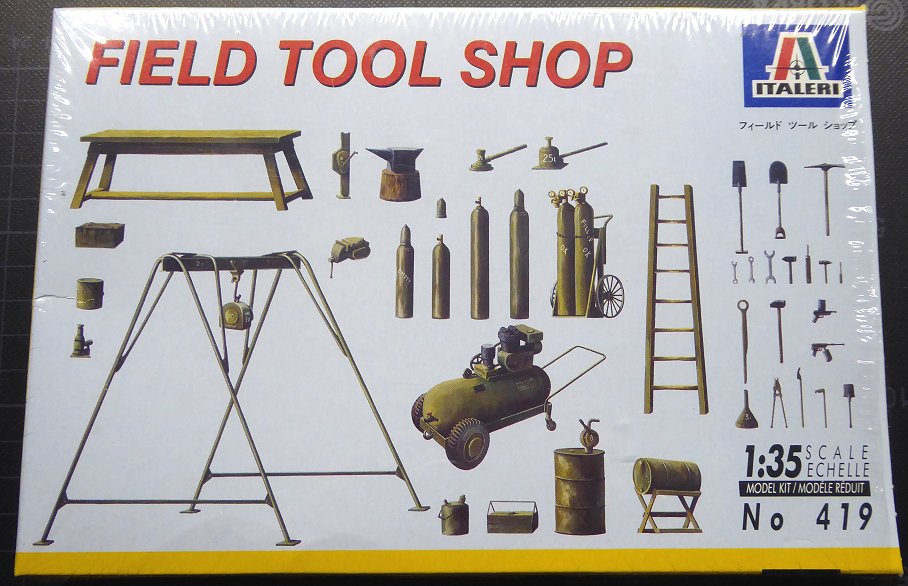 In addition, toy parts bought years ago and other accessories printed on cardboard, such as lockers or the large workbench, were used. 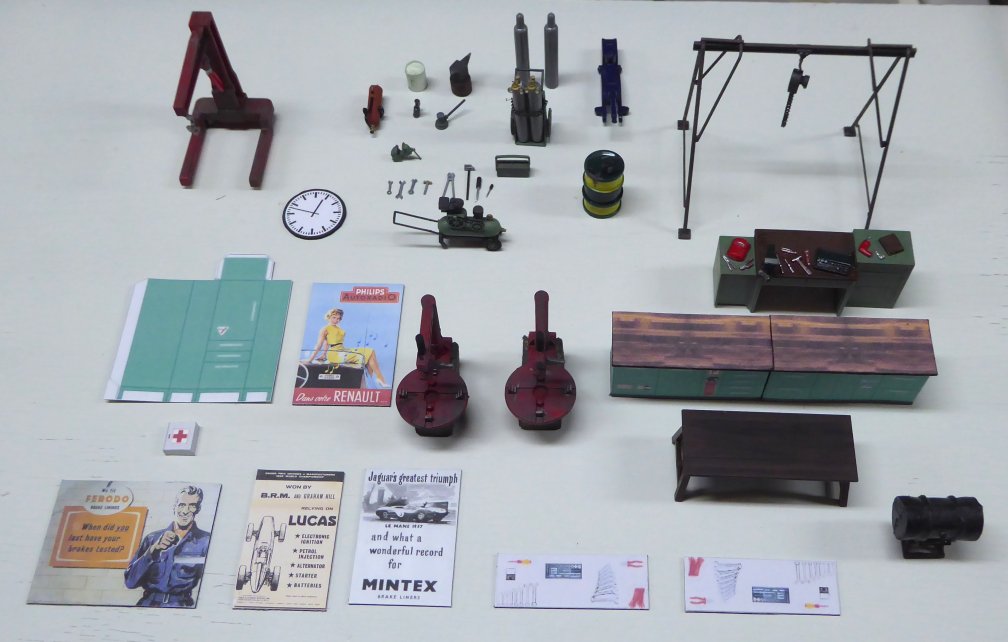 You can spend a lot of time with these odds and ends…. 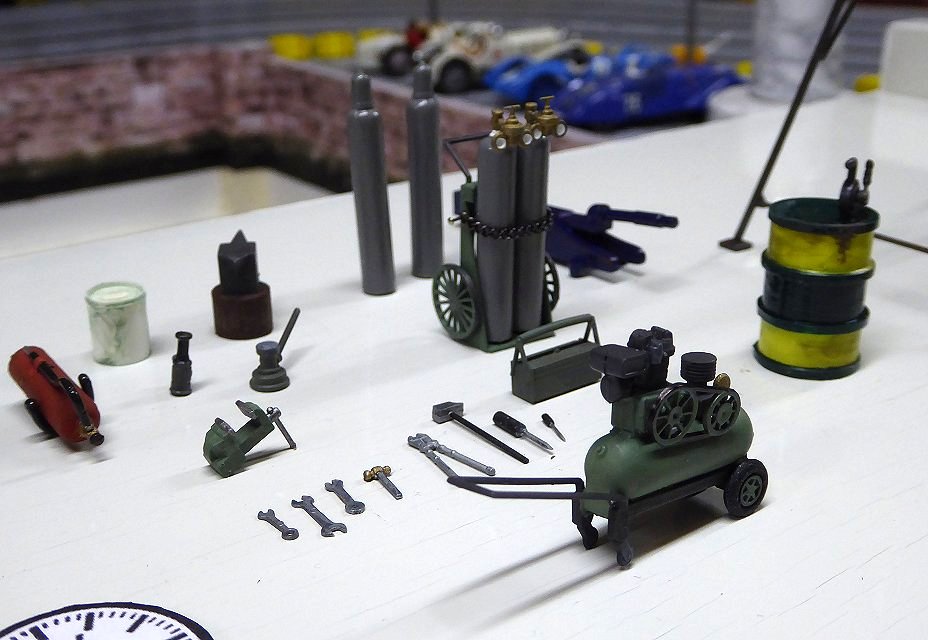 … Making, painting and aging the pulley system that moved on rails alone took more time than I would have ever imagined. For the rails, I sawed up a piece of rail from my old N-gauge model railway. 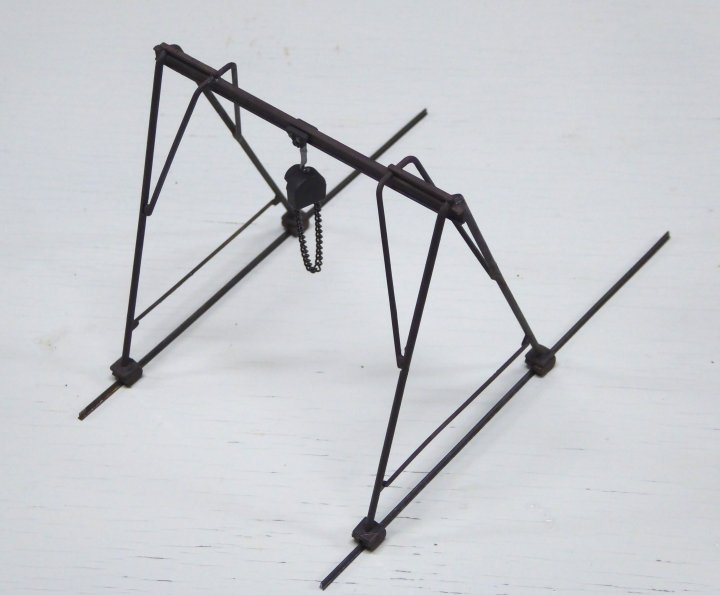 The best part is of course always installing the manufactured parts: 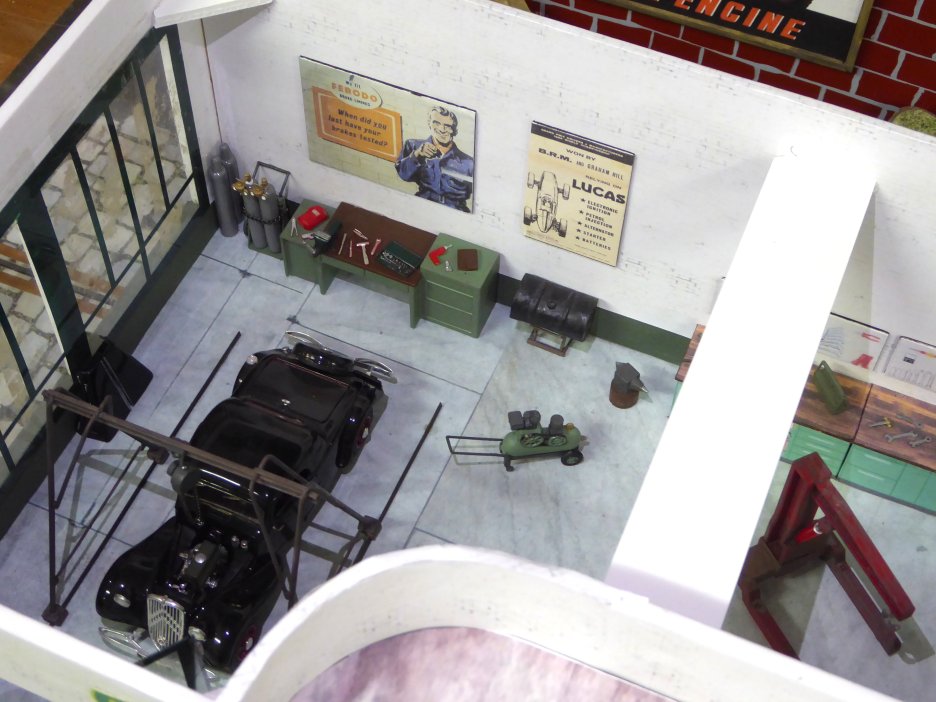 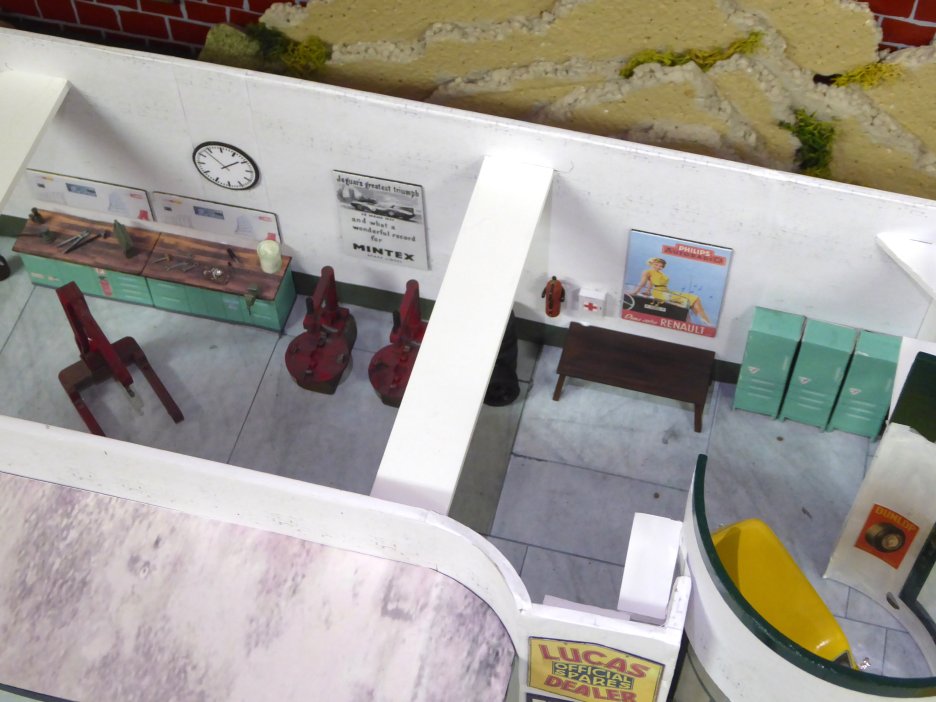 So that you can still see something of the furnishings later, I still have to think about interior lighting, it would be a shame if everything is dark as soon as the roof is on. 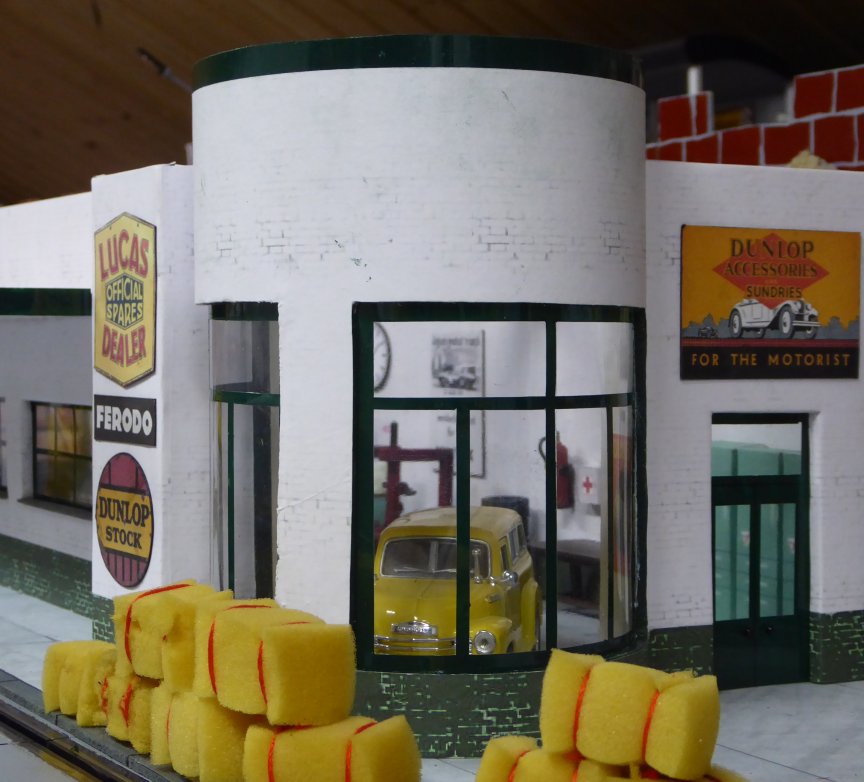 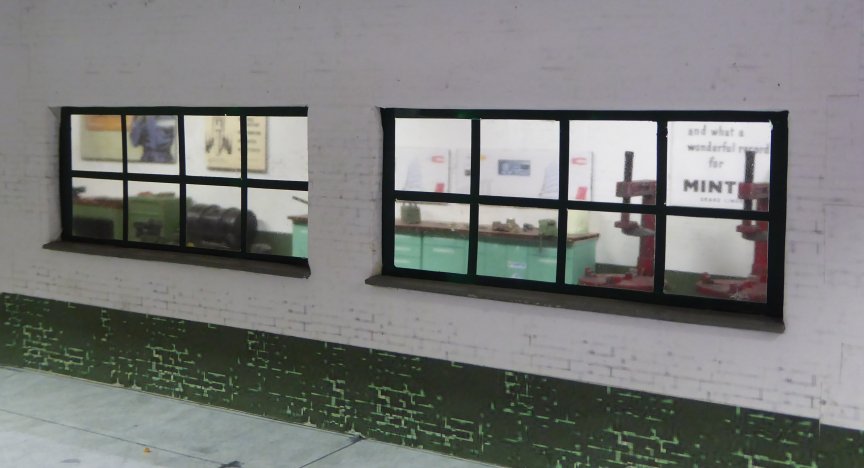 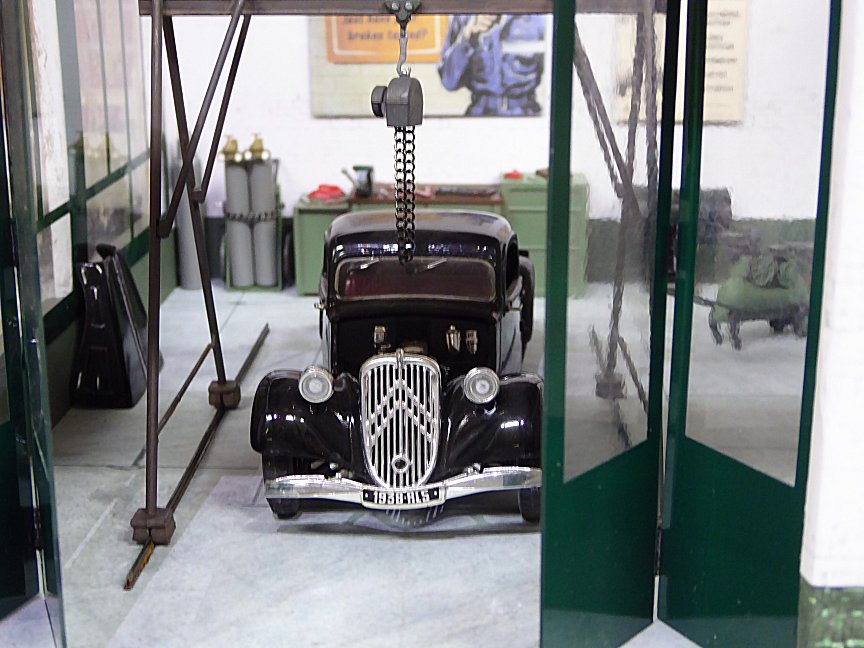 Now I continue with the further design of the exterior. A few mechanic figures also have to be dressed appropriately.
I will keep you up to date…. Best regards, Taffy |
|
|
|
Post by Chris Wright on Apr 6, 2021 12:58:31 GMT -5
Great stuff Taffy!
|
|
|
|
Post by David Mitcham on Apr 6, 2021 13:07:09 GMT -5
Fantastic Taffy. Your circuit gets better and better.
Best wishes
David
|
|
|
|
Post by 73emgee on Apr 9, 2021 8:17:20 GMT -5
Love the workshop tools! Your track photos are always inspiring.
Bob
|
|
|
|
Post by Andrew Rowland on Apr 12, 2021 1:48:31 GMT -5
Awesome work Taffy.
I'm very jealous of your lovely circuit.
Andi
|
|
|
|
Post by Taffy on Apr 15, 2021 4:45:00 GMT -5
@chris, Bob, David and Andy: thank you!  It's always the little things that hold you back so crazy!
First of all, I took up several pointers. So the workshop floor should be really dirty. What's the best way to simulate oily dirt? With oily dirt! So out in the garage, there is always a little bit dirty oil somewhere under my old motorcycles. So I picked it up with a cloth and put it on the base plate.
If you are as crazy as I am and pick up burned matches, then you have a wonderful use for soot and ashes: on the oil bed and rub it in properly with a hard brush. It couldn't be more original, I don't have to buy expensive pigments from any supplier….
In any case, I am completely satisfied with the result.
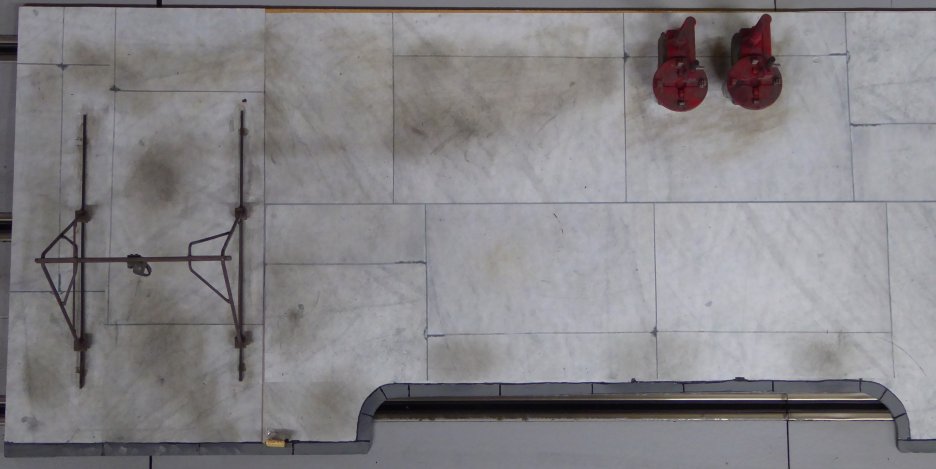
Then I was asked me how the spectators got on the roof of the garage. I asked the people on the stamp. The answer was: "Well, through the roof opening". Which roof opening? "Well, this one: ..." 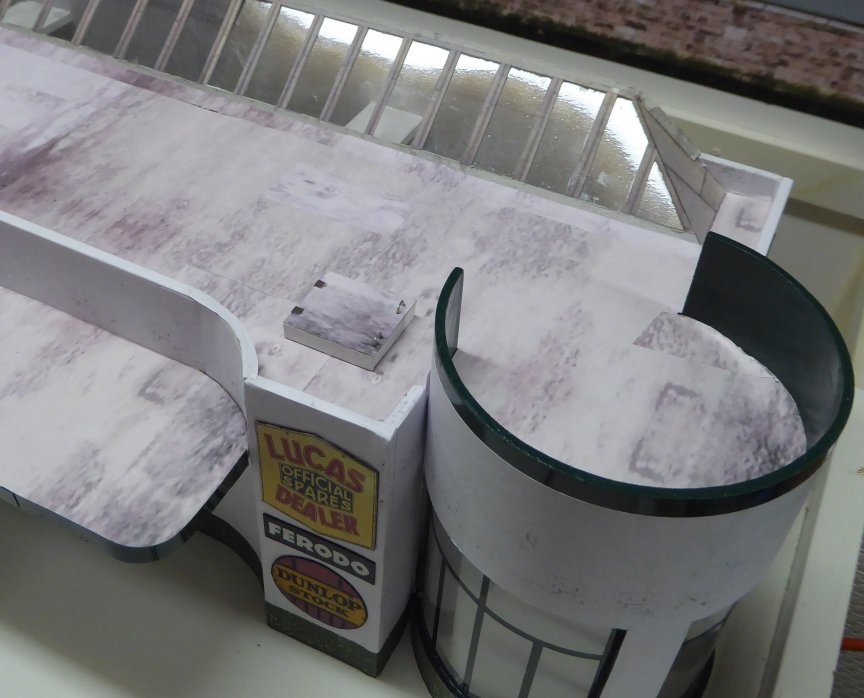 Of course you think of a (spiral) staircase inside…. The roof itself has a row of windows as skylights. I planned to do that anyway, but only as a “blind” window. I want to cover the "retaining wall" behind the garage a little more. I had already printed out something from the files for the semi-relief warehouse. But: a “real” skylight would be great…. So I stuck the printout on cardboard, neatly cut it out with a steel ruler and scalpel, and stuck the grid obtained in this way onto thick cling film (remainder of a packaging). Then of course I had to raise the wall of the garage and cut out the garage roof to match: 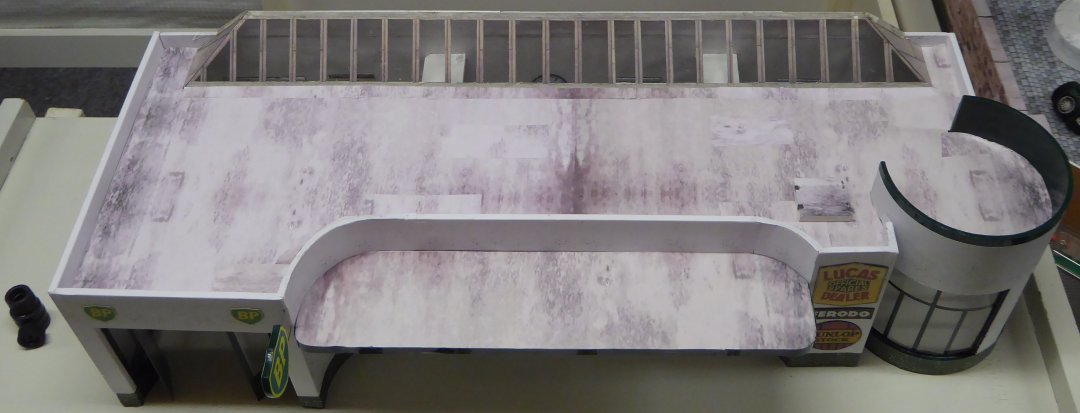 It continued with a few missing furnishings. When looking through my grabber box, I noticed a part that could well pass (with a little addition ) as a cash register. Said, tinkered. There is also a small table made from scrap wood. There should be a desk lamp and a couple of files on the table in the workshop. A chair was also missing. All you need is cardboard and wire. Voilà: 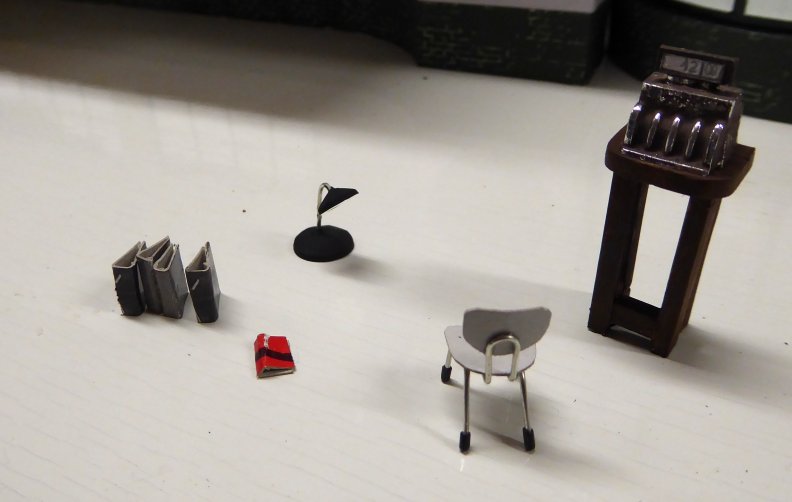 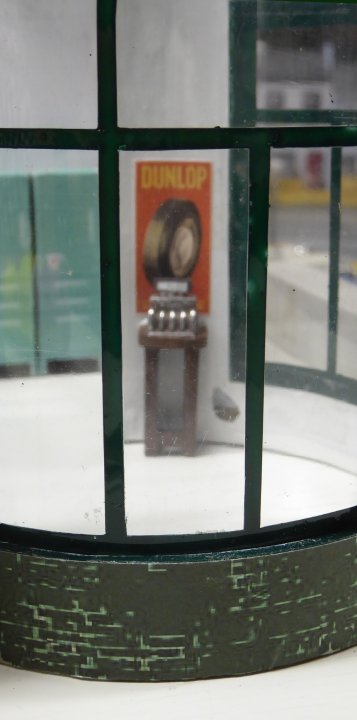 The interior is now fully equipped. Now the most important thing at a petrol station: the petrol pumps. In the past few years I had bought fuel pump resin kits from several manufacturers, all of which are slightly different in shape, size and design. What they have in common, however, is that they all represent fuel pumps from the 1930s. Since my “Jersey” is in the 50s-60s, I thought that the innovation boost at my petrol station might not have started yet. So I've dressed all pumps in uniform BP livery and will use them as they are set up here: 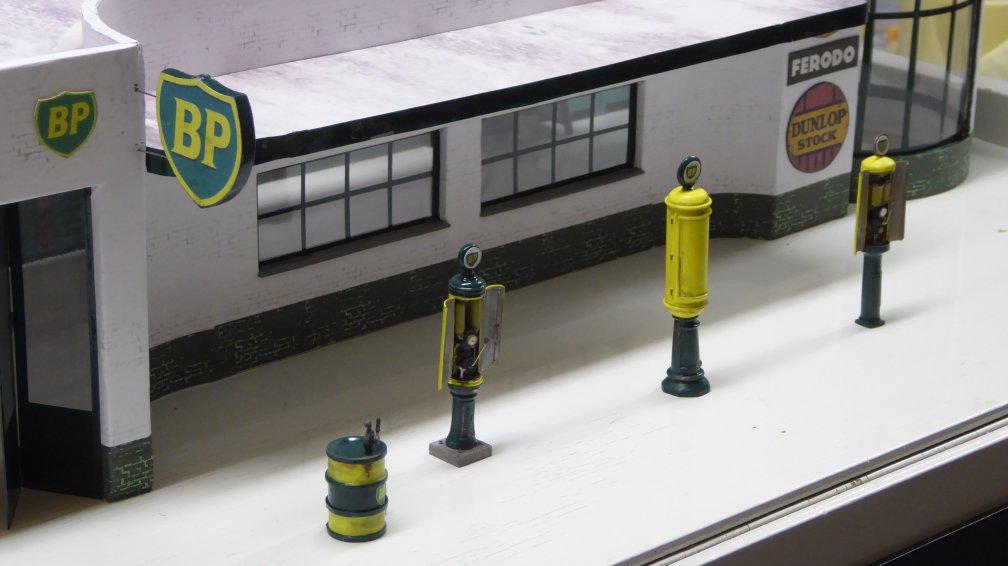 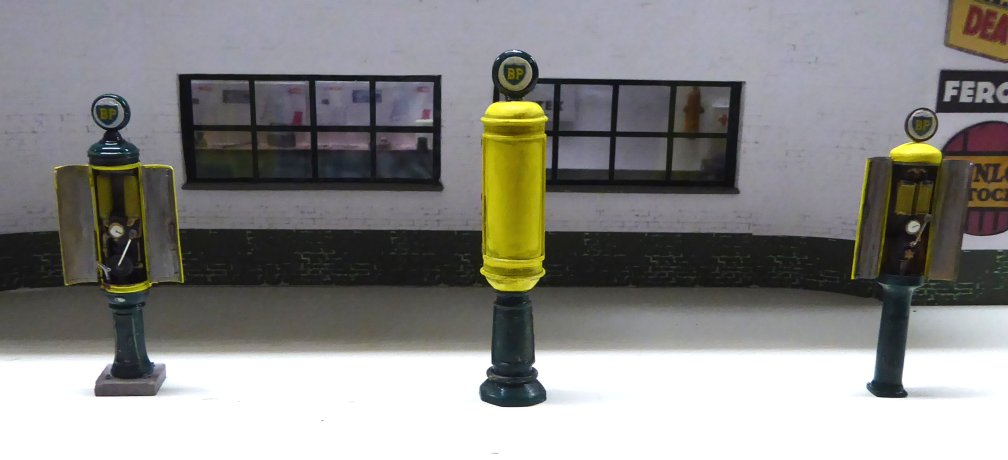 Well, that's it again for now. The following remains to be done: - Paint petrol station staff - Obtain and install interior lighting (maybe, this has to wait, until it is possible to go in a shop to buy it. Thank you, Covid-19) - Make and attach the lettering for the tower - Final assembly Doesn't sound like much, but it is...
Up soon, Taffy
|
|
|
|
Post by Taffy on Apr 15, 2021 12:31:13 GMT -5
Today's day's work (among other things ..): The 6 from the gas station…. 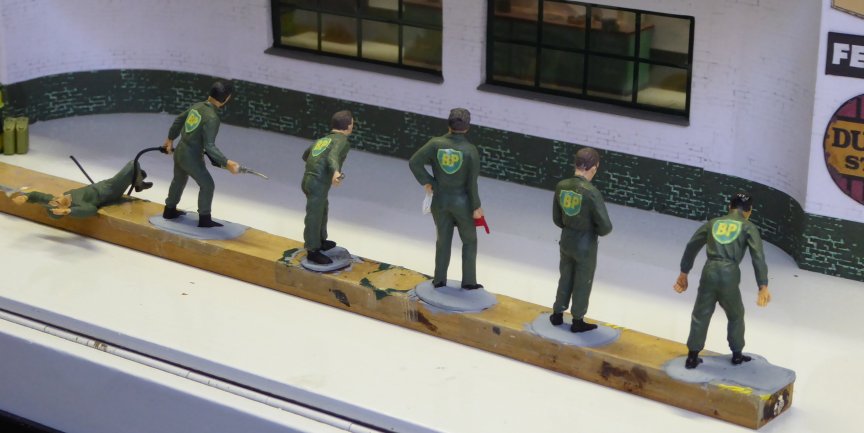 ... want to show off their new overalls first! Here on the painting aid. And then they can get to work! 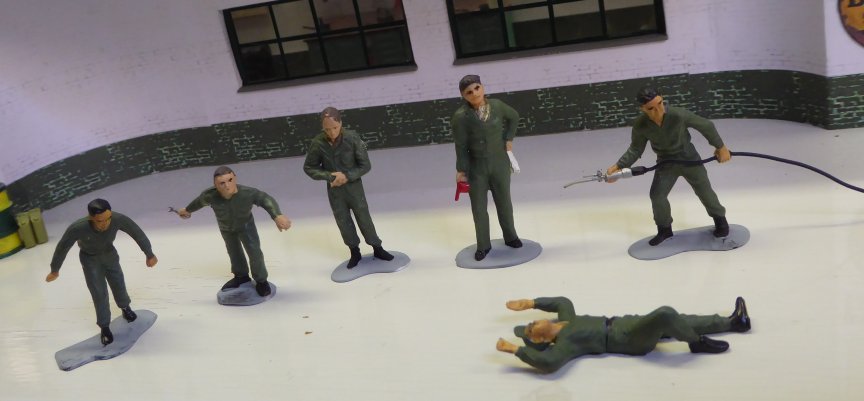 Best regards, Taffy |
|


 Taffy
Taffy